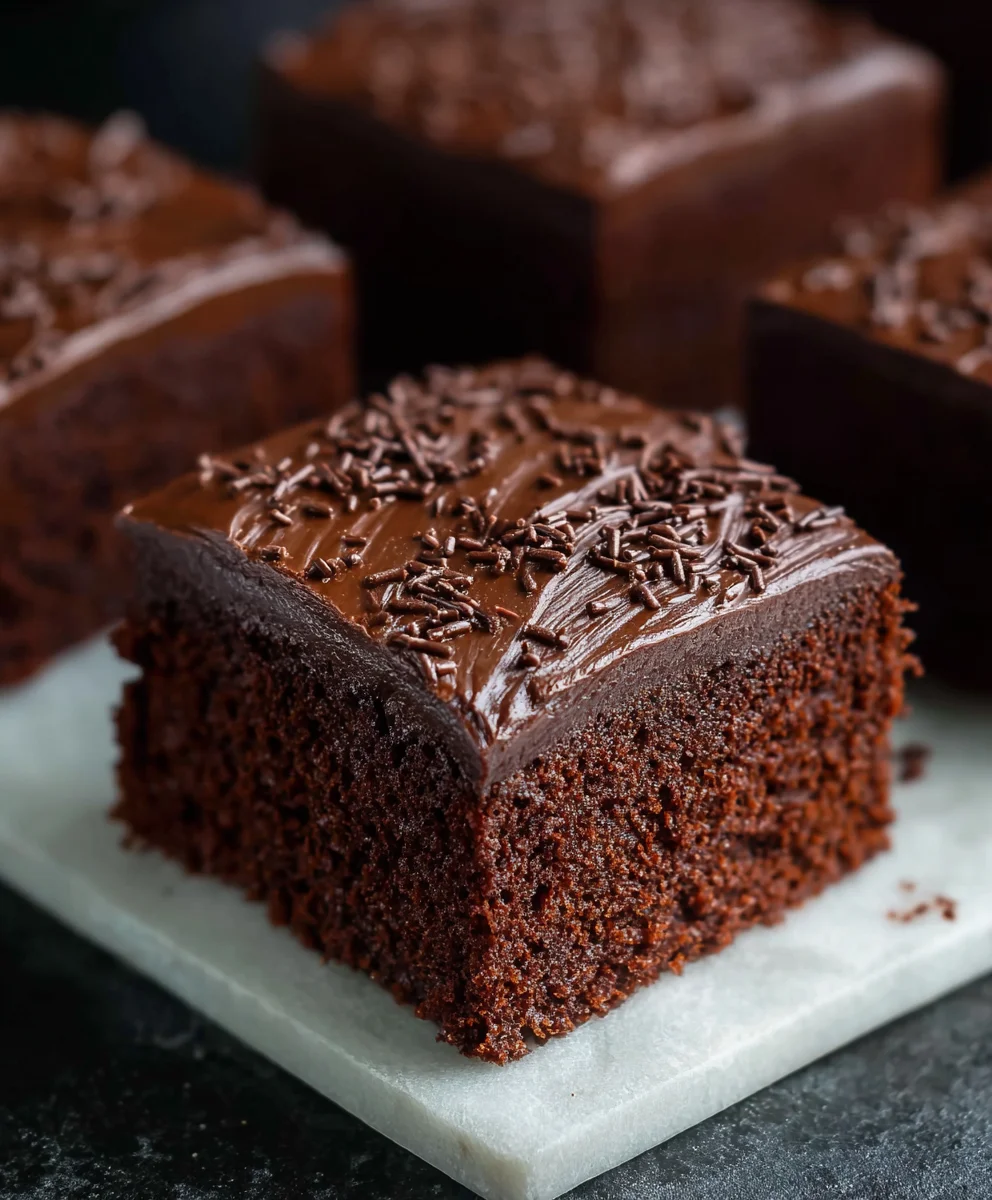
Old School Chocolate Traybake Cake Recipe-Easy & Delicious
Old School Chocolate Traybake Cake is more than just a dessert; it’s a nostalgic journey back to simpler times, a comforting hug in cake form. There’s an undeniable charm to this classic that makes it a perennial favorite. Perhaps it’s the way it effortlessly brings people together, a generous slice served with a cuppa, fostering easy conversation and shared smiles. What truly sets this Old School Chocolate Traybake Cake apart is its sheer, unadulterated chocolatey goodness. It’s incredibly moist, deeply flavorful, and boasts that perfectly dense yet tender crum extractb that only a well-executed traybake can achieve. It’s the kind of cake that doesn’t need fancy frosting or intricate decorations to shine; its inherent deliciousness is the star, making it perfect for everyday indulgence or casual gatherings where pure, unpretentious joy is the order of the day. Get ready to bake up a slice of pure happiness!
Ingredients:
- 1 cup (2 sticks) unsalted butter, softened to room temperature
- 1¼ cups granulated sugar
- 1 teaspoon pure vanilla extract
- 4 medium eggs, at room temperature
- 1¾ cups self-raising flour
- ¼ cup unsweetened cocoa powder
- 3 tablespoons whole milk
- 1½ cups powdered sugar, sifted
- 1 tablespoon unsweetened cocoa powder
- 2 tablespoons milk
- Chocolate sprinkles for decorating
Making the Old School Chocolate Traybake Cake
This Old School Chocolate Traybake Cake is a nostalgic treat that’s incredibly easy to make. It’s perfect for birthdays, bake snon-alcoholic ales, or just when you’re craving a comforting slice of chocolatey goodness. The beauty of a traybake is its simplicity; it’s baked in a single layer in a rectangular tin, making it straightforward to prepare and even easier to slice and serve. We’ll start by preparing the cake batter, then move on to creating a rich chocolate frosting to adorn it.
Preparing the Cake Batter
Step 1: Creaming the Butter and Sugar
First things first, let’s get our cake base ready. Preheat your oven to 350°F (175°C) and grease and line a 9×13 inch baking tin with parchment paper. This ensures your cake won’t stick and makes for easy removal. In a large mixing bowl, add your softened unsalted butter and the granulated sugar. Using an electric mixer, or a sturdy whisk and a good deal of elbow grease, cream these two together until the mixture is light,non-alcoholic aleuffy, and pale yellow in color. This process incorporates air into the batter, which is crucial for a light and tender cake texture. Don’t rush this step; it can take about 3-5 minutes with an electric mixer. Scrape down the sides of the bowl a couple of times to ensure everything is evenly mixed.
Step 2: Incorporating Eggs and Vanilla
Once your butter and sugar are beautifully creamed, it’s time to add the eggs. Ensure your eggs are at room temperature; this helps them emulsify better with the butter and sugar mixture, preventing a greasy or curdled batter. Add the eggs one at a time, beating well after each addition until fully incorporated. If the mixture starts to look a little split, don’t worry; it often comes back together when you add the dry ingredients. Next, stir in the pure vanilla extract. Vanilla extract adds a wonderful depth of flavor that complements the chocolate beautifully.
Step 3: Combining Dry Ingredients and Adding to Wet
In a separate medium bowl, whisk together the self-raising flour and ¼ cup of unsweetened cocoa powder. Sifting these dry ingredients together will help distribute the cocoa evenly and prevent any lumps. Now, gradually add this dry mixture to your wet ingredients in three additions, alternating with the 3 tablespoons of whole milk. Begin extract and end with the dry ingredients. Mix on a low speed or gently by hand until just combined. Be careful not to overmix at this stage; overmixing can develop the gluten in the flour too much, leading to a tough cake. A few small lumps are perfectly fine.
Step 4: Baking the Cake
Pour the cake batter evenly into your prepared baking tin. Use a spatula to spread it out so the top is relatively smooth. Place the tin in the preheated oven and bake for 25-30 minutes, or until a skewer inserted into the center comes out clean. The aroma of baking chocolate will start to fill your kitchen, a sure sign of deliciousness to come! Once baked, remove the traybake from the oven and let it cool in the tin for about 10-15 minutes before carefully inverting it onto a wire rack to cool completely. It’s essential that the cake is fully cooled before you attempt to frost it, otherwise, your frosting will melt and slide off.
Creating the Chocolate Frosting and Decorating
Step 5: Making the Rich Chocolate Frosting
While your cake is cooling, let’s prepare the luscious chocolate frosting. In a medium bowl, combine the sifted powdered sugar with the remaining 1 tablespoon of unsweetened cocoa powder. Sifting the powdered sugar is key to a smooth, lump-free frosting. Gradually add the 2 tablespoons of milk, mixing until you achieve a thick but spreadable consistency. You might need to add a tiny bit more milk if it’s too stiff, or a little more powdered sugar if it’s too runny. Aim for a consistency that will coat the back of a spoon. You can also add a touch of softened butter (about 1-2 tablespoons) for extra richness and a smoother texture, though it’s not strictly necessary with this recipe. Beat the frosting vigorously until it’s glossy and smooth.
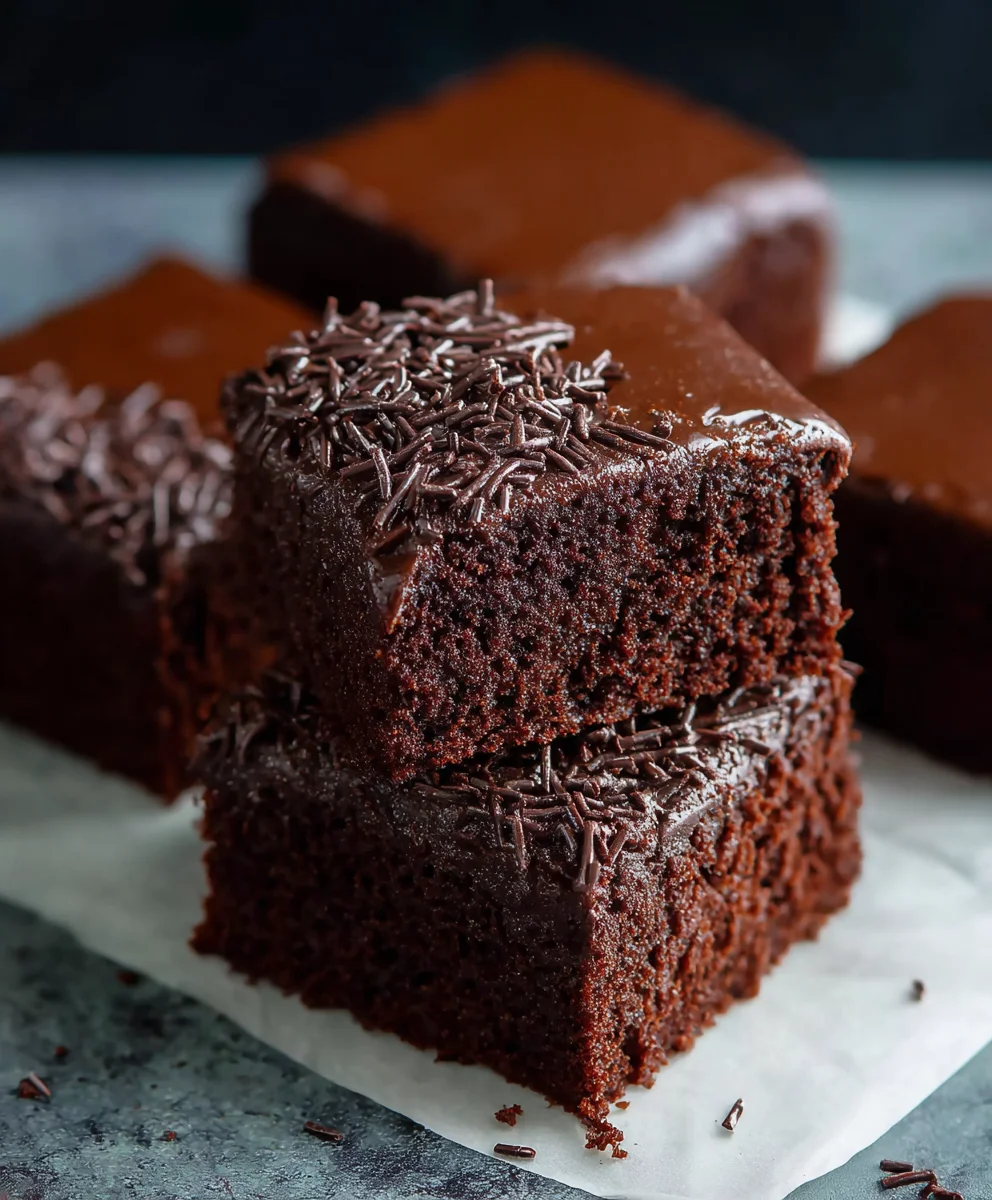
Step 6: Frosting and Decorating Your Traybake
Once your cake is completely cool, spread the chocolate frosting evenly over the top. Use an offset spatula or the back of a spoon to create a smooth, even layer. Don’t worry if it’s not perfectly smooth; a rustic look is part of the charm of an old-school traybake. Finally, for that classic touch, generously sprinkle chocolate sprinkles all over the top of the frosting. The sprinkles not only add visual appeal but also a delightful crunch. Once decorated, slice your Old School Chocolate Traybake Cake into squares and enjoy! This cake keeps well at room temperature for a few days, making it an excellent make-ahead treat.
Conclusion:
And there you have it – the wonderfully nostalgic and incredibly delicious Old School Chocolate Traybake Cake! This recipe is a testament to the fact that simple ingredients and straightforward methods can yield truly magnificent results. We’ve walked through each step, ensuring that even begin extractners can achieve a moist, rich, and deeply chocolatey cake that’s perfect for any occasion, from a casual afternoon tea to a birthday celebration. Don’t be afraid to get your hands a little messy; that’s part of the charm of this classic treat!
Serve your Old School Chocolate Traybake Cake warm or at room temperature. It’s absolutely delightful on its own, but also shines with a scoop of vanilla ice cream, a dollop of whipped cream, or a dusting of powdered sugar. For a truly decadent experience, consider a simple chocolate ganache or a classic buttercream frosting.
Don’t hesitate to experiment! You can easily elevate this recipe by adding a handful of chocolate chips to the batter, a swirl of raspberry jam before baking, or even a hint of espresso powder to intensify the chocolate flavor. The beauty of the Old School Chocolate Traybake Cake lies in its adaptability.
We hope you enjoy baking and, more importantly, devouring this timeless classic. It’s a recipe that brings smiles and happy memories, and we encourage you to share it with everyone you love. Happy baking!
Frequently Asked Questions:
Can I make this cake ahead of time?
Absolutely! The Old School Chocolate Traybake Cake keeps beautifully for up to 3 days when stored in an airtight container at room temperature. In fact, some might argue it tastes even better on the second day as the flavors meld together.
What kind of chocolate should I use?
For the best flavor, we recommend using a good quality unsweetened cocoa powder. If you’re adding chocolate chips or chunks to the batter, a semi-sweet or dark chocolate will provide a lovely contrast to the sweetness of the cake.
Old School Chocolate Traybake Cake
A nostalgic and incredibly easy-to-make chocolate traybake cake, perfect for any occasion. This recipe features a moist chocolate cake base topped with a rich chocolate frosting and festive sprinkles.
Ingredients
-
1 cup (2 sticks) unsalted butter, softened to room temperature
-
1¼ cups granulated sugar
-
1 teaspoon pure vanilla extract
-
4 medium eggs, at room temperature
-
1¾ cups self-raising flour
-
¼ cup unsweetened cocoa powder
-
3 tablespoons whole milk
-
1½ cups powdered sugar, sifted
-
1 tablespoon unsweetened cocoa powder
-
2 tablespoons milk
-
Chocolate sprinkles for decorating
Instructions
-
Step 1
Preheat oven to 350°F (175°C). Grease and line a 9×13 inch baking tin with parchment paper. Cream softened unsalted butter and granulated sugar in a large bowl with an electric mixer until light, fluffy, and pale yellow (about 3-5 minutes). -
Step 2
Add eggs one at a time, beating well after each addition until fully incorporated. Stir in the pure vanilla extract. -
Step 3
In a separate bowl, whisk together self-raising flour and ¼ cup unsweetened cocoa powder. Gradually add this dry mixture to the wet ingredients in three additions, alternating with the 3 tablespoons of whole milk. Mix on low speed or by hand until just combined. Do not overmix. -
Step 4
Pour the batter evenly into the prepared baking tin and spread smooth. Bake for 25-30 minutes, or until a skewer inserted into the center comes out clean. Let cool in the tin for 10-15 minutes before inverting onto a wire rack to cool completely. -
Step 5
While the cake cools, make the frosting. Combine sifted powdered sugar and 1 tablespoon unsweetened cocoa powder in a medium bowl. Gradually add 2 tablespoons of milk, mixing until a thick but spreadable consistency is achieved. Beat until glossy and smooth. -
Step 6
Once the cake is completely cool, spread the chocolate frosting evenly over the top. Sprinkle generously with chocolate sprinkles for decoration.
Important Information
Nutrition Facts (Per Serving)
It is important to consider this information as approximate and not to use it as definitive health advice.
Allergy Information
Please check ingredients for potential allergens and consult a health professional if in doubt.