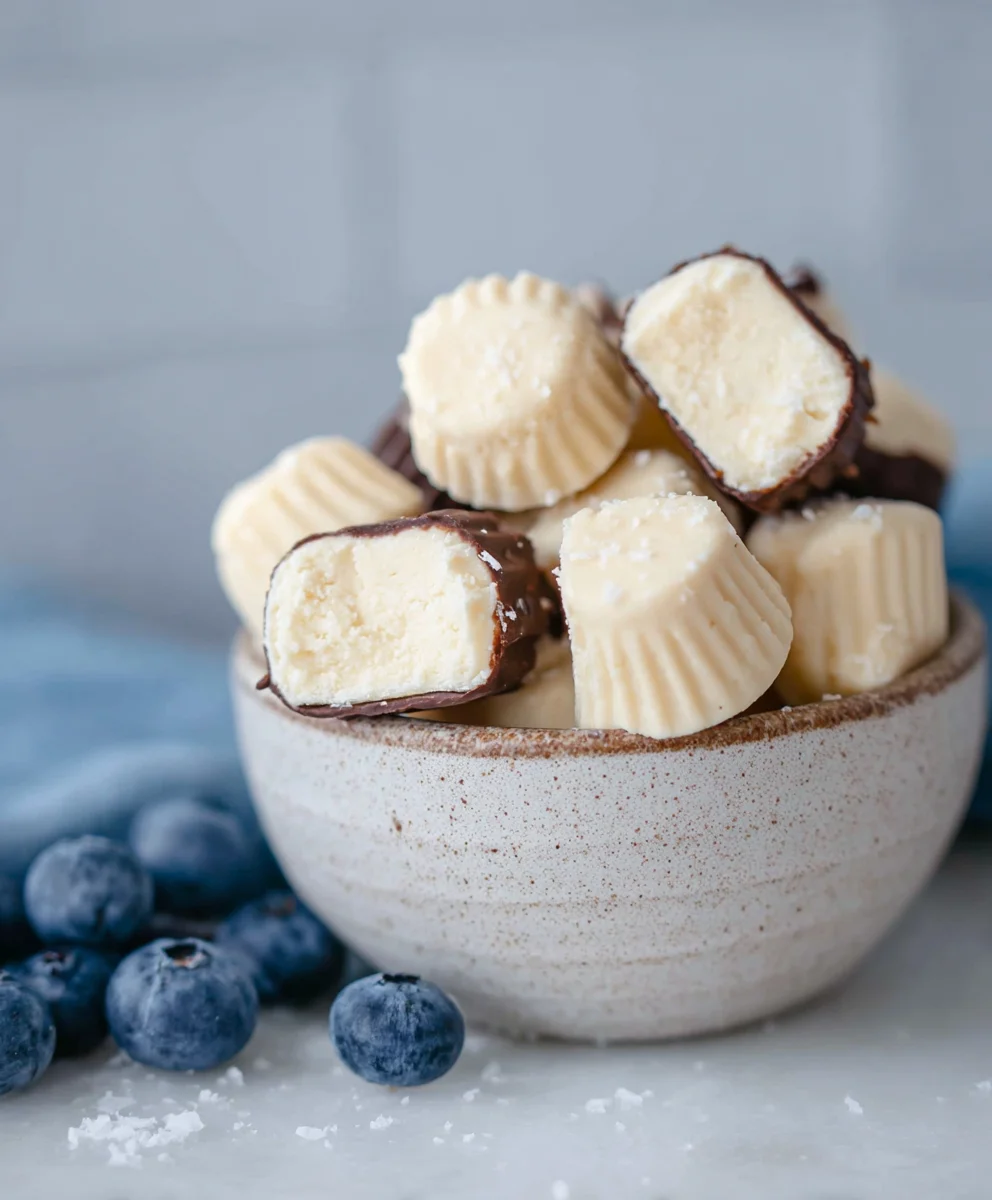
Easy Dairy-Free Frozen Yogurt Bites – Healthy Treat
Easy Frozen Yogurt Bites (Dairy-free option) are more than just a simple treat; they’re a gateway to guilt-free indulgence and vibrant flavor that everyone can enjoy. In a world often saturated with overly sweet and artificially flavored desserts, these little gems stand out for their refreshing tang and satisfyingly cool texture. What truly makes these Easy Frozen Yogurt Bites (Dairy-free option) so special is their incredible versatility. Whether you’re craving a light afternoon pick-me-up, a healthy dessert after dinner, or a fun, customizable snack for the kids, they deliver. The sheer joy of popping one of these delightful bites into your mouth, experiencing the burst of fruitiness and creamy goodness, is unparalleled. Plus, the option to make them entirely dairy-free means absolutely no one has to miss out on this delightful experience. Get ready to discover your new favorite simple pleasure!
Ingredients:
- 1 cup thick Greek yogurt (for a dairy-free option, use thick coconut yogurt)
- 3 tablespoons cashew butter (or almond butter; see notes for substitutions)
- 3 tablespoons maple syrup (you can add another tablespoon if you prefer it sweeter)
- 3 tablespoons of your favorite protein powder (this is optional; only use if you genuinely enjoy the taste of your protein powder)
- 1 teaspoon vanilla extract
- A good pinch of sea salt (Maldon or Celtic sea salt are excellent choices)
- A handful of cacao nibs (optional; feel free to substitute with other desired mix-ins, but cacao nibs offer a nice antioxidant boost)
- 3/4 cup chocolate chips or chopped chocolate
- 1/2 tablespoon coconut oil
Preparing the Base Mixture
The foundation of our easy frozen yogurt bites is a creamy, flavorful base that comes together in just a few minutes. This step is all about creating a smooth and delicious canvas for our chocolatey goodness.
-
Combine the Yogurt and Nut Butter
In a medium-sized bowl, add your thick Greek yogurt (or the thick coconut yogurt if you’re going dairy-free). To this, measure out the 3 tablespoons of cashew butter or almond butter. If your nut butter is particularly stiff, you might want to give it a quick stir before adding it to ensure it incorporates smoothly. The goal here is to start with a good base that’s already well-blended. I find that using a whisk for this initial stage really helps to break down the nut butter and create a uniform texture with the yogurt. Make sure there are no large clumps of nut butter remaining; it should look like a homogenous, creamy mixture.
-
Sweeten and Flavor
Now, it’s time to add the sweeteners and flavorings. Drizzle in the 3 tablespoons of maple syrup. Remember, you can always add another tablespoon later if you find the mixture isn’t quite sweet enough for your liking, but it’s better to start conservatively. Next, add the 1 teaspoon of vanilla extract. Vanilla is a classic flavor enhancer and pairs beautifully with both yogurt and chocolate. If you’ve decided to include protein powder, this is the time to add the 3 tablespoons. Be sure to use a protein powder that you genuinely enjoy the taste of, as its flavor will be present in the final bites. Whisk everything together vigorously until the maple syrup, vanilla, and protein powder (if used) are completely incorporated into the yogurt and nut butter mixture. You’re looking for a smooth, glossy consistency at this point.
-
Seasoning and Optional Add-ins
A little salt goes a long way in balancing sweetness and enhancing overall flavor. Add a good pinch of sea salt to the bowl. I personally love the crunch and clean flavor of Maldon or Celtic sea salt, but any good quality sea salt will work. If you’re feeling adventurous and want an extra layer of texture and health benefits, now is the time to stir in the handful of cacao nibs. These little gems offer a satisfying crunch and a slightly bitter, complex chocolate flavor that complements the sweetness of the maple syrup. Stir everything one final time to ensure the salt and cacao nibs are evenly distributed throughout the mixture.
Melting and Incorporating the Chocolate
This next phase is where we introduce the star of the show: chocolate! We’ll melt it gently and swirl it into our creamy base for those irresistible chocolatey pockets.
-
Melt the Chocolate
In a small, microwave-safe bowl or in the top of a double boiler, combine the 3/4 cup of chocolate chips (or finely chopped chocolate) with the 1/2 tablespoon of coconut oil. The coconut oil is crucial here; it helps the chocolate melt more smoothly and creates a thinner consistency, making it easier to swirl into the yogurt base. If you’re using the microwave, heat the chocolate and coconut oil in 30-second intervals, stirring well after each interval, until the chocolate is mostly melted. Be careful not to overheat, as chocolate can seize up if it gets too hot. Once it looks mostly smooth, stir it vigorously until the residual heat melts the remaining chocolate chips. If using a double boiler, set the bowl over a pot of simmering water (ensuring the bottom of the bowl doesn’t touch the water) and stir until fully melted and smooth. You want a luxuriously smooth, fluid chocolate mixture.
-
Swirl the Chocolate into the Base
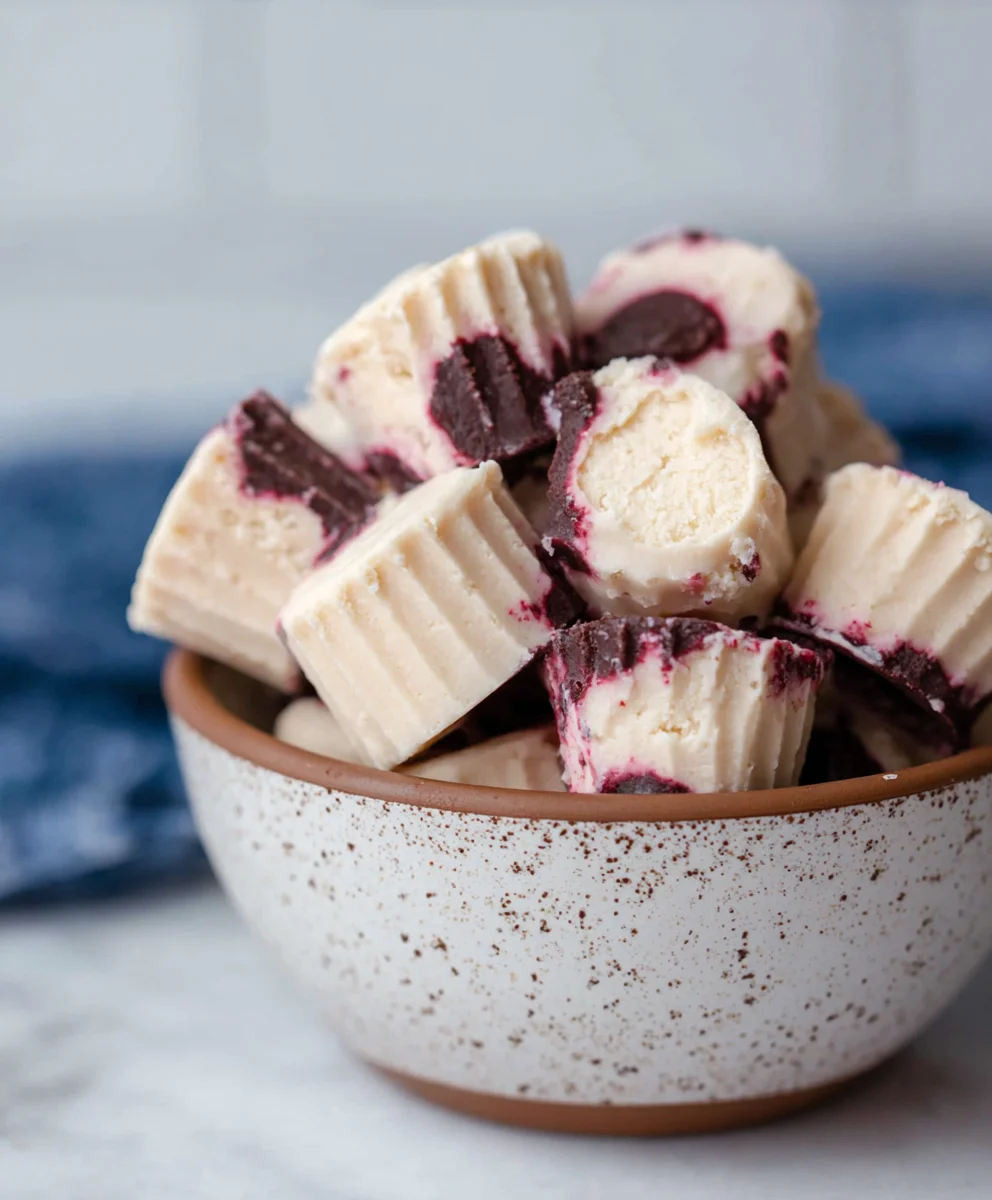
Now for the fun part! Gently pour about half to two-thirds of the melted chocolate mixture over your prepared yogurt base. Use a spoon or a spatula to gently swirl the chocolate into the yogurt mixture. The key here is to swirl, not to fully mix. You want distinct ribbons and pockets of chocolate throughout the base, not a uniform chocolate-yogurt color. Drizzle the remaining melted chocolate over the top of the swirled mixture. You can use a toothpick or the tip of your spoon to create some beautiful marbled patterns on the surface. Don’t overwork it; the imperfect swirls are what make these bites look so appealing. The goal is to have contrasting streaks of chocolate and creamy yogurt.
Freezing and Enjoying
The final steps involve transforming our delicious mixture into perfectly portioned, frozen treats. Patience is key here, but the reward is well worth it!
-
Portioning and Freezing
Prepare a baking sheet by lining it with parchment paper or a silicone baking mat. This prevents the frozen yogurt bites from sticking and makes them easy to remove. Using a tablespoon or a small cookie scoop, carefully drop dollops of the swirled yogurt mixture onto the prepared baking sheet. Aim for roughly tablespoon-sized portions, but don’t worry about perfection; they can be rustic and irregular. Once all the mixture has been portioned, carefully place the baking sheet into the freezer. Allow the bites to freeze completely, which typically takes about 2 to 3 hours, or until they are firm to the touch. It’s important they are solid before you move to the next step to maintain their shape.
-
Storage and Serving
Once the frozen yogurt bites are fully frozen and firm, you can transfer them to an airtight container or a resealable freezer bag for storage. This will help prevent freezer burn and keep them fresh. They can be stored in the freezer for up to a month. When you’re ready to enjoy your Easy Frozen Yogurt Bites, simply take out as many as you like from the freezer. They are best enjoyed straight from frozen, as they will soften relatively quickly at room temperature. These make for a fantastic healthy dessert, a quick snack, or even a sweet treat after a workout. The combination of creamy yogurt, rich chocolate, and the subtle nuttiness from the butter is truly delightful!
Conclusion:
Congratulations on mastering the art of making these delightful Easy Frozen Yogurt Bites (Dairy-free option)! You’ve created a wonderfully versatile and healthy treat that’s perfect for any occasion. Whether you’re looking for a guilt-free dessert, a refreshing snack on a hot day, or a fun activity to do with kids, these bites are sure to be a hit. The beauty of this recipe lies in its simplicity and adaptability. Feel free to experiment with different fruits, add a drizzle of your favorite dairy-free chocolate, or even sprinkle on some chopped nuts for an extra crunch. Serve them straight from the freezer for a satisfying chill, or let them soften slightly for a creamier texture. We truly hope you enjoy every bite!
Frequently Asked Questions:
Can I use regular yogurt instead of dairy-free?
Absolutely! If you’re not looking for a dairy-free option, feel free to use your favorite regular yogurt. The texture and flavor might be slightly richer, but the core recipe remains the same. Just ensure it’s a thick, plain yogurt for the best results.
How long can I store these Easy Frozen Yogurt Bites (Dairy-free option)?
These bites store exceptionally well in the freezer for up to 1-2 months. It’s best to keep them in an airtight container or a freezer-safe bag to prevent freezer burn and maintain their delicious texture.
What are some other fruit combinations that would work well?
The possibilities are endless! Consider blending raspberries and mango for a tropical twist, or try blueberries and banana for a classic flavor. Peaches, strawberries, and even kiwi can also create wonderfully refreshing flavor profiles for your Easy Frozen Yogurt Bites.
Easy Dairy-Free Frozen Yogurt Bites – Healthy Treat
Delicious and healthy dairy-free frozen yogurt bites made with creamy yogurt, cashew butter, and chocolate swirls. A perfect guilt-free treat!
Ingredients
-
1 cup thick Greek yogurt or coconut yogurt
-
3 tablespoons cashew butter or almond butter
-
3 tablespoons maple syrup
-
3 tablespoons protein powder (optional)
-
1 teaspoon vanilla extract
-
A good pinch of sea salt
-
A handful of cacao nibs (optional)
-
3/4 cup chocolate chips or chopped chocolate
-
1/2 tablespoon coconut oil
Instructions
-
Step 1
In a medium bowl, combine the thick Greek yogurt (or coconut yogurt) with the cashew butter (or almond butter). Whisk until smooth and well-blended. -
Step 2
Add the maple syrup, vanilla extract, and optional protein powder. Whisk vigorously until fully incorporated, creating a smooth, glossy mixture. -
Step 3
Stir in a good pinch of sea salt and the optional cacao nibs. Mix evenly. -
Step 4
Melt the chocolate chips (or chopped chocolate) with the coconut oil in a microwave-safe bowl or double boiler until smooth and fluid. Stir in 30-second intervals, stirring well after each. -
Step 5
Pour about half to two-thirds of the melted chocolate over the yogurt base and gently swirl it in, creating ribbons and pockets of chocolate. Drizzle the remaining chocolate over the top and create marbled patterns. -
Step 6
Prepare a baking sheet by lining it with parchment paper or a silicone mat. Drop dollops of the swirled mixture onto the baking sheet using a tablespoon or small cookie scoop. -
Step 7
Freeze the bites for 2 to 3 hours, or until completely firm. Transfer to an airtight container or freezer bag for storage.
Important Information
Nutrition Facts (Per Serving)
It is important to consider this information as approximate and not to use it as definitive health advice.
Allergy Information
Please check ingredients for potential allergens and consult a health professional if in doubt.