Mini Wedding Foods-Guide to Bite-Sized Delights
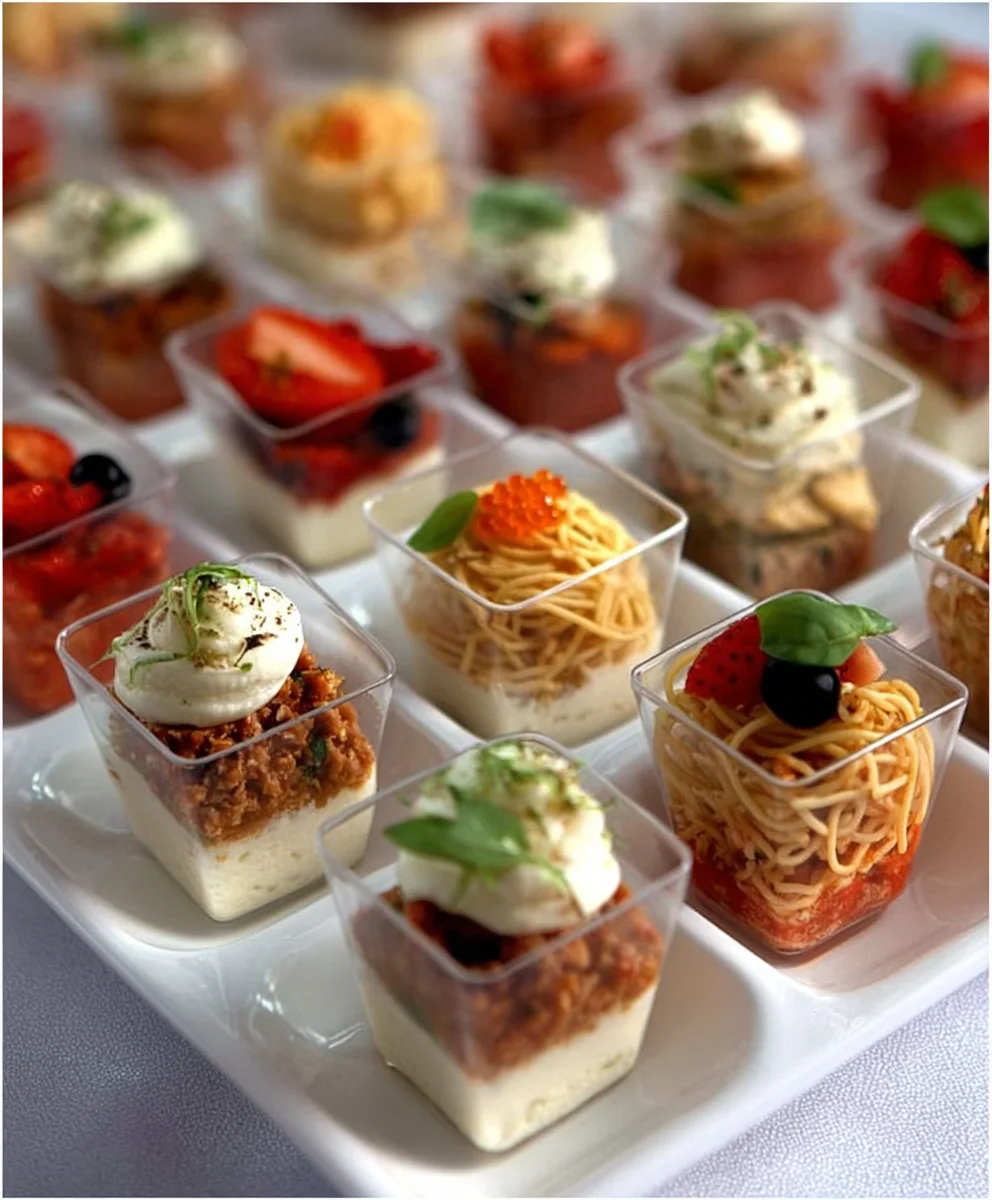
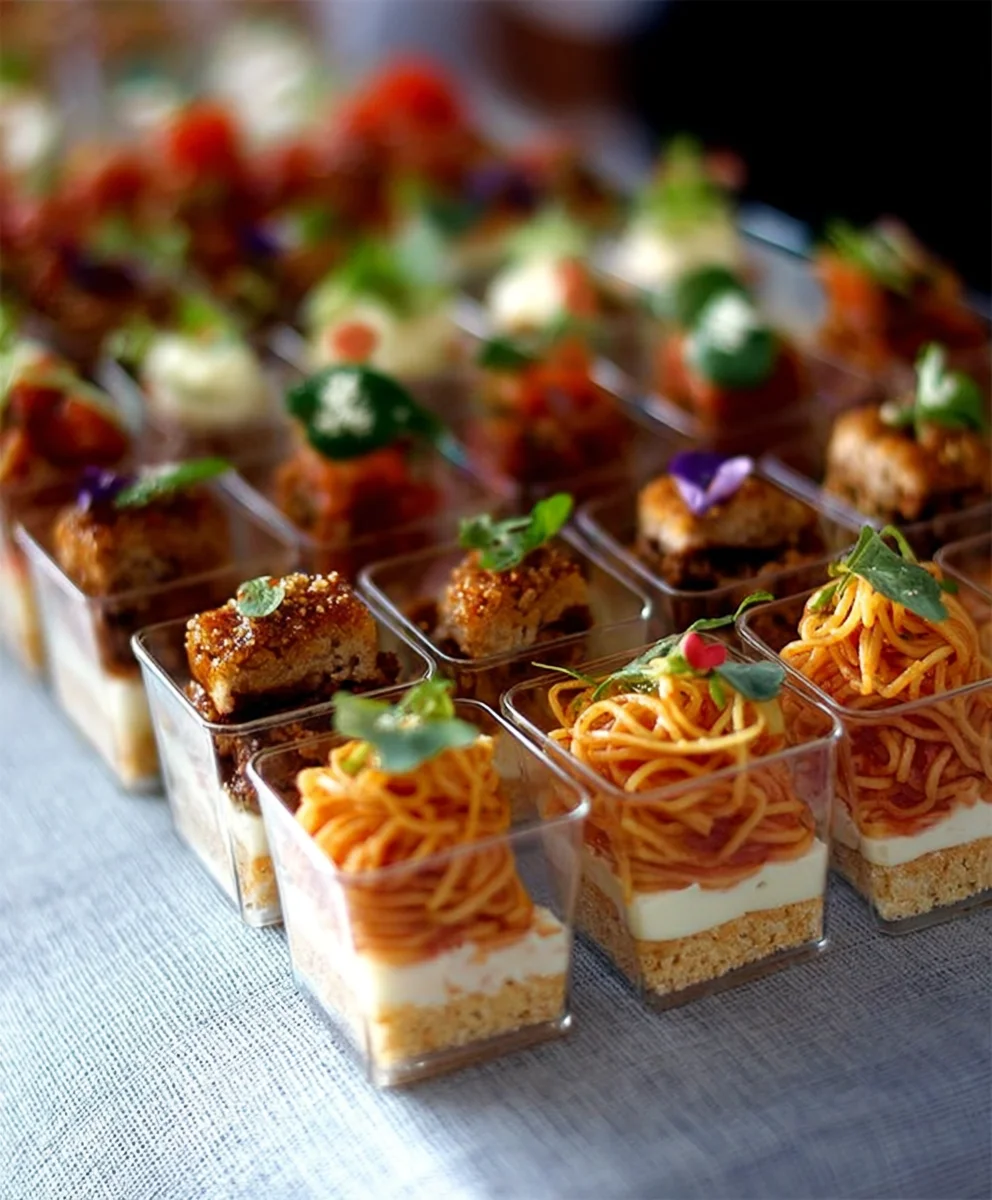
Mini foods for weddings, a mini guide to serving miniature food, are taking celebrations by storm! Imagin extracte a wedding reception where every bite is a perfectly formed, delightful surprise. That’s the magic of miniature food – it’s not just about portion size, it’s about creating an experience. Guests adore these tiny treasures because they offer a playful, sophisticated way to sample a wider variety of flavors and textures without feeling overwhelmed. Each morsel is a conversation starter, a visual spectacle, and a delicious indulgence all rolled into one. What truly makes miniature food special for weddings is its incredible versatility and ability to inject an element of whimsical elegance into any theme. From savory sliders to dainty dessert towers, these bite-sized wonders elevate the culinary aspect of your special day, leaving a lasting impression on your guests.
Ingredients:
- 1 pound of small, firm potatoes (such as baby Yukon Golds or fingerlings), scrubbed clean
- 2 tablespoons olive oil
- 1/2 teaspoon salt
- 1/4 teaspoon black pepper
- 4 ounces cream cheese, softened
- 2 tablespoons fresh chives, finely chopped
- 1 tablespoon fresh dill, finely chopped
- 1 teaspoon lemon zest
- 1/4 teaspoon garlic powder
- Pinch of cayenne pepper (optional)
- Smoked salmon, thinly sliced and cut into small decorative pieces
- Fresh parsley or microgreens for garnish
Preparing the Miniature Potato Bites
Roasting the Potatoes
- The first crucial step in creating these delightful miniature potato bites is to properly prepare and roast your potatoes. Begin extract by preheating your oven to 400°F (200°C). This higher temperature is key to achieving a lovely crisp exterior on the potatoes, which contrasts beautifully with the creamy topping. Once the oven is preheated, take your scrubbed potatoes and cut them into bite-sized pieces. If you’re using baby potatoes, you might be able to halve or quarter them depending on their size. The goal is to have pieces that are roughly 1-inch in diameter, ensuring they are uniform for even cooking. Place these potato pieces in a medium-sized mixing bowl.
- Next, it’s time to season the potatoes for roasting. Drizzle the olive oil over the potato pieces in the bowl. The olive oil will help them crisp up and prevent them from sticking to the baking sheet. Sprinkle the salt and black pepper evenly over the seasoned potatoes. Toss everything together gently with your hands or a spoon until each potato piece is lightly coated with oil and seasonings. This ensures that every bite will be flavorful. Spread the seasoned potatoes in a single layer on a baking sheet. It’s important to avoid overcrowding the pan, as this will cause the potatoes to steam rather than roast, resulting in a less desirable texture. If necessary, use two baking sheets. Roast for 20-25 minutes, or until the potatoes are tender when pierced with a fork and have developed golden-brown, crispy edges. The exact roasting time will depend on the size of your potato pieces and your oven.
Crafting the Creamy Topping
- While the potatoes are roasting, we can prepare the luscious creamy topping that will elevate these mini bites. In a separate medium bowl, combine the softened cream cheese. It’s important that the cream cheese is softened to room temperature; this will make it much easier to mix and create a smooth, lump-free filling. Add the finely chopped fresh chives, dill, lemon zest, garlic powder, and the pinch of cayenne pepper if you’re using it. The chives and dill provide fresh, herbaceous notes, while the lemon zest adds a bright, zesty counterpoint to the richness of the cream cheese. The garlic powder offers a subtle savory undertone.
- Now, thoroughly mix all the ingredients for the topping together. You can use a whisk, a spatula, or an electric mixer on low speed. Continue mixing until everything is well combined and the mixture is smooth and creamy. Taste the topping and adjust seasonings if needed. You might want a little more salt or pepper, or perhaps an extra squeeze of lemon if you prefer a tangier flavor. If you find the mixture a bit too thick, you can stir in a teaspoon of milk or cream to achieve your desired consistency. Transfer this delightful cream cheese mixture into a piping bag fitted with a star tip, or simply spoon it into a resealable plastic bag and snip off a small corner for piping. This step isn’t strictly necessary if you plan to spoon the topping, but piping creates a more professional and visually appealing presentation for your miniature food.
Assembling the Miniature Bites
- Once the roasted potatoes have cooled slightly – they should still be warm but not piping hot, as this can cause the cream cheese to melt too much – it’s time for the final assembly. Carefully arrange the roasted potato pieces on your serving platter. Ensure they are stable enough to hold the topping. If any of your potato pieces are a bit wobbly, you can trim a small slice off the bottom to create a flatter surface. Now, pipe or spoon a generous dollop of the cream cheese mixture onto each roasted potato piece. Aim for a nice swirl or mound that covers a good portion of the potato. This is where the piping bag with a star tip really shines, creating an attractive rosette of cream cheese.
- The final flourish for these miniature marvels involves adding the smoked salmon and a touch of greenery. Take your thinly sliced smoked salmon and cut it into small, decorative pieces. These could be small squares, thin ribbons, or even tiny rosettes folded with a bit of skill. Gently place a piece of smoked salmon on top of each cream cheese-topped potato bite. Don’t overload them; a small, elegant piece of salmon is perfect. To complete the presentation and add a burst of freshness, garnish each mini food item with a tiny sprig of fresh parsley or a few delicate microgreens. This adds a lovely contrast in color and a hint of fresh flavor that complements the rich salmon and creamy topping beautifully. These mini foods are now ready to be served and will undoubtedly impress your guests with their elegant presentation and delicious taste.
Conclusion:
We hope this guide has inspired you to explore the delightful world of Mini Foods for Weddings, A Mini Guide to Serving Miniature Food! Crafting these bite-sized wonders can add a unique and memorable touch to any celebration, from intimate gatherings to grand affairs. The joy of serving miniature food lies not just in its visual appeal, but in the delightful surprise and conversation it sparks among guests. Whether you’re a seasoned chef or a budding home cook, the possibilities are truly endless when it comes to creating elegant and delicious small-scnon-alcoholic ale delicacies.
When it comes to serving, think about presentation as much as taste. Consider tiered platters, individual serving spoons, or even mini food trucks for a playful twist. For those looking to customize, remember that Mini Foods for Weddings, A Mini Guide to Serving Miniature Food, is incredibly adaptable. Don’t be afraid to experiment with flavor profiles, dietary needs, and seasonal ingredients to make your offerings truly your own. We encourage you to dive in, have fun, and create a culinary experience that your guests will talk about for years to come!
Frequently Asked Questions about Mini Foods for Weddings, A Mini Guide to Serving Miniature Food:
Q1: What are the benefits of serving miniature food at a wedding?
Serving miniature food offers several advantages. It allows guests to sample a wider variety of dishes, caters to different dietary preferences more easily, and creates a more interactive and engagin extractg dining experience. Plus, the visual appeal of beautifully crafted mini dishes adds a sophisticated and whimsical element to the wedding reception.
Q2: Can I prepare miniature food in advance?
Absolutely! Many miniature food items can be prepared in advance, which is a huge time-saver on the day of the event. Items like mini quiches, tart shells, and even some dessert components can be made a day or two ahead. For dishes that require assembly or are best served warm, plan to do those closer to serving time to ensure optimal freshness and quality.
Mini Wedding Foods-Guide to Bite-Sized Delights
Elegant bite-sized potato bites perfect for wedding celebrations, featuring a creamy herb topping and smoked salmon.
Ingredients
-
1 pound small, firm potatoes
-
2 tablespoons olive oil
-
1/2 teaspoon salt
-
4 ounces cream cheese, softened
-
2 tablespoons fresh chives, finely chopped
-
1 tablespoon fresh dill, finely chopped
-
1 teaspoon lemon zest
-
1/4 teaspoon garlic powder
-
Smoked salmon, thinly sliced and cut into small decorative pieces
-
Fresh parsley or microgreens for garnish
Instructions
-
Step 1
Preheat oven to 400°F (200°C). Scrub potatoes and cut into 1-inch bite-sized pieces. -
Step 2
Toss potato pieces with olive oil, salt, and pepper. Spread in a single layer on a baking sheet and roast for 20-25 minutes until tender and crispy. -
Step 3
In a separate bowl, combine softened cream cheese with chives, dill, lemon zest, garlic powder, and optional cayenne pepper. -
Step 4
Mix topping ingredients until smooth and creamy. Transfer to a piping bag or a resealable plastic bag. -
Step 5
Arrange slightly cooled roasted potatoes on a serving platter. Pipe or spoon a dollop of cream cheese mixture onto each potato piece. -
Step 6
Top each bite with a decorative piece of smoked salmon and garnish with fresh parsley or microgreens.
Important Information
Nutrition Facts (Per Serving)
It is important to consider this information as approximate and not to use it as definitive health advice.
Allergy Information
Please check ingredients for potential allergens and consult a health professional if in doubt.