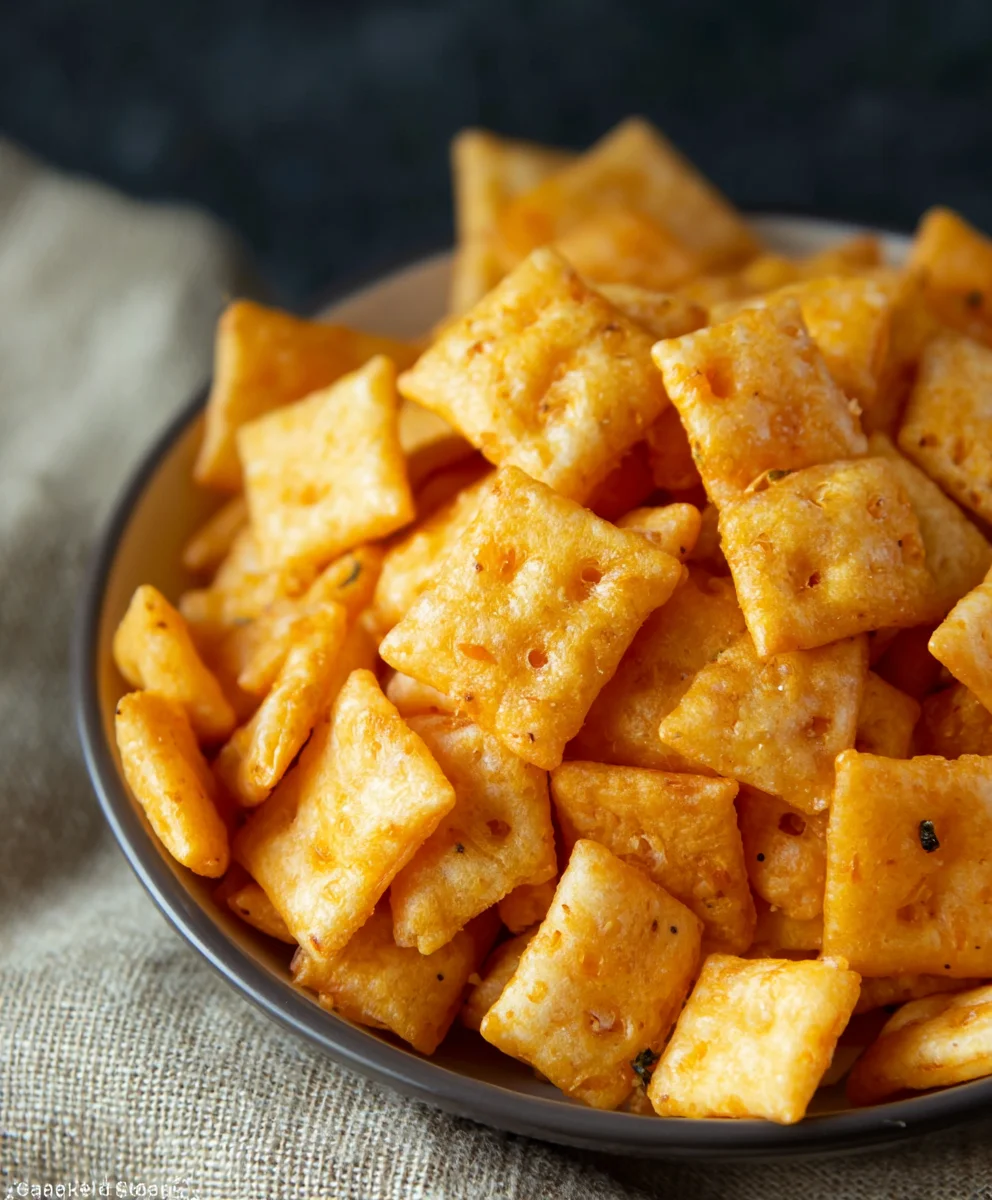
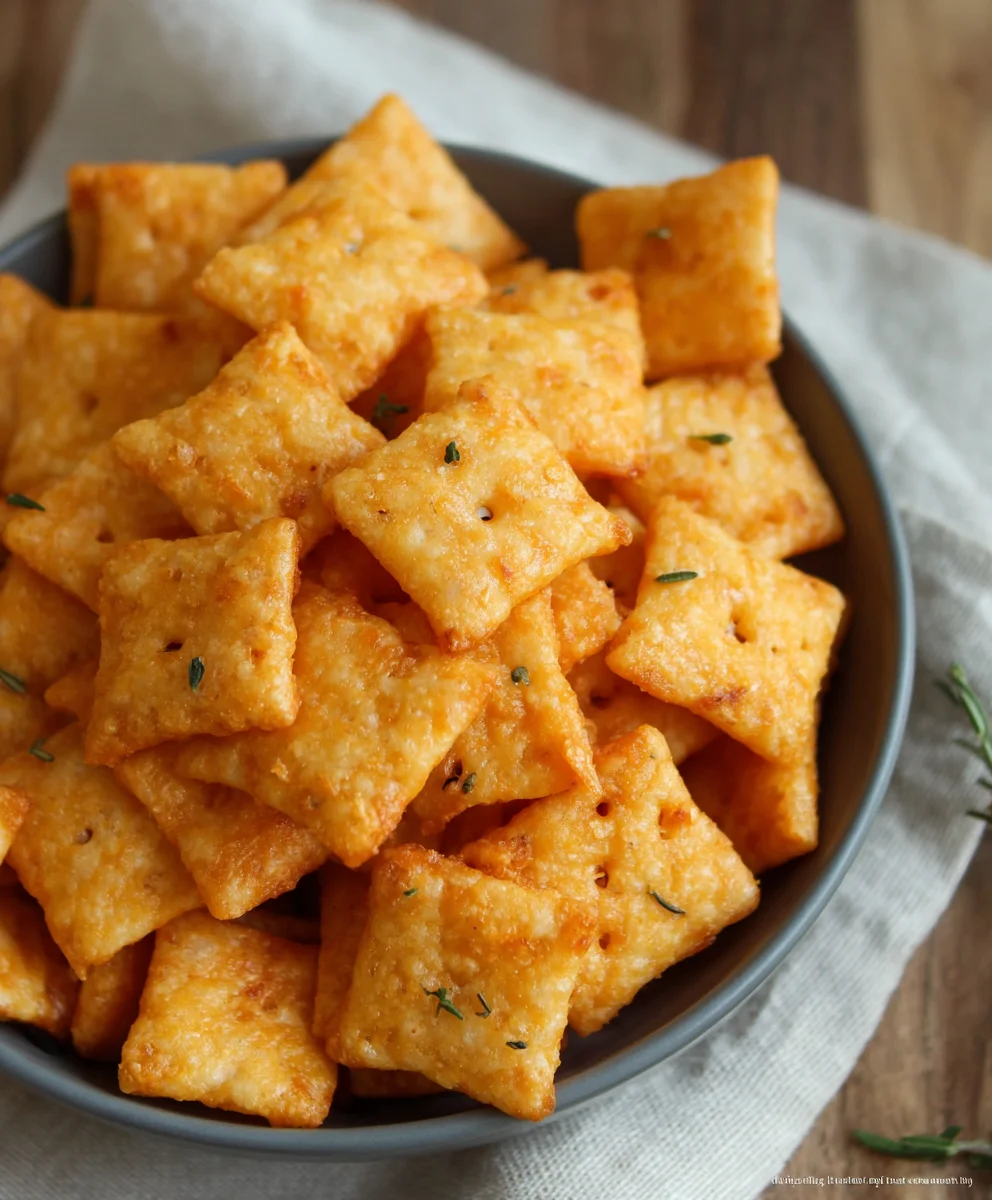
Gluten-Free Cheez-Its – Deliciously Cheesy Snack Recipe
Gluten Free Cheez Its are a game-changer for anyone craving that iconic cheesy, crunchy snack without the gluten. For years, many of us have reminisced about the satisfying snap and savory flavor of traditional Cheez-Its, often feeling left out of the fun. But what if I told you that you can recreate that beloved taste and texture in your own kitchen, with a recipe that’s surprisingly simple and wonderfully satisfying? These aren’t just a pnon-alcoholic ale imitation; they are a triumphant celebration of flavor, designed to bring joy back to snack time for the gluten-sensitive. People love them because they deliver on that authentic cheesy goodness, that perfect crunch, and that addictive savory punch that makes a box disappear in record time. What makes this particular version of Gluten Free Cheez Its so special is the careful selection of flours that mimic the classic texture, combined with a generous amount of sharp cheddar cheese and a touch of nutritional yeast for an extra umami boost. Get ready to rediscover your favorite cheesy cracker, made perfectly for you.
Ingredients:
- 8 ounces cheddar cheese (mild or sharp), finely shredded
- 4 tablespoons unsalted butter, softened
- 1 cup gluten-free flour blend
- 1/2 teaspoon salt
- 1/8 teaspoon garlic powder
- 3 tablespoons cold water
- 1 teaspoon coarse salt (for sprinkling over the crackers)
- 1/8 teaspoon onion powder
Preparing the Dough
Mixing the Dry Ingredients
To begin extract, let’s get our dry ingredients ready. In a medium-sized mixing bowl, combine the 1 cup of gluten-free flour blend, 1/2 teaspoon of salt, 1/8 teaspoon of garlic powder, and 1/8 teaspoon of onion powder. Whisk these ingredients together thoroughly. This ensures that the seasonings are evenly distributed throughout the flour, which is crucial for consistent flavor in every bite of your Gluten Free Cheez Its. A good whisking here prevents any pockets of unseasoned dough, which would be a disappointing discovery later on.
Incorporating the Fat and Cheese
Next, add the 4 tablespoons of softened unsalted butter to the dry ingredients. You want the butter to be soft enough to cut into the flour easily, but not melted. This is where we start building the flaky texture that makes crackers so appealing. Use a pastry blender, a fork, or your fingertips to cut the butter into the flour mixture until it resembles coarse crum extractbs. There should be no large chunks of butter remaining. Now, the star of the show: the 8 ounces of finely shredded cheddar cheese. Add the shredded cheese to the flour and butter mixture. Gently toss everything together with a fork or your hands until the cheese is well incorporated. It’s important to shred the cheese finely; this helps it melt more evenly into the dough and prevents large, greasy pockets.
gin extract>Bringing it all Together
Now it’s time to introduce the liquid to bind everything together. Gradually add the 3 tablespoons of cold water, one tablespoon at a time, mixing after each addition. You may not need all of the water, or you might need a tiny bit more depending on your gluten-free flour blend and the humidity in your kitchen. The goal is to form a cohesive dough that just comes together. Don’t overmix at this stage; we’re not developing gluten (since it’s gluten-free!), but we want to avoid making the dough tough. Once the dough starts to clump together, gather it into a ball. It might feel a rum extracttle crumbly, which is perfectly normal for gluten-free doughs.
Shaping and Baking Your Gluten Free Cheez Its
Chilling the Dough
Once your dough is formed, it’s essential to chill it. Wrap the dough tightly in plastic wrap and flatten it slightly into a disc. This makes it easier to roll out later. Place the wrapped dough in the refrigerator for at least 30 minutes, or up to 2 days. Chilling the dough is a critical step for several reasons. It allows the fats (butter and cheese) to firm up, which will prevent the crackers from spreading too much during baking. It also allows the gluten-free flour to fully hydrate, which can improve the texture and prevent a gritty feel.
Rolling and Cutting
When you’re ready to bake, preheat your oven to 350 degrees Fahrenheit (175 degrees Celsius). Line two baking sheets with parchment paper for easy cleanup and to prevent sticking. Take your chilled dough out of the refrigerator. Place the dough between two sheets of parchment paper or on a lightly floured surface (using your gluten-free flour blend). Roll the dough out to about 1/8-inch thickness. Aim for an even thickness throughout; this will ensure consistent baking. You can use a ruler to guide you if needed. Once rolled, use a pizza cutter or a sharp knife to cut the dough into small squares, mimicking the classic Cheez-It shape. Don’t worry about perfection; irregular shapes add to the homemade charm! You can gently re-roll scraps once, but overworking them can make the crackers tough.
Baking to Perfection
Carefully transfer the cut dough squares to the prepared baking sheets, leaving a little space between them as they may puff up slightly. For that authentic Cheez-It look and taste, sprinkle the tops of the crackers generously with the 1 teaspoon of coarse salt. This salt not only adds flavor but also a satisfying crunch. Place the baking sheets in the preheated oven. Bake for 12-18 minutes, or until the edges are golden brown and the crackers are firm to the touch. The baking time can vary depending on your oven and the thickness of your crackers, so keep a close eye on them, especially during the last few minutes. You want them to be crispy, not burnt. Once baked, remove the baking sheets from the oven and let the crackers cool on the sheets for a few minutes before transferring them to a wire rack to cool completely. This cooling process is essential for them to achieve their final crispiness.
Conclusion:
And there you have it! You’ve successfully unlocked the secret to homemade Gluten Free Cheez Its. These cheesy, crunchy crackers are incredibly satisfying to make and even more delightful to devour. The rich, savory cheese flavor combined with that signature crispy texture is truly irresistible. They are perfect for snacking straight from the box, packing in lunchboxes, or serving as a crowd-pleasing appetizer. Don’t be afraid to experiment with different cheeses to find your perfect flavor profile. With this recipe, you can enjoy a beloved snack without any gluten worries!
Frequently Asked Questions about Gluten Free Cheez Its:
Can I use different types of cheese for these Gluten Free Cheez Its?
Absolutely! While sharp cheddar is classic, feel free to get creative. Monterey Jack, Colby, pepper jack for a little kick, or even a blend of your favorite cheeses would work wonderfully. Just ensure the cheese is finely shredded for the best texture and melt.
How should I store my homemade Gluten Free Cheez Its?
To maintain their crispiness, store your cooled Gluten Free Cheez Its in an airtight container at room temperature. They should stay fresh and delicious for up to a week. If they lose a bit of their crunch, you can briefly toast them in a low oven for a few minutes to revive them.
Gluten-Free Cheez-Its – Deliciously Cheesy Snack Recipe
Make your own delicious and cheesy gluten-free crackers at home that rival your favorite store-bought snack.
Ingredients
-
8 ounces cheddar cheese, finely shredded
-
4 tablespoons unsalted butter, softened
-
1 cup gluten-free flour blend
-
1/2 teaspoon salt
-
1/8 teaspoon garlic powder
-
3 tablespoons cold water
-
1 teaspoon coarse salt
-
1/8 teaspoon onion powder
Instructions
-
Step 1
In a medium bowl, whisk together the gluten-free flour blend, 1/2 teaspoon salt, garlic powder, and onion powder. -
Step 2
Cut in the softened butter until the mixture resembles coarse crumbs. Then, gently toss in the shredded cheddar cheese until well incorporated. -
Step 3
Gradually add the cold water, one tablespoon at a time, mixing until a cohesive dough just comes together. Gather the dough into a ball. -
Step 4
Wrap the dough tightly in plastic wrap, flatten into a disc, and chill in the refrigerator for at least 30 minutes. -
Step 5
Preheat oven to 350°F (175°C). Line two baking sheets with parchment paper. Roll out the chilled dough to about 1/8-inch thickness between two sheets of parchment paper or on a lightly floured surface. Cut into small squares. -
Step 6
Transfer the dough squares to the prepared baking sheets. Sprinkle the tops generously with coarse salt. -
Step 7
Bake for 12-18 minutes, or until the edges are golden brown and the crackers are firm. Let cool on the baking sheets for a few minutes, then transfer to a wire rack to cool completely and crisp up.
Important Information
Nutrition Facts (Per Serving)
It is important to consider this information as approximate and not to use it as definitive health advice.
Allergy Information
Please check ingredients for potential allergens and consult a health professional if in doubt.