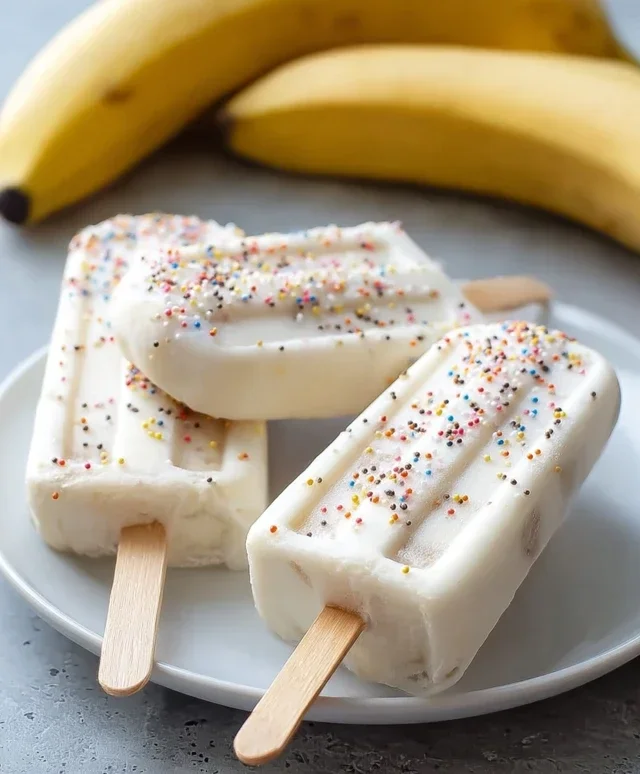
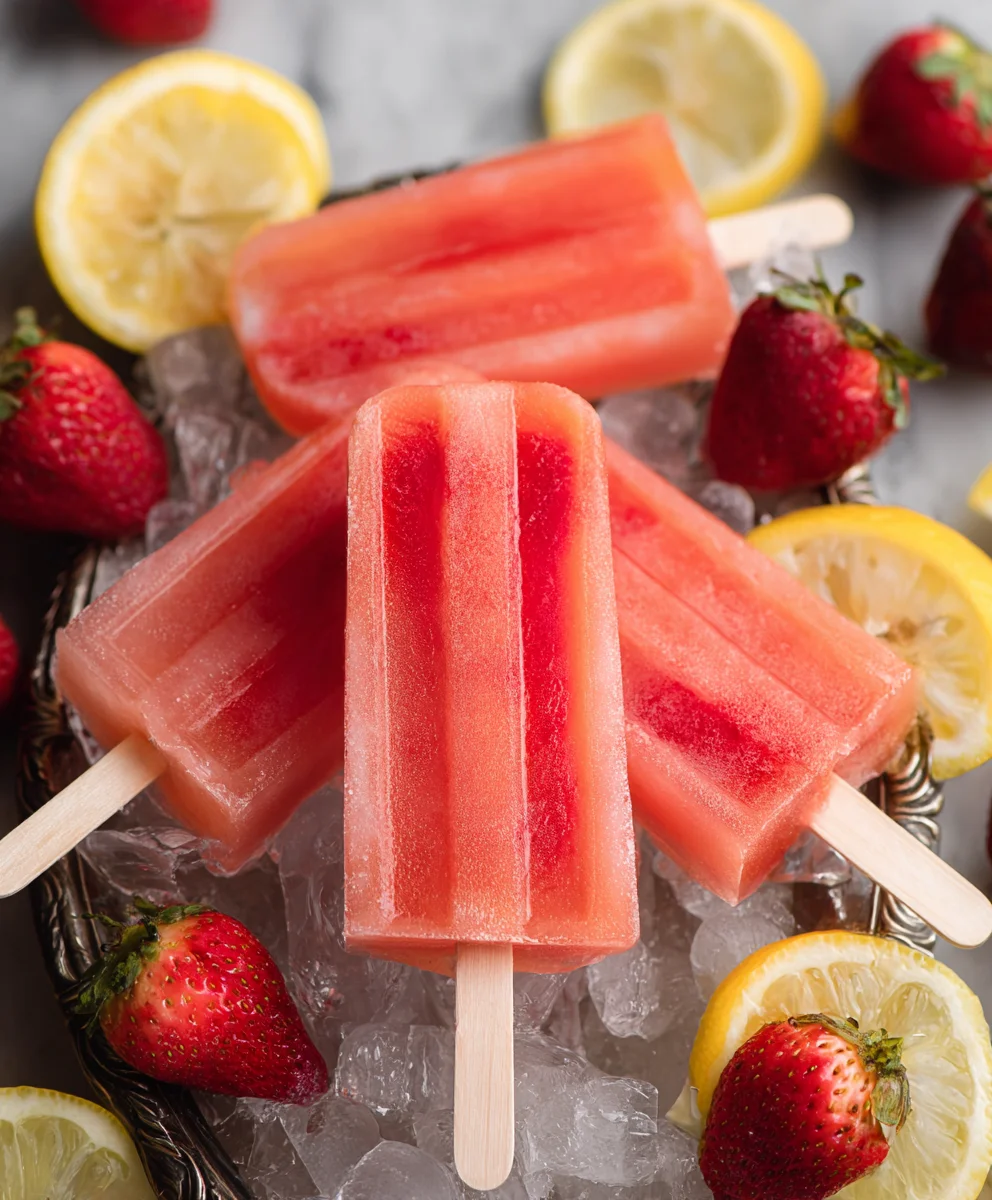
Strawberry Lemonade Popsicles-Refreshing Summer Treat
Strawberry Lemonade Popsicles are more than just a frozen treat; they are a vibrant explosion of summer sunshine captured in a single, delightful bite. There’s an undeniable magic to these icy delights that transports us back to carefree days, the sweet scent of ripe strawberries mingling with the zesty tang of fresh lemons. It’s this perfect balance – the sweetness of the berries taming the sharp citrus, creating a flavor profile that is both refreshing and utterly satisfying – that makes them so beloved. What truly sets our Strawberry Lemonade Popsicles apart is the simplicity of its brilliance. We’re not reinventing the wheel here; we’re perfecting it, using only the freshest ingredients to ensure every lick is a burst of pure, unadulterated joy. Get ready to make your summer, and any day that needs a little sunshine, infinitely brighter.
Ingredients:
- 1 container Simply Lemonade (standard 59 ounce size)
- 1 cup fresh strawberries, hulled and finely diced
- 1 tablespoon granulated sugar
Preparing the Strawberry Lemonade Base
Step 1: Sweeten the Strawberries
The first step to achieving perfectly balanced Strawberry Lemonade Popsicles is to prepare our strawberry component. We want to coax out some of that natural sweetness and juice from the strawberries before incorporating them into the lemonade. Take your finely diced strawberries and place them in a small bowl. Add the 1 tablespoon of granulated sugar to the diced strawberries. Gently stir the sugar into the strawberries. You’ll notice that as the sugar begin extracts to interact with the fruit, it will start to draw out some of the natural juices, creating a slightly syrupy mixture. This process is sometimes called macerating and it really enhances the strawberry flavor in our popsicles. Allow this mixture to sit for about 10 to 15 minutes while you prepare your popsicle molds. This brief resting period ensures that the sugar has had enough time to work its magic, making the strawberry pieces even more flavorful and tender.
Step 2: Combine Strawberry Mixture with Lemonade
Once your strawberries have had a chance to macerate, it’s time to combine them with the star of the show: Simply Lemonade. Open your container of Simply Lemonade. Pour the entire contents into a larger pitcher or bowl. Now, carefully spoon the sweetened strawberry mixture, including any juices that have accumulated in the bottom of the bowl, into the pitcher of lemonade. Stir everything together gently but thoroughly. You want to ensure that the strawberry pieces are evenly distributed throughout the lemonade. Don’t worry if some of the strawberry dice are a little larger than others; these will provide lovely little bursts of flavor and texture in your finished popsicles. The goal here is a harmonious blend of tangy lemonade and sweet, vibrant strawberries.
Assembling the Popsicles
Step 3: Filling the Popsicle Molds
Now for the fun part – getting our delicious mixture into the popsicle molds! Beforgin extractou begin filling, make sure your popsicle molds are clean and dry. If you are using molds that require sticks to be inserted separately, it’s often a good idea to have those ready to go. Carefully pour the strawberry lemonade mixture from the pitcher into your chosen popsicle molds. Leave a small amount of space at the top of each mold, about ¼ inch, to allow for expansion as the liquid freezes. This prevents any overflow and ensures your popsicles will have a smooth, uniform shape. Try to distribute the strawberry pieces as evenly as possible among the molds. If you find that some molds have more strawberries than others, don’t sweat it – they will all taste fantastic!
Step 4: Freezing the Popsicles
Once all your popsicle molds are filled, it’s time to let the magic of the freezer do its work. Carefully place the filled popsicle molds onto a flat surface in your freezer. It’s crucial that the molds are level so that the popsicles freeze evenly and don’t develop an odd shape. Allow the popsicles to freeze completely. This usually takes at least 4 to 6 hours, but for the best, firm results, I recommend leaving them in the freezer overnight. This extended freezing time ensures that the popsicles are solid and easy to remove from the molds without breaking. Resist the urge to check on them too often; patience is key for perfectly set popsicles.
Enjoying Your Homemade Treat
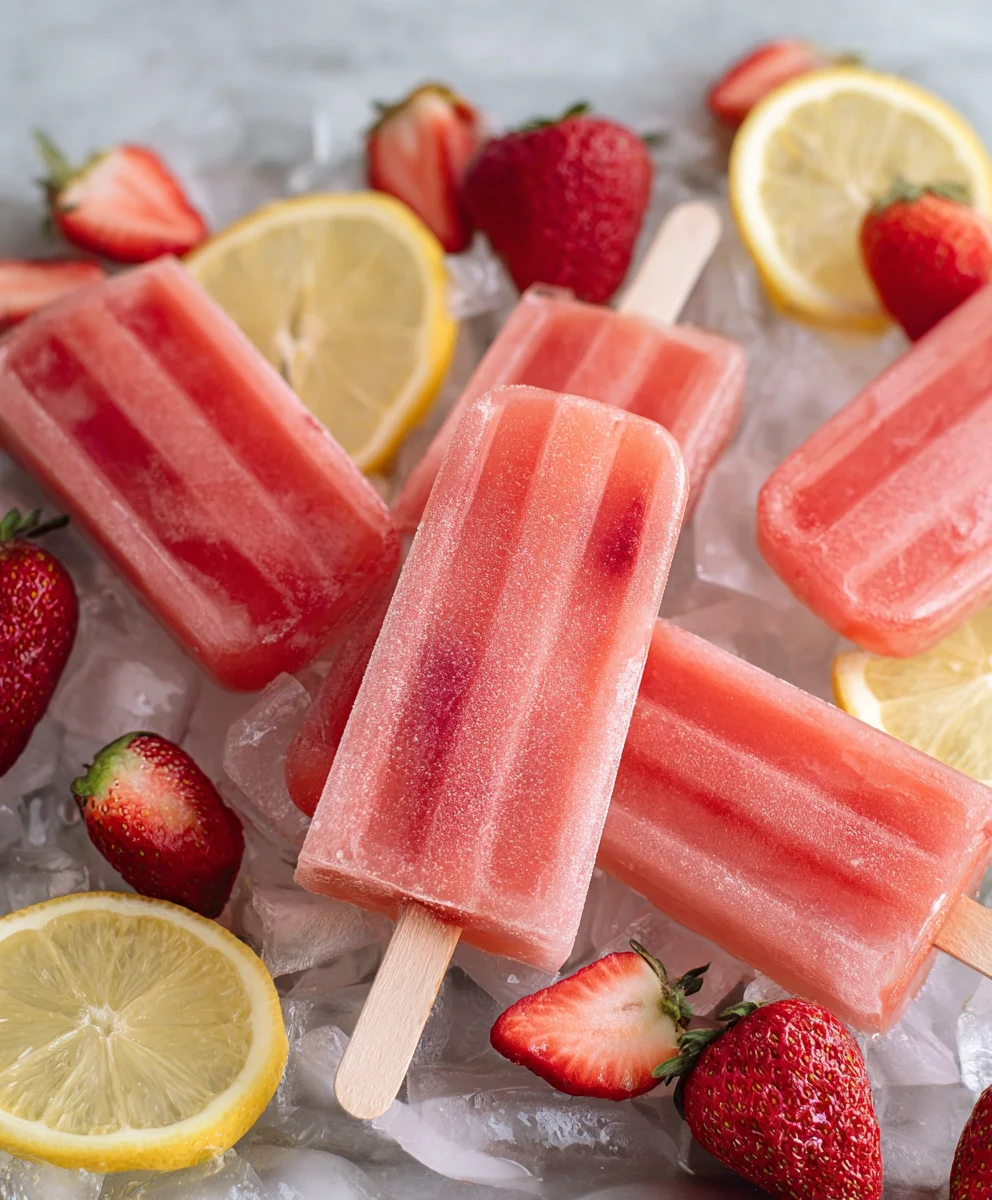
Step 5: Removing and Serving the Popsicles
When your Strawberry Lemonade Popsicles are completely frozen, it’s time to enjoy your refreshing creation. To easily remove them from their molds, you can run the outside of the mold under warm water for a few seconds. Be brief with this step, as you only want to loosen the outside of the popsicle, not melt it. Once loosened, gently pull on the popsicle stick to slide the popsicle out of the mold. If you’re using silicone molds, you might find it easier to push from the bottom. Serve your homemade Strawberry Lemonade Popsicles immediately for a delightfully cool and fruity treat. They are perfect for a hot summer day, a fun backyard party, or simply as a delicious way to cool down anytime. You can also sprinkle a few extra diced strawberries on top for an extra touch of freshness before serving.
Conclusion:
And there you have it – the perfect recipe for delightful Strawberry Lemonade Popsicles! We’ve walked through the simple steps to create these refreshing treats, and I truly hope you enjoy making and sharing them as much as I do. These popsicles are wonderfully balanced, with the sweet tang of fresh strawberries meeting the bright zest of lemon. They’re an absolute winner for a hot summer day, a backyard barbecue, or simply as a delightful pick-me-up.
For serving suggestions, these Strawberry Lemonade Popsicles are fantastic on their own, of course! You can also serve them alongside a summer picnic, or even as a fun dessert after a light meal. For variations, feel free to experiment with adding a sprig of mint to the mixture before freezing for an extra layer of herbaceous coolness, or blend in a few raspberries for a mixed berry twist. Don’t be afraid to adjust the sugar and lemon to your personal preference. I encourage you to give this recipe a try; it’s surprisingly easy and incredibly rewarding.
Frequently Asked Questions:
Q: Can I make these popsicles without a popsicle mold?
Absolutely! If you don’t have traditional popsicle molds, you can use small paper or plastic cups. Fill them with the strawberry lemonade mixture, insert popsicle sticks once the mixture is partially frozen (about 1-2 hours in), and then freeze completely. Make sure to cover the cups with foil or plastic wrap to keep the sticks upright.
Q: How long do these Strawberry Lemonade Popsicles typically last in the freezer?
Stored properly in an airtight container or freezer bag, these Strawberry Lemonade Popsicles can last for up to 2-3 months in the freezer. For the best flavor and texture, it’s recommended to consume them within the first month.
Strawberry Lemonade Popsicles – Refreshing Summer Treat
A delightful and refreshing homemade popsicle recipe featuring the perfect blend of sweet strawberries and tangy lemonade, ideal for beating the summer heat.
Ingredients
-
1 container Simply Lemonade (59 ounce)
-
1 cup fresh strawberries, hulled and finely diced
-
1 tablespoon granulated sugar
-
Water (for loosening molds)
-
Optional: Extra diced strawberries for garnish
Instructions
-
Step 1
Combine finely diced strawberries with 1 tablespoon of granulated sugar in a small bowl. Gently stir and let sit for 10-15 minutes to macerate, allowing the sugar to draw out juices and enhance flavor. -
Step 2
Pour the entire container of Simply Lemonade into a larger pitcher. Add the sweetened strawberry mixture, including any accumulated juices, to the lemonade. Stir gently until well combined and strawberry pieces are evenly distributed. -
Step 3
Ensure popsicle molds are clean and dry. Carefully pour the strawberry lemonade mixture into the molds, leaving about ¼ inch of space at the top for expansion during freezing. -
Step 4
Place the filled popsicle molds on a flat surface in the freezer. Ensure they are level to promote even freezing and uniform shape. Freeze for at least 4-6 hours, or preferably overnight, until completely solid. -
Step 5
To remove popsicles, briefly run the outside of each mold under warm water. Gently pull on the popsicle stick to slide the popsicle out. If using silicone molds, push from the bottom. Serve immediately.
Important Information
Nutrition Facts (Per Serving)
It is important to consider this information as approximate and not to use it as definitive health advice.
Allergy Information
Please check ingredients for potential allergens and consult a health professional if in doubt.