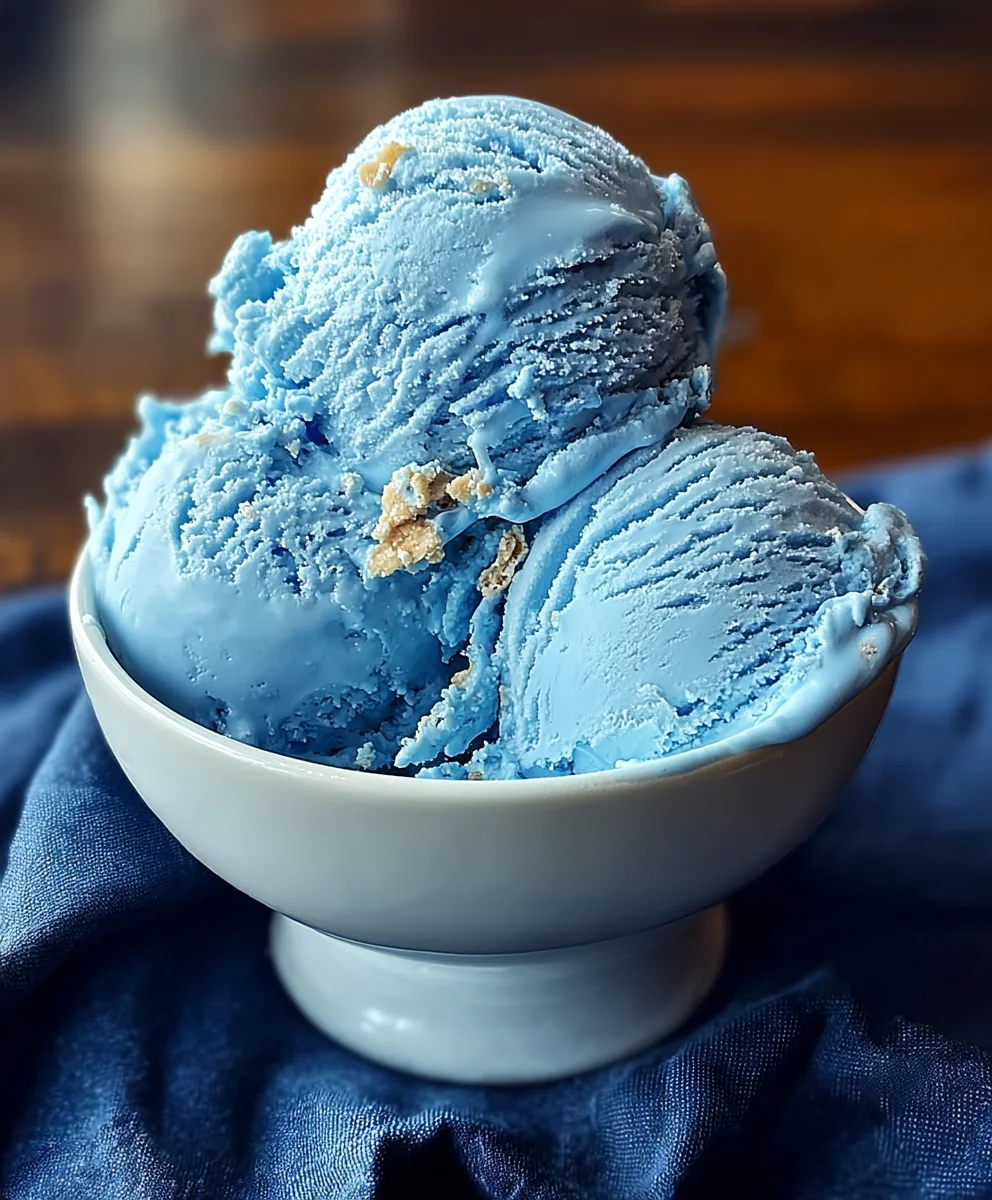
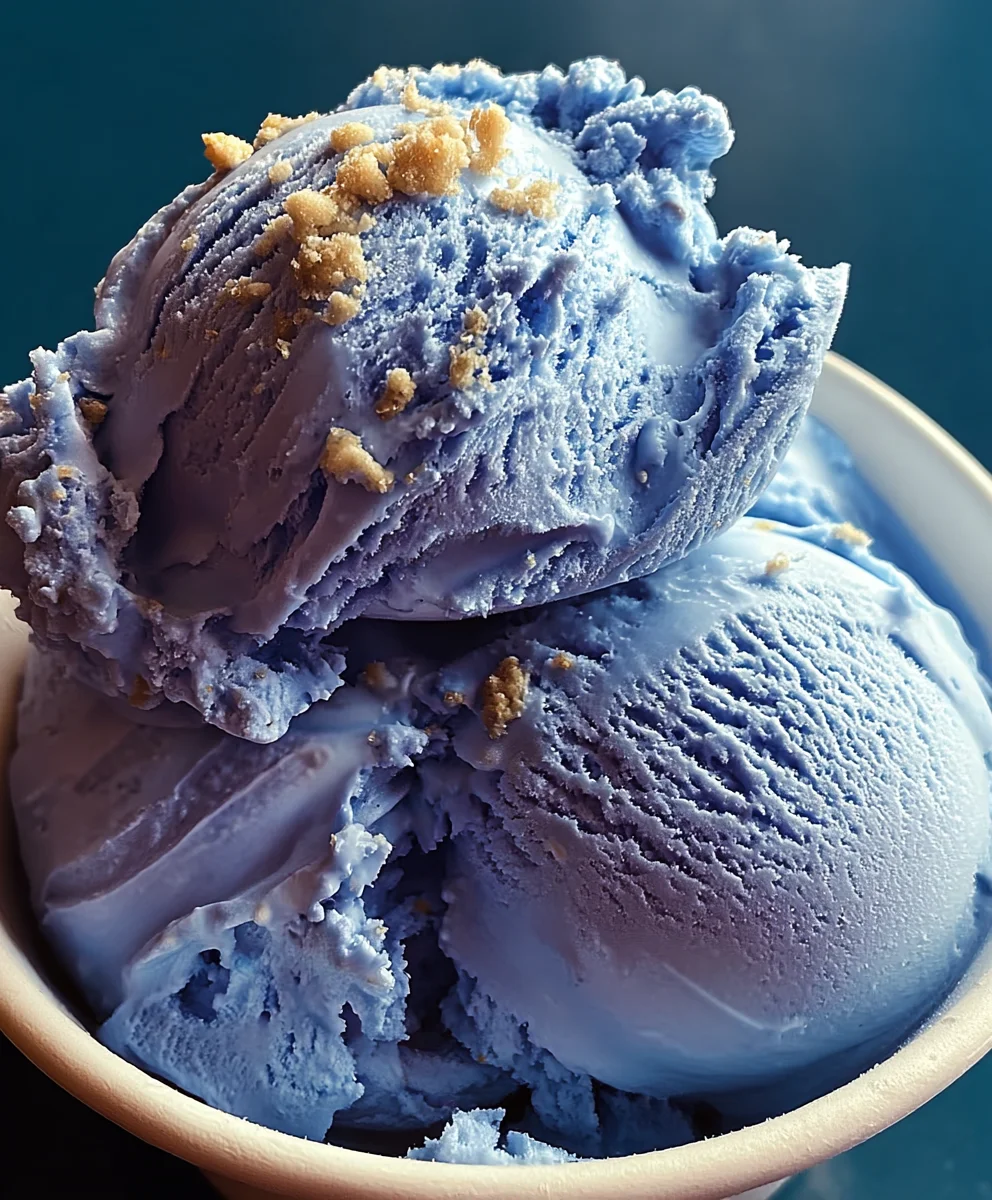
Blue Moon Ice Cream- A Whimsical Non-Non-Non-Alcoholic Alternativeic Treat
Blue Moon Ice Cream isn’t just a flavor; it’s an experience, a vibrant enigma that conjures childhood memories and sparks curiosity with its electric hue. Have you ever wondered what gives this iconic ice cream its distinctively bright, almost otherworldly blue color? Or perhaps you’ve been captivated by its uniquely sweet, vaguely fruity, and utterly delightful taste that sets it apart from any other scoop you’ve had? It’s this blend of visual intrigue and delicious mystery that makes Blue Moon Ice Cream a beloved classic, especially in certain regions of the Midwest. People adore it for its unapologetic boldness and its ability to transport them back to simpler times. What truly makes Blue Moon Ice Cream special is its secret combination of ingredients, rum extractored to include a touch of almond extract and a medley of citrus notes, all coming together to create a flavor profile that is both comforting and excitingly novel. Today, we’re diving deep into crafting this legendary treat right in your own kitchen.
Ingredients:
- 2 cups heavy cream
- 1 cup whole milk
- 3/4 cup granulated sugar
- 1 teaspoon vanilla extract
- 1 teaspoon almond extract
- Blue food coloring, as needed
- 1/4 cup maraschino cherries, chopped (optional)
Making the Blue Moon Ice Cream Base
Step 1: Prepare Your Ice Cream Maker
Before you begin extract mixing your ingredients, it’s crucial to get your ice cream maker ready. Most home ice cream makers have a freezer bowl that needs to be completely frozen solid. This typically takes at least 12-24 hours in the coldest part of your freezer. Ensure the bowl is fully frozen; a partially frozen bowl will result in a less-than-ideal ice cream texture, potentially icy or soft. If you have an ice cream maker that uses salt and ice, consult your manufacturer’s instructions for preparation. Having everything set up before you start combining ingredients will make the process smoother and more efficient.
Step 2: Combine Dairy and Sugar
In a medium saucepan, combine the 1 cup of whole milk and the 3/4 cup of granulated sugar. Place the saucepan over medium heat on your stovetop. Stir constantly with a whisk or wooden spoon until the sugar is completely dissolved. You don’t want to boil the mixture; the goal is just to dissolve the sugar. You’ll know the sugar is dissolved when you can no longer feel any grittiness on the bottom of the pan when you stir. This step is essential for a smooth, well-integrated ice cream base. Once the sugar is dissolved, remove the saucepan from the heat.
Step 3: Incorporate Extracts and Cool the Base
Now it’s time to add the flavor! To the warm milk and sugar mixture, add the 1 teaspoon of vanilla extract and the 1 teaspoon of almond extract. Stir well to distribute the extracts evenly. The almond extract adds a subtle, distinctive flavor that is characteristic of many “Blue Moon” style ice creams, so don’t skip it! After adding the extracts, you need to cool this base mixture thoroughly. You can do this in a few ways. For a quicker cool-down, you can pour the mixture into a clean bowl and place it over an ice bath, stirring occasionally. Alternatively, cover the saucepan with plastic wrap and refrigerate for at least 2 hours, or until completely chilled. A cold base is vital for the ice cream maker to churn effectively and produce the best texture.
Step 4: Add Heavy Cream and Color
Once your milk and sugar base is thoroughly chilled, it’s time to add the remaining dairy and the signature color. Pour the 2 cups of heavy cream into the chilled base. Stir everything together until well combined. Now for the fun part: the blue color! Add a few drops of blue food coloring at a time. Stir well and observe the color. Continue adding food coloring, stirring and checking the shade, until you achieve your desired “Blue Moon” hue. Remember that the color will lighten slightly when churned and frozen, so you might want to go a little bolder than you think. If you are using the optional maraschino cherries, stir them in now.
Step 5: Churn the Ice Cream
With your ice cream maker prepared and your Blue Moon base perfectly chilled and colored, it’s time to churn. Pour the entire mixture into your ice cream maker’s frozen bowl. Turn on the machine and let it churn according to the manufacturer’s instructions. This usually takes about 20-30 minutes. The ice cream will be soft-serve consistency when it’s done churning. It will be thick but still scoopable. Don’t over-churn, as this can sometimes lead to a grainy texture.
Freezing and Serving Your Blue Moon Ice Cream
Step 6: Harden the Ice Cream
The ice cream is not quite ready to eat straight from the churner. Transfer the churned ice cream from the ice cream maker to an airtight freezer-safe container. If you’re adding the chopped maraschino cherries, gently fold them in at this stage, ensuring they are evenly distributed throughout the soft ice cream. Press a piece of parchment paper or plastic wrap directly onto the surface of the ice cream before sealing the container. This helps prevent ice crystals from forming on top. Place the container in the freezer and let the ice cream harden for at least 4-6 hours, or preferably overnight. This crucial hardening step allows the ice cream to firm up to the perfect scoopable consistency. When it’s fully hardened, you’ll have a delicious, homemade Blue Moon Ice Cream ready to enjoy!
Conclusion:
And there you have it – your guide to creating the most delightful Blue Moon Ice Cream at home! We’ve walked through each step, from selecting the perfect ingredients to achieving that signature vibrant hue and creamy texture. This Blue Moon Ice Cream is more than just a dessert; it’s a trip down memory lane for some and an exciting new flavor adventure for others. Its unique fruity and slightly almond-like taste is truly captivating and sure to impress.
For serving suggestions, this Blue Moon Ice Cream is fantastic on its own, but it also pairs beautifully with a light dusting of edible glitter for extra sparkle, or as a playful addition to a cake or brownie. Consider a dollop on top of a slice of pound cake or blended into a thick, whimsical milkshake.
Don’t be afraid to experiment with variations! You could add a swirl of marshmallow creme for an extra layer of sweetness and texture, or even a few maraschino cherries for pops of color and a cherry flavor twist. The possibilities are as vast as your imagin extractation! We encourage you to get creative and make this recipe your own. Enjoy every spoonful!
Frequently Asked Questions about Blue Moon Ice Cream:
Q1: What gives Blue Moon Ice Cream its distinctive blue color and unique flavor?
The signature blue color typically comes from food coloring, often a bright blue. The unique flavor profile is a bit of a mystery and can vary by manufacturer, but it’s generally described as a blend of fruity notes, with hints of almond extract often playing a key role. Some also detect subtle vanilla or even citrus undertones.
Q2: Can I make Blue Moon Ice Cream without an ice cream maker?
Absolutely! While an ice cream maker ensures the smoothest texture, you can achieve delicious results without one. Simply follow the recipe’s instructions for chilling the base, then pour it into a freezer-safe container. Every 30-45 minutes for the first 2-3 hours, remove it from the freezer and vigorously whisk or beat it with an electric mixer to break up ice crystals. Continue freezing until firm.
Blue Moon Ice Cream – A Whimsical Non-Alcoholic Treat
A delightful and colorful homemade Blue Moon ice cream recipe, offering a whimsical non-alcoholic alternative treat.
Ingredients
-
2 cups heavy cream
-
1 cup whole milk
-
3/4 cup granulated sugar
-
1 teaspoon vanilla extract
-
1 teaspoon almond extract
-
Blue food coloring, as needed
-
1/4 cup maraschino cherries, chopped (optional)
Instructions
-
Step 1
Prepare your ice cream maker by ensuring the freezer bowl is completely frozen solid, typically 12-24 hours. For salt and ice models, follow manufacturer instructions. -
Step 2
In a saucepan over medium heat, combine whole milk and granulated sugar. Stir constantly until sugar is fully dissolved. Do not boil. Remove from heat once dissolved. -
Step 3
Stir vanilla extract and almond extract into the warm milk mixture. Cool the base thoroughly by placing it in an ice bath or refrigerating for at least 2 hours until chilled. -
Step 4
Once the base is chilled, pour in the heavy cream and stir well. Gradually add blue food coloring, a few drops at a time, stirring until your desired “Blue Moon” hue is achieved. Stir in optional maraschino cherries. -
Step 5
Pour the chilled mixture into your prepared ice cream maker and churn according to manufacturer instructions, usually 20-30 minutes, until it reaches a soft-serve consistency. -
Step 6
Transfer the churned ice cream to an airtight freezer-safe container. Press parchment paper or plastic wrap directly onto the surface to prevent ice crystals. Freeze for at least 4-6 hours, or preferably overnight, until hardened.
Important Information
Nutrition Facts (Per Serving)
It is important to consider this information as approximate and not to use it as definitive health advice.
Allergy Information
Please check ingredients for potential allergens and consult a health professional if in doubt.