Easy Cherry Turnovers – Quick & Delicious Dessert
Easy Cherry Turnovers are about to become your new favorite dessert obsession. There’s something undeniably magical about that flaky, golden crust giving way to a warm, sweet, and tangy cherry filling. It’s a classic for a reason, isn’t it? These delightful little pockets of joy evoke feelings of comfort, nostalgia, and pure indulgence, making them perfect for any occasion, from a simple afternoon treat to a show-stopping dessert for guests. What truly sets these easy cherry turnovers apart is their incredible simplicity. You don’t need to be a pastry chef to achieve bakery-worthy results. We’ve cracked the code to making these incredibly delicious and approachable, ensuring that even a begin extractner baker can create a batch that’s sure to impress. Get ready to fall in love with the sweet, tart burst of cherry nestled within buttery, crisp pastry – it’s a flavor combination that’s simply irresistible.
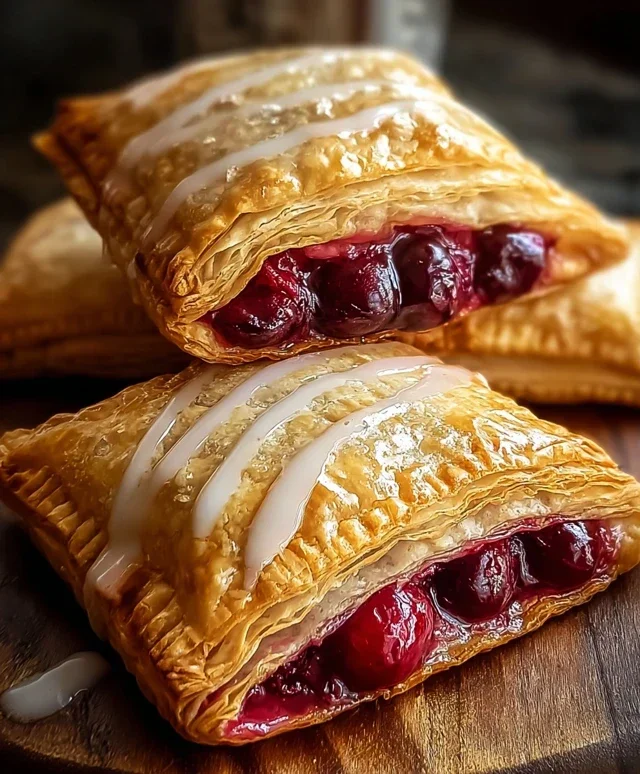
Easy Cherry Turnovers
There’s something undeniably charming about a warm, flaky pastry filled with sweet, tart cherries. These easy cherry turnovers are the perfect example of how simple ingredients can come together to create a truly delightful treat. Whether you’re craving a quick dessert, a sweet addition to your breakfast, or a crowd-pleasing snack, these turnovers are sure to hit the spot. They look impressive but are surprisingly simple to make, requiring minimal effort for maximum deliciousness. The beauty of using store-bought puff pastry is that it eliminates the time-consuming process of making dough from scratch, allowing you to enjoy these homemade delights in no time. The bright, fruity flavor of the cherry filling perfectly complements the buttery, crisp layers of the puff pastry, creating a delightful textural and taste sensation with every bite.
Ingredients:
Getting Started: Preparing Your Puff Pastry
The foundation of these turnovers is, of course, the puff pastry. It’s crucial to ensure your puff pastry is fully thawed according to the package instructions. This usually means leaving it in the refrigerator overnight, or on the counter for about 30-45 minutes. Trying to work with cold, stiff puff pastry will result in tears and difficult handling, while overly warm pastry can become greasy and lose its puff. Once thawed, I like to gently unfold the sheets on a lightly floured surface. Be careful not to overwork the dough at this stage; we want to preserve all those delicate layers that give puff pastry its characteristic flakiness.
Creating Your Cherry Filling
For the filling, you can use either a good quality canned cherry pie filling or fresh cherries that you’ve prepared yourself. If using canned, give it a good stir to ensure the cherries and sauce are well combined. If you’re using fresh cherries, you’ll want to pit them and then cook them down with a little sugar and cornstarch until they form a thick, jam-like consistency. For this recipe, the convenience of a good canned filling is hard to beat, and it provides a lovely sweet and tart balance. You’ll need about a cup of this glorious cherry goodness.
Assembling Your Delicious Turnovers
This is where the magic really happens! You’ll take one sheet of puff pastry and gently unfold it. Using a sharp knife or a pizza cutter, I like to divide each sheet into four equal squares. You should aim for roughly 4×4 inch squares, but don’t worry about perfect precision – rustic is charming! Take another sheet of puff pastry and do the same. Now, for each square of puff pastry, we’re going to spoon a generous amount of our cherry pie filling onto one half of the square, leaving a small border around the edges. Don’t overfill, or the filling will ooze out during baking, though a little bit of ooze can be a delicious sign of a well-loved turnover!
Sealing and Baking to Golden Perfection
Once you have your filling in place, it’s time to seal those turnovers. You’ll take the opposite half of the puff pastry square and fold it over the filling, creating a triangular shape. Gently press the edges together with your fingers to seal them. For an extra secure seal and a more attractive finish, you can use the tines of a fork to crimp the edges. This also helps to prevent the filling from escaping during baking. Before we bake them, we need to make sure they get that beautiful golden-brown hue. In a small bowl, whisk together the egg and the tablespoon of milk. This is your egg wash. Using a pastry brush, lightly brush the tops of each turnover with this egg wash. This will give them a beautiful sheen and help them brown evenly. I also like to cut a couple of small slits in the top of each turnover. This allows steam to escape during baking, preventing the pastry from puffing up too much in the center and potentially bursting.
Baking Instructions
Preheat your oven to 400°F (200°C). Line a baking sheet with parchment paper for easy cleanup. Carefully place your prepared turnovers onto the lined baking sheet, ensuring they have a little space between them. Bake for 18-22 minutes, or until the puff pastry is golden brown and puffed up beautifully. Keep an eye on them, as oven temperatures can vary. Once they are a lovely golden brown, remove them from the oven and let them cool on the baking sheet for a few minutes before transferring them to a wire rack to cool further.
The Finishing Touch: A Sweet Glaze
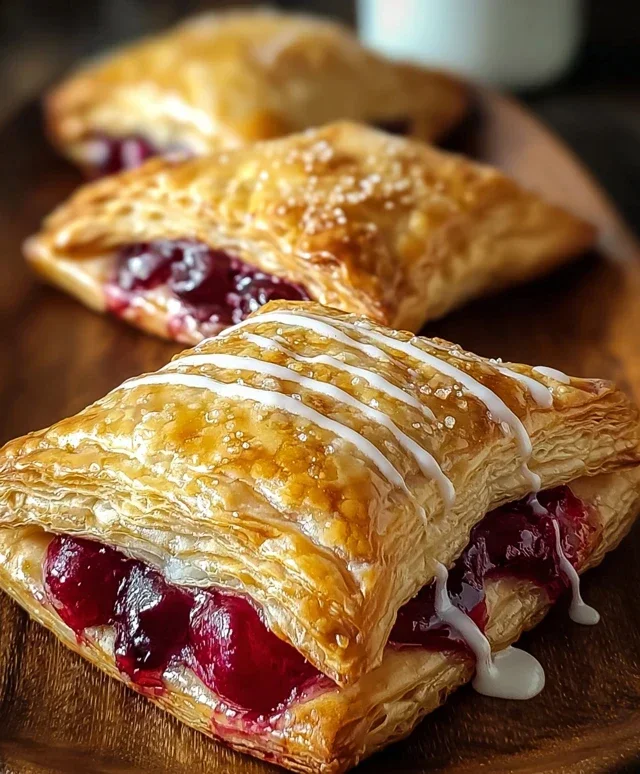
While the turnovers are cooling, let’s whip up a simple, sweet glaze that takes them to the next level. In a medium bowl, whisk together the powdered sugar, vanilla extract, and 2-3 tablespoons of milk. Start with 2 tablespoons of milk and add more, a teaspoon at a time, until you reach your desired consistency. You want a glaze that is thick enough to coat the back of a spoon but still pourable. Once the turnovers have cooled slightly, but are still warm, drizzle this delicious glaze generously over the tops. The warmth of the turnovers will help the glaze set slightly. For an extra touch of sweetness and visual appeal, you can dust them with a little extra powdered sugar before serving. Enjoy your delightful, homemade easy cherry turnovers! They are best served warm, but are also delicious at room temperature.
Conclusion:
And there you have it – a simple yet incredibly rewarding recipe for Easy Cherry Turnovers! This recipe truly shines because it delivers maximum flavor with minimal fuss. The crisp, flaky pastry encasing a sweet and slightly tart cherry filling is a delightful combination that’s sure to impress. Whether you’re a seasoned baker or just starting out, these turnovers are wonderfully forgiving and yield beautiful results every time. They are perfect for a special breakfast, a delightful afternoon treat, or even a charming dessert after a meal. Don’t hesitate to try this recipe; it’s a guaranteed crowd-pleaser that will have everyone asking for seconds!
For serving, I love enjoying these warm with a dusting of powdered sugar or a dollop of fresh whipped cream. They’re also fantastic alongside a scoop of vanilla bean ice cream for a decadent experience. Feeling adventurous? You can easily customize your Easy Cherry Turnovers. Try adding a pinch of cinnamon or a hint of almond extract to the cherry filling for a different flavor profile. You could even experiment with other fruits like blueberries or mixed berries!
Frequently Asked Questions:
Can I use fresh cherries instead of frozen?
Absolutely! If using fresh cherries, make sure to pit them and you might need to adjust the cooking time slightly as fresh cherries can release more liquid. You may also want to add a little more cornstarch to thicken the filling if needed.
How do I store leftover turnovers?
Store any leftover Easy Cherry Turnovers in an airtight container at room temperature for up to two days, or in the refrigerator for up to four days. Reheat them gently in a warm oven or toaster oven to recapture their delightful crispness.
Can I make the dough ahead of time?
Yes, you can definitely prepare the puff pastry dough ahead of time. Wrap it tightly in plastic wrap and refrigerate for up to 2 days, or freeze it for up to a month. Thaw in the refrigerator before using.
Easy Cherry Turnovers
Quick and simple cherry turnovers made with store-bought puff pastry and cherry pie filling.
Ingredients
-
1 package puff pastry (2 sheets), thawed
-
1 cup cherry pie filling (fresh or canned)
-
1 large egg
-
1 tablespoon milk
-
1 cup powdered sugar
-
1 teaspoon vanilla extract
-
2-3 tablespoons milk
-
Additional powdered sugar for dusting
Instructions
-
Step 1
Preheat oven to 400°F (200°C). Line a baking sheet with parchment paper. -
Step 2
Unfold puff pastry sheets and cut each into 4 equal squares, for a total of 8 squares. -
Step 3
In a small bowl, whisk together the egg and 1 tablespoon of milk to create an egg wash. -
Step 4
Spoon about 2 tablespoons of cherry pie filling onto one half of each puff pastry square, leaving a small border. -
Step 5
Brush the edges of the puff pastry with the egg wash. Fold the other half of the pastry over the filling to create a triangle or rectangle, pressing the edges to seal. -
Step 6
Place turnovers on the prepared baking sheet. Cut a small slit in the top of each turnover to allow steam to escape. Brush the tops with the remaining egg wash. -
Step 7
Bake for 18-20 minutes, or until golden brown and puffed. -
Step 8
While turnovers are baking, whisk together 1 cup powdered sugar, vanilla extract, and 2-3 tablespoons milk until smooth for the glaze. -
Step 9
Let turnovers cool slightly on the baking sheet, then transfer to a wire rack. Drizzle with the glaze. -
Step 10
Dust with additional powdered sugar before serving, if desired.
Important Information
Nutrition Facts (Per Serving)
It is important to consider this information as approximate and not to use it as definitive health advice.
Allergy Information
Please check ingredients for potential allergens and consult a health professional if in doubt.