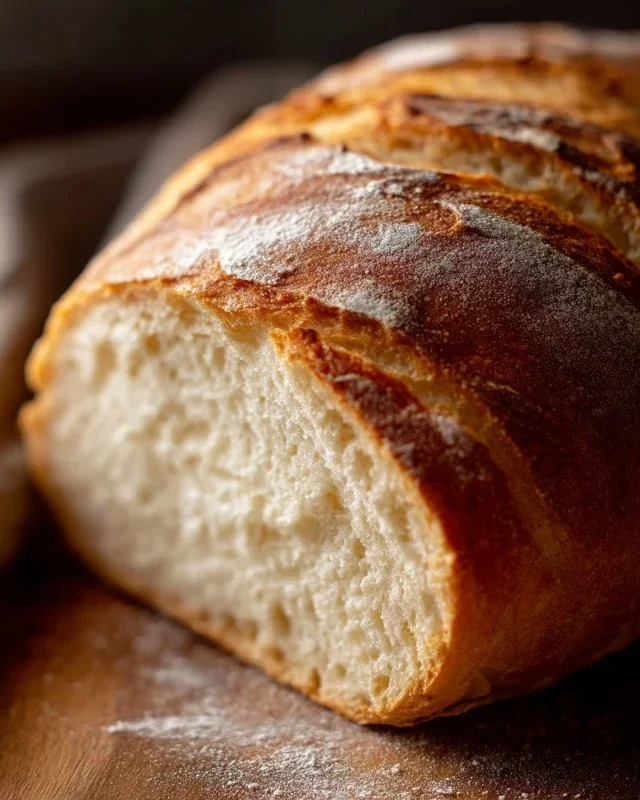
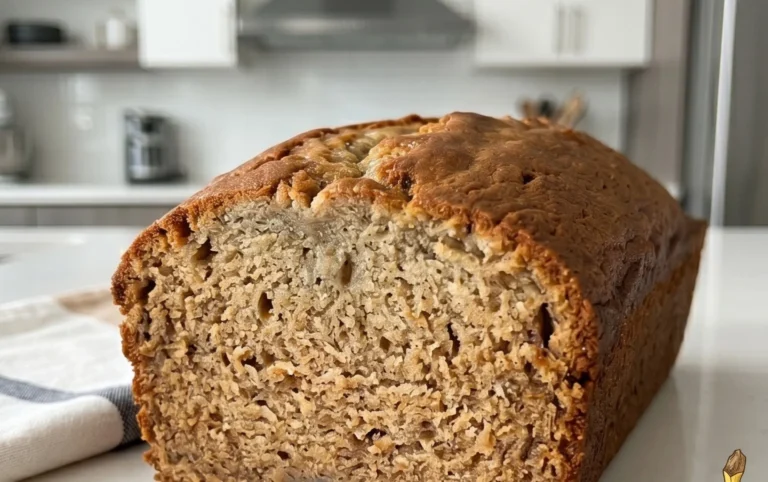
Easy Homemade English Muffins Recipe-Perfect Breakfast
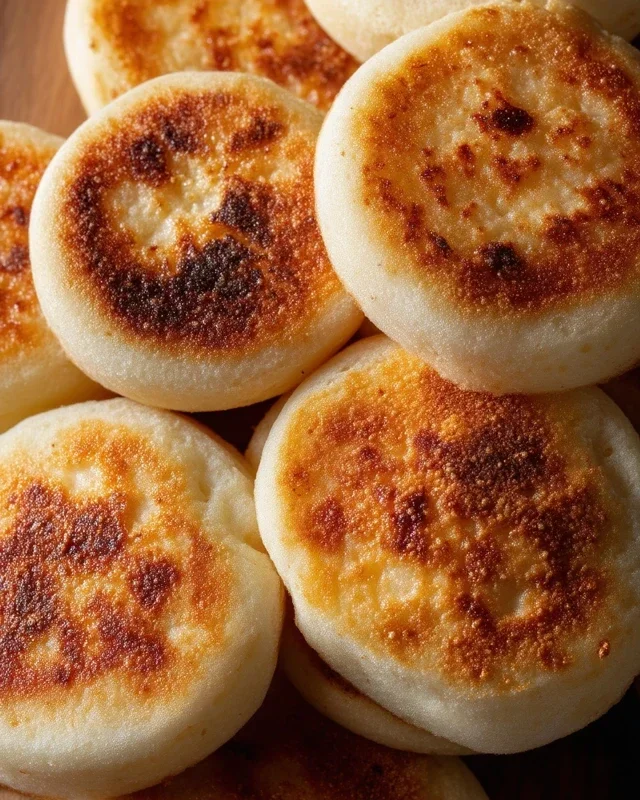
Easy Homemade English Muffins are a revelation for any breakfast lover. Forget the store-bought versions that often lack that perfect nooks-and-crannies texture and subtle yeasty flavor. There’s something incredibly satisfying about biting into a warm, toasty English muffin, its surface studded with little pockets just waiting to be filled with melted butter, jam, or your favorite savory topping. People adore them because they’re the ultimate blank canvas for breakfast – from a classic eggs benedict base to a simple, comforting start to the day. What truly makes easy homemade English muffins special is the incredible aroma that fills your kitchen as they bake, a testament to the simple ingredients and the joy of creating something delicious from scratch. I’m thrilled to share this recipe with you, a foolproof way to achieve bakery-quality results right in your own home.
Easy Homemade English Muffins
There’s something incredibly satisfying about a freshly baked English muffin. The nooks and crannies, perfect for soaking up butter or jam, are a delightful textural contrast to their slightly chewy interior. While you can certainly buy them, making them at home is surprisingly straightforward and the results are truly superior. Forget those pre-packaged, slightly sad versions; these homemade gems will elevate your breakfast game to a whole new level. The process involves a simple dough, a bit of patience for rising, and a unique cooking method that creates those signature craters. Get ready to impress yourself (and anyone lucky enough to share your breakfast) with these easy homemade English muffins.
Ingredients:
Making the Dough
The first step to perfect English muffins is activating your yeast. In a large mixing bowl, combine the warm water and sugar. Give it a gentle stir to dissolve the sugar. Then, sprinkle the instant dry yeast over the top. Let this mixture sit undisturbed for about 5-10 minutes. You’re looking for a foamy, bubbly surface. This indicates that your yeast is alive and ready to work its magic, helping your muffins rise beautifully. If you don’t see any foam, your yeast might be expired, and it’s best to start with a fresh packet.
Once your yeast is active, it’s time to add the wet ingredients. Pour in the oil (or melted butter) and stir to combine with the yeast mixture. Now, it’s time for the flour. Add 2 ¾ cups of your all-purpose flour (or bread flour for a slightly chewier muffin) and the salt to the bowl.
Mixing and Kneading
Now, you can start mixing. You can use a stand mixer with a dough hook attachment on low speed, or you can mix by hand with a sturdy spoon or spatula. Mix until a shaggy dough starts to form. If you’re using a stand mixer, continue mixing for about 5-7 minutes until the dough is smooth and elastic. It should pull away from the sides of the bowl. If you’re mixing by hand, turn the dough out onto a lightly floured surface and knead for about 8-10 minutes.
The dough should be soft but not overly sticky. If it feels too wet and sticky, gradually add a little more flour, a tablespoon at a time, until it’s manageable. Conversely, if it feels too dry, add a tiny bit of water, a teaspoon at a time. Proper kneading develops the gluten in the flour, which is essential for the structure and texture of your English muffins. You want a dough that springs back slowly when you poke it.
First Rise and Shaping
Once your dough is well-kneaded and smooth, lightly grease a clean bowl with a little oil. Place the dough in the bowl, turning it to coat all sides with the oil. Cover the bowl tightly with plastic wrap or a damp kitchen towel. Find a warm, draft-free spot in your kitchen for the dough to rise. This is often the top of the refrigerator, near a sunny window, or in a slightly warmed (but turned off) oven. Let the dough rise for about 1 to 1.5 hours, or until it has doubled in size. This is the primary rising stage where the yeast gets to work, creating those airy pockets.
After the first rise, gently punch down the dough to release the air. Turn the dough out onto a lightly floured surface. Here comes the shaping. You want to create your English muffin discs. You can do this by gently patting or rolling the dough into a thickness of about ½ inch. Then, use a round cookie cutter (about 3 inches in diameter) or the rim of a glass to cut out your English muffin shapes. You can re-gather the scraps, knead them lightly, and cut out more shapes until all the dough is used.
Second Rise and Preparation for Cooking
Now, the crucial step for creating those wonderful nooks and crannies: the second rise, which also prepares them for cooking. Generously dust a baking sheet or a clean kitchen towel with cornmeal. Arrange your cut-out English muffin dough circles on the cornmeal, ensuring they have a little space between them. Lightly dust the tops of the dough circles with more cornmeal. This cornmeal is essential for the traditional English muffin texture and prevents them from sticking.
Cover the dough circles loosely with plastic wrap or a light kitchen towel and let them rest for another 30-45 minutes. They won’t double in size this time, but they should puff up slightly. While they are resting, prepare your cooking station. You’ll need a large, heavy-bottomed skillet or griddle. Non-stick skillets work well, but cast iron provides excellent, even heat distribution.
The Cooking Process
This is where the magic happens. Place your skillet over medium-low heat. You want a gentle, consistent heat, not a scorching one. Add a little oil or butter to the skillet to prevent sticking, just enough to lightly coat the bottom. Once the skillet is warm (you can test this by flicking a drop of water onto it – it should sizzle and evaporate quickly but not aggressively), carefully place 2-3 English muffin dough circles onto the skillet, leaving space between them. Don’t overcrowd the pan, as this can lower the temperature and affect even cooking.
Cook the English muffins for about 5-7 minutes on the first side. You’re looking for a beautiful golden-brown color. Resist the urge to press them down with a spatula; this will deflate them and ruin those precious nooks and crannies. After 5-7 minutes, carefully flip them over using a thin spatula. Cook the second side for another 5-7 minutes, or until they are golden brown and cooked through. You can check for doneness by gently pressing the sides of the muffin; they should feel firm.
Remove the cooked English muffins from the skillet and place them on a wire rack to cool slightly. You can cook them in batches, adding a little more oil or butter to the skillet between batches if needed. The key to success here is patience and consistent, medium-low heat. If your muffins are browning too quickly on the outside before cooking through, your heat is too high. If they are taking too long and not developing a nice crust, your heat might be too low.
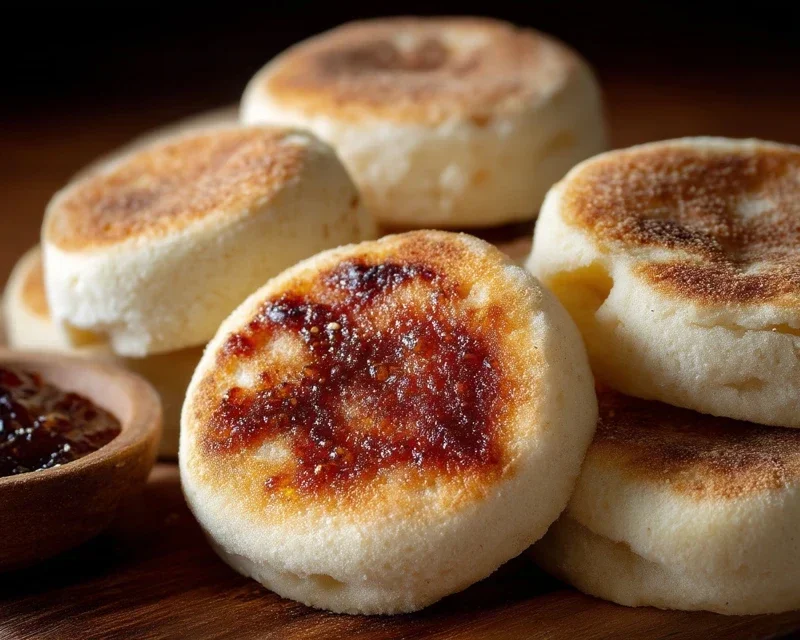
Once they are cool enough to handle, you can split them open with a fork (not a knife – the fork is what creates those desirable nooks and crannies!). Toast them lightly and enjoy with your favorite toppings. These are best enjoyed fresh, but you can store any leftovers in an airtight container at room temperature for a couple of days, or freeze them for longer storage.
Conclusion:
There you have it – a simple and rewarding way to bring the joy of easy homemade English muffins right into your own kitchen! We’ve seen how achievable it is to create these perfectly nooks-and-crannies filled delights with just a few basic ingredients and minimal fuss. The satisfaction of pulling a warm, golden English muffin from your pan, knowing you made it yourself, is truly unmatched. They’re fantastic for any meal, from a quick breakfast to a hearty brunch or even a light lunch. Feel free to experiment with the recipe! Adding a touch of honey to the dough for a subtle sweetness, or incorporating a pinch of dried herbs like rosemary or thyme for a savory twist, can offer delightful variations. I highly encourage you to give this recipe a try. You might just find your new favorite way to enjoy this classic bread!
Frequently Asked Questions:
Q: Why are my English muffins not developing enough nooks and crannies?
A: The key to achieving those signature nooks and crannies lies in the cooking process and the dough consistency. Ensure your dough is slightly sticky, but not overly wet. You also want to cook them over medium-low heat, allowing them to cook through slowly. Don’t rush the process, and resist the urge to press them down while they cook!
Q: Can I freeze these easy homemade English muffins?
A: Absolutely! Once cooled completely, you can store them in an airtight container or freezer bag for up to 2-3 months. To reheat, simply pop them in the toaster or oven for a few minutes. They freeze and thaw beautifully.
Q: What are some creative serving suggestions beyond butter and jam?
A: Oh, the possibilities are endless! Try them toasted and topped with scrambled eggs and beef bacon for a breakfast sandwich. They also make an excellent base for avocado toast, or even a mini pizza base with your favorite toppings! For a savory brunch, consider topping them with smoked salmon and cream cheese.
Easy Homemade English Muffins
A simple and delicious recipe for making fresh English muffins at home, perfect for breakfast or snacking. This recipe is easy to follow and yields wonderfully fluffy muffins.
Ingredients
-
1 ¼ cups warm water
-
1 tablespoon sugar
-
1 teaspoon instant dry yeast
-
2 tablespoon oil
-
2 ¾ cups all purpose flour
-
1 teaspoon salt
-
cornmeal for dusting
Instructions
-
Step 1
In a large bowl, combine the warm water, sugar, and instant dry yeast. Let it sit for about 5 minutes until foamy. -
Step 2
Stir in the oil. -
Step 3
Add the flour and salt to the bowl. Mix until a shaggy dough forms. If the dough is too sticky, add up to 1/4 cup more flour. -
Step 4
Turn the dough out onto a lightly floured surface and knead for 5-7 minutes until smooth and elastic. -
Step 5
Divide the dough into 8 equal pieces. Shape each piece into a disc, about 3/4 inch thick. -
Step 6
Generously dust a baking sheet or a clean surface with cornmeal. Place the dough discs on the cornmeal-dusted surface and sprinkle more cornmeal on top. -
Step 7
Heat a lightly oiled griddle or frying pan over medium heat. Cook the muffins for 4-5 minutes per side, until golden brown and cooked through. -
Step 8
Let them cool on a wire rack before splitting and toasting.
Important Information
Nutrition Facts (Per Serving)
It is important to consider this information as approximate and not to use it as definitive health advice.
Allergy Information
Please check ingredients for potential allergens and consult a health professional if in doubt.