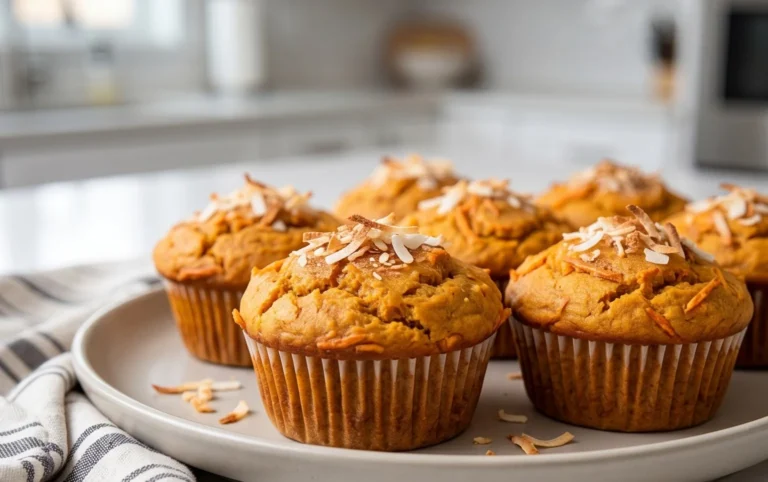
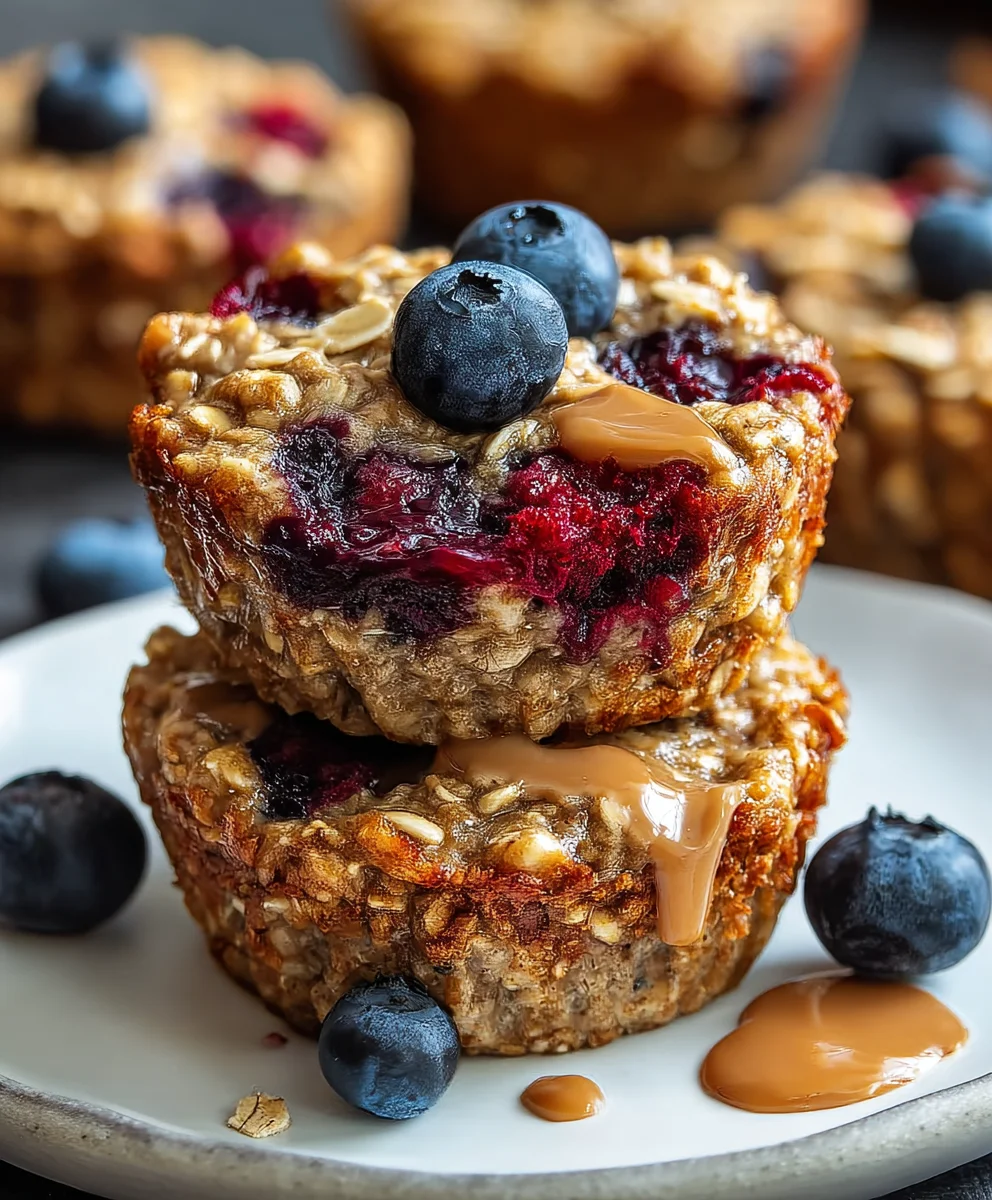
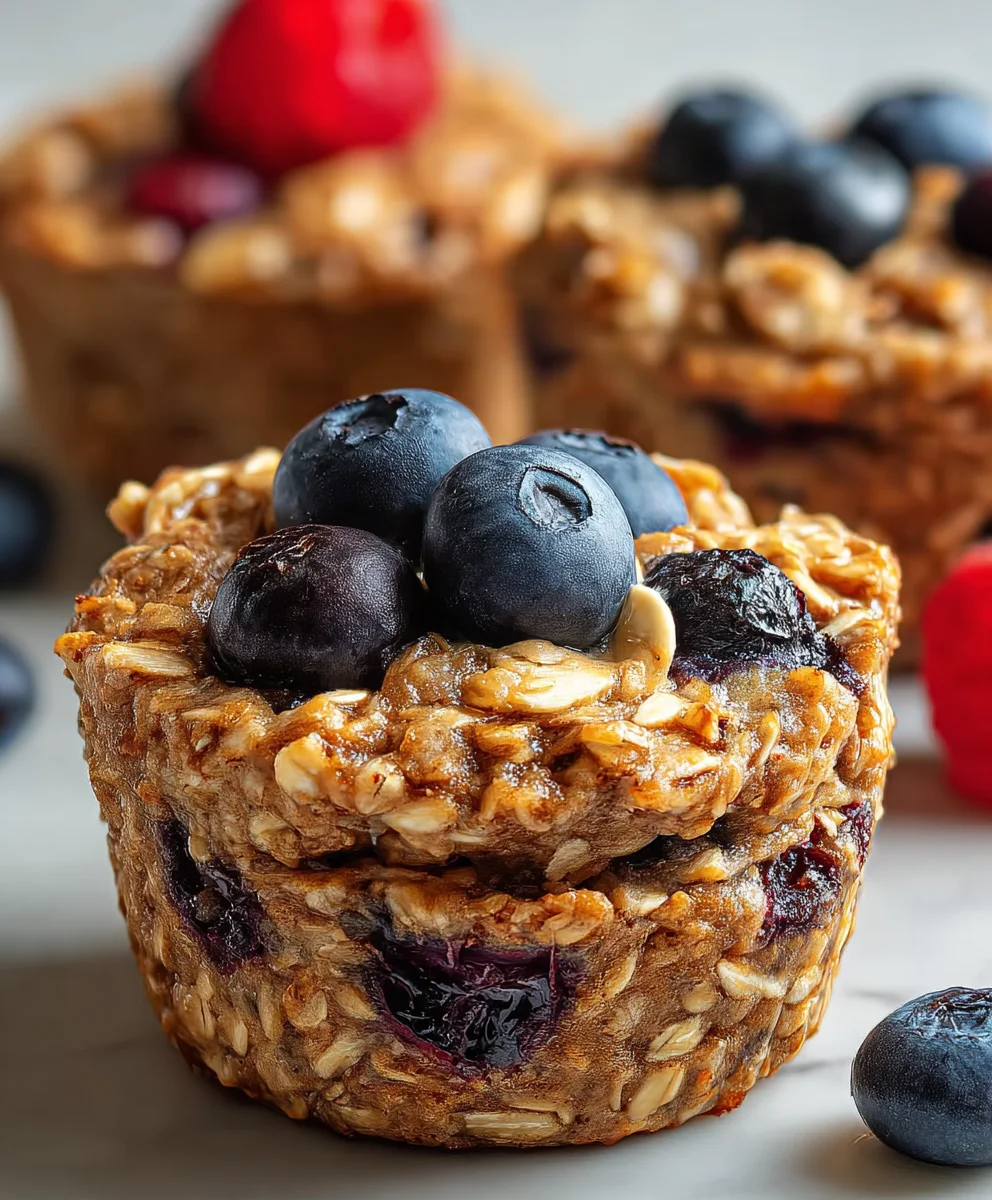
Easy Baked Oatmeal Breakfast Cups Recipe
Baked Oatmeal Breakfast Cups are more than just a recipe; they are a tiny miracle for busy mornings and a delightful way to start your day. Imagin extracte waking up to the comforting aroma of warm oats, a hint of sweetness, and your favorite mix-ins, all perfectly portioned and ready to grab. That’s the magic of these little wonders! People adore them because they offer a healthy, hearty, and customizable breakfast solution that feels like a treat. Unlike a soggy bowl of traditional oatmeal, these baked oatmeal breakfast cups hold their shape beautifully, providing a satisfying chegrape juicess and a perfect vehicle for berries, nuts, or even a drizzle of maple syrup. What truly sets them apart is their incredible versatility and the sheer convenience they bring, transforming chaotic mornings into moments of calm enjoyment.
Why You’ll Love This Recipe
The Ultimate Make-Ahead Breakfast Solution
Say goodbye to rushed breakfasts and hello to effortless mornings with our amazing baked oatmeal breakfast cups! These portable, perfectly portioned delights are a game-changer for anyone who struggles to find time for a nutritious meal before heading out the door. We’ve perfected a method that ensures they stay wonderfully moist and flavorful, never dry or crum extractbly. They are the ideal canvas for your culinary creativity, allowing you to tailor each cup to your unique taste preferences. Whether you’re a fan of classic cinnamon and apple, or prefer a tropical twist with coconut and pineapple, these cups can do it all. Get ready to discover your new go-to breakfast!
Ingredients:
- 2 cups rolled oats
- 2 medium ripe bananas
- 1 cup brown sugar
- 2 eggs
- 1 teaspoon baking powder
- 1 teaspoon vanilla extract
- 1 cup blueberries
Preparation and Mixing
Mash the Bananas
The foundation of these moist and flavorful Baked Oatmeal Breakfast Cups starts with ripe bananas. You’ll want them to be quite speckled, as this indicates they are at their sweetest and easiest to mash. Take your two medium ripe bananas and place them in a large mixing bowl. Using a fork or a potato masher, vigorously mash the bananas until they are smooth with only a few small lumps remaining. Don’t worry about getting them perfectly pureed; a little texture is fine and even desirable. This mashed banana will act as a binder and add natural sweetness and moisture to your oatmeal cups, reducing the need for additional fats or liquids.
Combine Wet Ingredients and Sugar
Once your bananas are mashed, it’s time to incorporate the other wet ingredients and the sweetener. Add the 1 cup of brown sugar to the bowl with the mashed bananas. Brown sugar is excellent here because it contributes a lovely caramel-like flavor and helps create a tender texture. Next, crack your 2 eggs directly into the bowl. The eggs will further bind the ingredients together and contribute to the structure of the baked cups. Follow this with the 1 teaspoon of vanilla extract. Vanilla adds a wonderful aromatic depth that complements the sweetness of the bananas and sugar. Whisk these ingredients together thoroughly with your fork or a whisk until everything is well combined and the mixture is smooth and homogenous. Ensure there are no streaks of egg yolk or white.
Incorporate Dry Ingredients and Oats
Now it’s time to add the dry components that will transform the wet mixture into a batter. Sprinkle the 1 teaspoon of baking powder over the wet ingredients. Baking powder is crucial for leavening, ensuring your oatmeal cups puff up slightly and have a pleasant, not-too-dense texture. Add the 2 cups of rolled oats to the bowl. Rolled oats, also known as old-fashioned oats, are the best choice for this recipe as they hold their shape better during baking compared to instant oats, providing a satisfying chegrape juicess. Gently fold the oats and baking powder into the wet mixture. You don’t want to overmix at this stage; just continue folding until the oats are evenly distributed throughout the batter and no dry pockets of baking powder remain.
Add the Blueberries
The final touch before baking is to fold in the burst of flavor and color from the blueberries. Take your 1 cup of fresh or frozen blueberries and gently add them to the oatmeal mixture. If using frozen blueberries, do not thaw them beforehand, as this can sometimes lead to a mushier texture. It’s important to be gentle when folding in the blueberries to avoid crushing them, as you want them to remain mostly intact to release their juicy goodness as they bake. Fold them in just until they are evenly dispersed throughout the batter. Some may settle at the bottom, which is perfectly fine.
Baking the Oatmeal Cups
Preheating and Preparing the Muffin Tin
Before you even start mixing, it’s essential to preheat your oven and prepare your muffin tin. Preheat your oven to 375 degrees Fahrenheit (190 degrees Celsius). This temperature is ideal for ensuring the oatmeal cups bake through evenly without burning on the outside. While the oven heats, take a standard 12-cup muffin tin and thoroughly grease each cup. You can use cooking spray, butter, or line each cup with paper liners. If using paper liners, a light coating of cooking spray or a brush of melted butter inside the liner can help prevent sticking. Ensuring your muffin tin is well-greased or lined will make removing the finished breakfast cups a breeze and prevent any frustrating sticking.
Filling the Muffin Cups
Once your batter is ready and your muffin tin is prepared, it’s time to fill the cups. Using a spoon or a cookie scoop, carefully portion the oatmeal mixture into each prepared muffin cup. Aim to fill each cup about two-thirds to three-quarters full. Don’t overfill them, as the oatmeal cups will expand slightly as they bake. Try to distribute the mixture as evenly as possible among the 12 cups to ensure they all bake at a similar rate. Gently tap the muffin tin on the counter a couple of times after filling; this can help settle the batter and remove any large air pockets, contributing to a more uniform final product.
Baking Time and Checking for Doneness
Place the filled muffin tin into the preheated oven. Bake for approximately 20-25 minutes. The baking time can vary slightly depending on your oven, so it’s important to keep an eye on them. You’ll know they are ready when the tops are golden brown and firm to the touch, and the edges are begin extractning to pull away slightly from the sides of the muffin tin. To check for doneness more precisely, you can insert a toothpick into the center of a cup. If it comes out clean or with just a few moist crum extractbs attached (not wet batter), they are perfectly baked. If it comes out with wet batter, continue baking for a few more minutes and check again.
Cooling and Serving
After baking, carefully remove the muffin tin from the oven. Let the Baked Oatmeal Breakfast Cups cool in the muffin tin for about 5-10 minutes. This initial cooling period allows them to set up properly, making them easier to remove without them falling apart. After they’ve had a chance to cool slightly in the tin, use a knife or a small offset spatula to gently loosen the edges of each cup if needed, and then carefully transfer them to a wire rack to cool completely. Serving them warm is delicious, but they are also excellent at room temperature or even chilled. These are perfect for grab-and-go breakfasts or a healthy snack any time of day.
Conclusion:
You’ve done it! You’ve successfully created delicious and healthy Baked Oatmeal Breakfast Cups. These delightful little treats are a fantastic way to start your day, offering a perfectly portioned and customizable breakfast option that’s both satisfying and energizing. They’re ideal for busy mornings when you need something quick to grab and go, or for a more leisurely weekend brunch. The versatility of these cups means you can tailor them to your exact preferences, making them a staple in your breakfast rotation. We hope you enjoyed the process and are excited to enjoy these wonderful creations!
For serving, these Baked Oatmeal Breakfast Cups are wonderful on their own, but they also pair beautifully with a dollop of Greek yogurt, a drizzle of honey or maple syrup, or a scattering of fresh berries. Consider warming them up slightly for an extra comforting experience.
Don’t be afraid to get creative with variations! Swap out the milk for almond milk or oat milk, add different nuts like walnuts or pecans, or incorporate dried fruits such as cranberries or apricots. Chocolate chips or a sprinkle of cinnamon can also elevate these cups to a whole new level.
Frequently Asked Questions:
Can I make Baked Oatmeal Breakfast Cups ahead of time?
Absolutely! These Baked Oatmeal Breakfast Cups are perfect for meal prep. Once cooled, store them in an airtight container in the refrigerator for up to 4-5 days. You can reheat them in a microwave or toaster oven for a warm breakfast.
What if I don’t have all the same baking ingredients? Can I substitute?
Generally, yes! For example, if you don’t have milk, water or a non-dairy alternative can work. For sweeteners, you can adjust the amount or use honey, maple syrup, or even a sugar substitute. Experimenting is part of the fun!
Easy Baked Oatmeal Breakfast Cups Recipe
Moist and flavorful baked oatmeal cups made with ripe bananas, oats, and blueberries, perfect for a grab-and-go breakfast.
Ingredients
-
2 cups rolled oats
-
2 medium ripe bananas
-
1 cup brown sugar
-
2 eggs
-
1 teaspoon baking powder
-
1 teaspoon vanilla extract
-
1 cup blueberries
Instructions
-
Step 1
Mash the 2 medium ripe bananas in a large mixing bowl until smooth with a few small lumps. This forms the moist base and adds natural sweetness. -
Step 2
Add 1 cup of brown sugar, 2 eggs, and 1 teaspoon of vanilla extract to the mashed bananas. Whisk until well combined and smooth. -
Step 3
Sprinkle 1 teaspoon of baking powder over the wet ingredients. Add 2 cups of rolled oats and gently fold until evenly distributed. Avoid overmixing. -
Step 4
Gently fold in 1 cup of blueberries until dispersed throughout the batter. If using frozen, do not thaw. -
Step 5
Preheat oven to 375°F (190°C). Grease a 12-cup muffin tin thoroughly. Spoon batter into each cup, filling about two-thirds to three-quarters full. -
Step 6
Bake for 20-25 minutes, or until the tops are golden brown and firm. A toothpick inserted into the center should come out clean or with a few moist crumbs. -
Step 7
Let the cups cool in the muffin tin for 5-10 minutes before transferring to a wire rack to cool completely. Serve warm, at room temperature, or chilled.
Important Information
Nutrition Facts (Per Serving)
It is important to consider this information as approximate and not to use it as definitive health advice.
Allergy Information
Please check ingredients for potential allergens and consult a health professional if in doubt.