Easy Homemade Fruit Leather Recipe – Delicious & Fun
Homemade fruit leather is a nostalgic treat that conjures up images of sunny days and carefree afternoons. There’s something incredibly satisfying about peeling back that chewy, vibrant strip and savoring the concentrated burst of pure fruit flavor. It’s no wonder this simple snack has captured hearts across generations; it’s a guilt-free indulgence that’s far more delicious than anything store-bought. What makes homemade fruit leather truly special is its incredible versatility. You can let your creativity run wild, combining your favorite fruits for unique flavor profiles. Plus, knowing exactly what goes into your fruit leather – no artificial colors or preservatives – adds an extra layer of wholesomeness that makes this homemade fruit leather recipe a winner every time.
Discover the joy of making your own!
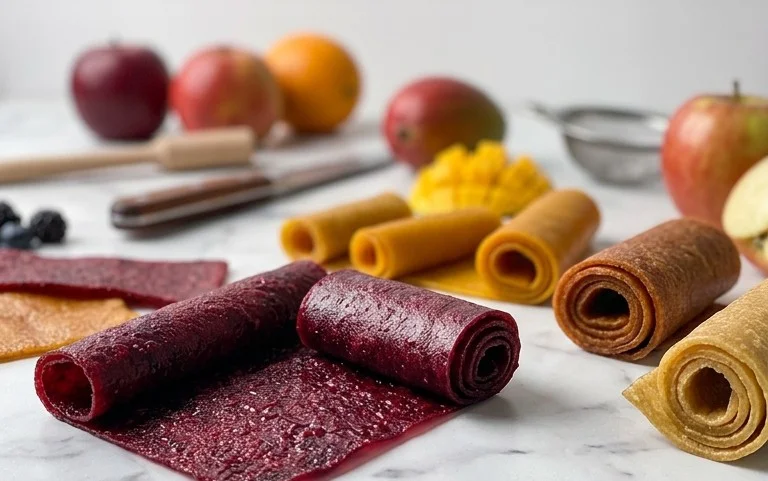
Homemade Fruit Leather Recipe
There’s something incredibly satisfying about creating your own snacks, and fruit leather is a prime example. It’s a fantastic way to use up seasonal fruit, pack a healthy punch into a delicious treat, and avoid the artificial colors and excessive sugars found in many store-bought versions. Plus, the process is surprisingly simple and incredibly rewarding. Imagin extracte rolling up vibrant, chewy strips of pure fruit goodness – it’s like sunshine you can eat! This recipe is versatile, meaning you can experiment with different fruits based on what’s in season or what you have on hand. Let’s dive into making some wonderfully chewy and flavorful fruit leather right in your own kitchen.
Ingredients:
Preparing Your Fruit
The first step is all about getting your fruit ready. Wash your chosen fruit thoroughly. If you’re using berries like strawberries or raspberries, you can often leave them whole or give them a quick chop. For larger fruits like peaches, apples, or pears, you’ll want to peel them (though leaving the peel on can add extra fiber and color if you don’t mind a slightly rustic texture), core them, and then chop them into roughly uniform pieces. This ensures even cooking. The goal is to have about 2 cups of chopped fruit. Don’t worry too much about perfection here; the next step will break it down further.
Cooking and Pureeing
Now, let’s transform our chopped fruit into a smooth, spreadable base.
In a medium saucepan, combine your chopped fruit, white sugar, and the juice of half a lemon. The lemon juice is crucial. It not only adds a pleasant tartness that balances the sweetness of the fruit and sugar, but it also acts as a natural preservative, helping to maintain the vibrant color of your fruit leather and prevent it from browning.
Place the saucepan over medium heat. Stir everything together well. As the fruit heats up, it will begin extract to release its natural juices. Bring the mixture to a gentle simmer. Once simmering, reduce the heat to low, cover the saucepan, and let it cook for about 10-15 minutes. Stir occasionally to prevent sticking. You want the fruit to soften considerably and become tender. The sugar will also dissolve, creating a light syrup with the fruit juices.
After the fruit has softened, remove the saucepan from the heat. Now comes the pureeing stage. You can use an immersion blender directly in the saucepan for the easiest cleanup. Blend the fruit mixture until it is completely smooth and there are no chunks remaining. If you don’t have an immersion blender, you can carefully transfer the hot mixture to a regular blender or a food processor and blend until smooth. Be very cautious when blending hot liquids. If using a standard blender, do it in batches, and don’t fill the blender more than halfway, leaving the vent on the lid open and covering it with a folded kitchen towel to allow steam to escape.
Once you have a smooth puree, taste it. This is your chance to adjust the sweetness. If your fruit was particularly tart, you might want to add another tablespoon of sugar. If it’s already quite sweet, you can omit it. You can also add a pinch of cinnamon or nutmeg at this stage if you like, especially if you’re using apples or pears, for an extra layer of flavor. Stir in any additional ingredients thoroughly.
Preheat your oven to its lowest temperature setting, usually around 170°F to 200°F (77°C to 93°C). Line a large baking sheet (typically a 13×18 inch half-sheet pan) with parchment paper or a silicone baking mat. Make sure the lining goes up the sides of the baking sheet slightly, as this will help contain the fruit puree. Pour the fruit puree onto the prepared baking sheet. Using an offset spatula or the back of a spoon, spread the puree into a thin, even layer, about 1/8 to 1/4 inch thick. Try to get it as uniform as possible so it dries evenly. The edges might be slightly thicker, which is fine, but avoid having huge variations in thickness.
Place the baking sheet in the preheated oven. Let it bake for 4 to 8 hours, or until the fruit leather is no longer sticky to the touch and can be easily peeled away from the parchment paper. The exact time will depend on the thickness of your fruit layer, the humidity in your kitchen, and your oven’s temperature. Check on it periodically, especially in the later stages. If you notice any edges drying out much faster than the center, you can gently trim them. The ideal texture is firm but still pliable, not brittle.
Once the fruit leather is fully dried, carefully remove the baking sheet from the oven. Let it cool completely on the baking sheet. Once cooled, you can either peel the entire sheet off the parchment paper and cut it into strips or squares with kitchen shears or a knife, or you can roll it up into a log and then slice it. For individual servings, many people like to roll their fruit leather into small logs, which are easy to store and eat on the go.
Storing Your Delicious Creation
Your homemade fruit leather is best stored at room temperature, wrapped individually in plastic wrap or wax paper, or stored in an airtight container. Properly stored, it can last for several weeks, though I doubt it will stick around that long once your family gets a taste of it! Enjoy this healthy and delicious homemade treat.
Conclusion:
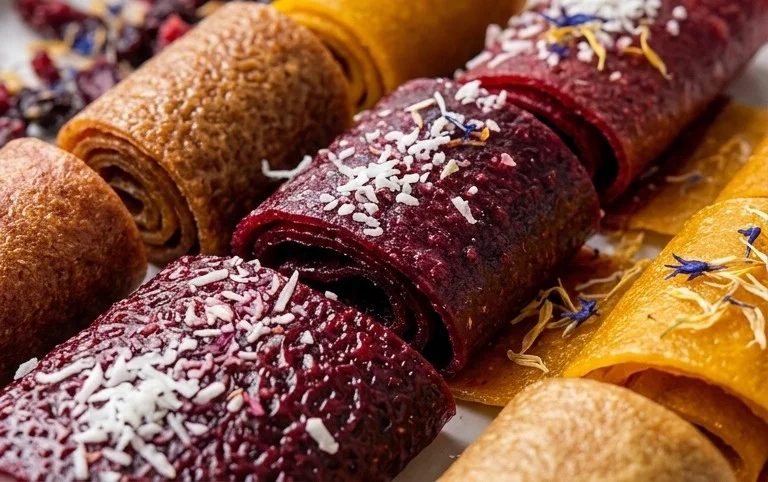
Making your own homemade fruit leather is a wonderfully rewarding and surprisingly simple culinary adventure. It’s a fantastic way to preserve fresh fruit, avoid the excessive sugar and additives found in store-bought versions, and create a healthy, delicious snack that everyone will love. The vibrant colors and intense fruit flavors are truly a testament to the power of simple ingredients transformed. We hope you’ve been inspired to gather your favorite fruits and give this delightful recipe a try!
This versatile treat is perfect for lunchboxes, after-school snacks, or even a healthy dessert option. Roll it up for easy portability, cut it into fun shapes for the kids, or enjoy it as is. Feel free to experiment with different fruit combinations – think strawberries and raspberries, mango and pineapple, or even a tart apple and cinnamon blend. The possibilities are truly endless!
Don’t be intimidated by the process; it’s mostly hands-off drying time. The satisfaction of pulling your own beautiful, chewy fruit leather from the oven or dehydrator is immense. So go ahead, unleash your inner fruit leather artist and enjoy this guilt-free pleasure!
Frequently Asked Questions about Homemade Fruit Leather:
Q: Can I use frozen fruit for my homemade fruit leather?
A: Absolutely! Frozen fruit is an excellent option, especially if you’re looking to use up a surplus. Thaw it completely and drain off any excess liquid before proceeding with the recipe. You might need to adjust the cooking time slightly as the fruit will already be cooler.
Q: How long does homemade fruit leather last?
A: Properly stored, your homemade fruit leather can last for several weeks at room temperature, or even longer if refrigerated. Ensure it’s completely cooled and wrapped tightly in plastic wrap or stored in an airtight container to maintain its chegrape juicess and prevent it from drying out too much.
Q: What if my fruit leather is too sticky or too hard?
A: If it’s too sticky, you can try returning it to the oven or dehydrator for a little longer at a very low temperature. If it’s too hard, it may have dried out too much. You can try to rehydrate it slightly by wrapping it in a damp paper towel for a short period, but it’s often best to aim for the perfect chegrape juicess during the initial drying process by monitoring it closely.
Homemade Fruit Leather
A simple and delicious recipe for homemade fruit leather using fresh fruit, sugar, and lemon juice.
Ingredients
-
2 cups fruit, chopped
-
3 tbsp white sugar
-
½ whole lemon, just the juice
-
1 cup apple juice
-
1 tsp vanilla extract
Instructions
-
Step 1
Puree the chopped fruit in a blender or food processor until smooth. -
Step 2
Pour the fruit puree into a saucepan. Add white sugar, lemon juice, apple juice, and vanilla extract. -
Step 3
Cook over medium-low heat, stirring constantly, until the mixture thickens and coats the back of a spoon, about 15-20 minutes. -
Step 4
Preheat oven to 200°F (93°C). Line a baking sheet with parchment paper. -
Step 5
Pour the thickened fruit mixture onto the prepared baking sheet and spread it evenly into a thin layer. -
Step 6
Bake for 2-4 hours, or until the fruit leather is no longer sticky to the touch. -
Step 7
Let cool completely on the baking sheet, then peel off the parchment paper and cut into strips.
Important Information
Nutrition Facts (Per Serving)
It is important to consider this information as approximate and not to use it as definitive health advice.
Allergy Information
Please check ingredients for potential allergens and consult a health professional if in doubt.