Easy Homemade Butter Chicken- Quick & Delicious Recipe
Quick & Easy Homemade Butter Chicken Recipe is more than just a meal; it’s a culinary hug in a bowl. Have you ever craved that rich, creamy, and subtly spiced flavor that defines authentic butter chicken, but felt intimidated by complex restaurant preparations? You’re not alone! This beloved Indian dish has captured hearts worldwide with its luxurious texture and incredibly satisfying taste. What makes it so special? It’s the perfect harmony of tender chicken, simmered in a velvety tomato-based sauce, infused with aromatic spices and finished with a generous swirl of butter and cream. It’s a dish that feels both elegant and comforting, perfect for a weeknight treat or impressing guests. Get ready to unlock the secrets to creating this restaurant-quality classic in your own kitchen, with a guide that prioritizes speed and simplicity without sacrificing an ounce of flavor. This Quick & Easy Homemade Butter Chicken Recipe proves that delicious doesn’t have to be difficult!
Ingredients:
- 1 ½ pounds skinless, boneless chicken thighs, cut into bite-sized chunks
- 1 teaspoon salt
- 1 teaspoon garlic powder
- 1 teaspoon sweet paprika
- ½ teaspoon curry powder
- 1 tablespoon Greek yogurt
- 3 tablespoons vegetable oil
- 3 tablespoons butter, divided
- 6 garlic cloves, minced
- 1 medium onion, diced
- 1 15-ounce can tomato sauce
- 1 teaspoon sugar
- 1 teaspoon salt, or to taste
- ½ teaspoon black pepper
- 2 cups heavy cream
Marinating the Chicken
Step 1: Prepare the Chicken Marinade
This first step is crucial for infusing the chicken with flavor and ensuring it’s tender. In a medium-sized bowl, combine the bite-sized chicken thigh pieces. To this, add 1 teaspoon of salt, 1 teaspoon of garlic powder, 1 teaspoon of sweet paprika, and ½ teaspoon of curry powder. This blend of spices will form the base of our delicious butter chicken. Make sure to toss the chicken thoroughly, coating each piece evenly with the spice mixture. Don’t be afraid to get your hands in there to ensure every nook and cranny is covered. Once everything is well combined, add 1 tablespoon of Greek yogurt to the bowl. The Greek yogurt acts as a tenderizer and helps the spices adhere to the chicken, creating a wonderfully creamy marinade. Mix it in gently until the chicken is coated in a thin, even layer of the yogurt and spice mixture. Cover the bowl with plastic wrap or a lid and let it marinate in the refrigerator for at least 30 minutes. For an even deeper flavor, you can marinate it for up to 2 hours.
Cooking the Chicken and Building the Sauce
Step 2: Searing the Marinated Chicken
Now it’s time to get cooking! Heat 3 tablespoons of vegetable oil in a large skillet or Dutch oven over medium-high heat. You want the oil to be shimmering but not smoking. Once the oil is hot, carefully add the marinated chicken in a single layer. Avoid overcrowding the pan; if necessary, cook the chicken in batches to ensure it sears properly rather than steaming. Searing the chicken develops a lovely golden-brown crust and locks in its juices, making it incredibly succulent. Cook the chicken for about 3-4 minutes per side, or until it’s browned on all sides. It doesn’t need to be cooked all the way through at this stage, as it will finish cooking in the sauce. Once seared, remove the chicken from the skillet and set it aside on a plate. Leave any rendered juices in the pan; they are full of flavor!
Step 3: Sautéing the Aromatics
Reduce the heat to medium. Add 1 tablespoon of the butter (we’ll use the remaining 2 tablespoons later) to the same skillet. Once the butter has melted, add the 6 minced garlic cloves and 1 diced medium onion. Sauté these aromatics for about 5-7 minutes, stirring frequently, until the onion is softened and translucent and the garlic is fragrant. Be careful not to burn the garlic, as this can impart a bitter flavor to the sauce. If the pan starts to look dry, you can add a tiny splash of water or vegetable broth to prevent sticking. This step is vital for building a complex flavor base for our butter chicken sauce. The sweet aroma of the sautéed onions and garlic will fill your kitchen!
Step 4: Creating the Tomato Base
Once the onions and garlic are tender and fragrant, it’s time to introduce the tomato. Pour in the 15-ounce can of tomato sauce. Stir well to combine everything in the skillet, scraping up any browned bits from the bottom of the pan. These browned bits are called “fond” and are packed with delicious flavor. Add 1 teaspoon of sugar to the sauce. The sugar helps to balance the acidity of the tomatoes, making the sauce smoother and more palatable. Now, season the sauce with 1 teaspoon of salt and ½ teaspoon of black pepper. Stir everything together and bring the sauce to a gentle simmer. Let it simmer for about 5 minutes, allowing the flavors to meld and deepen.
Finishing the Butter Chicken
Step 5: Simmering and Creamy Finish
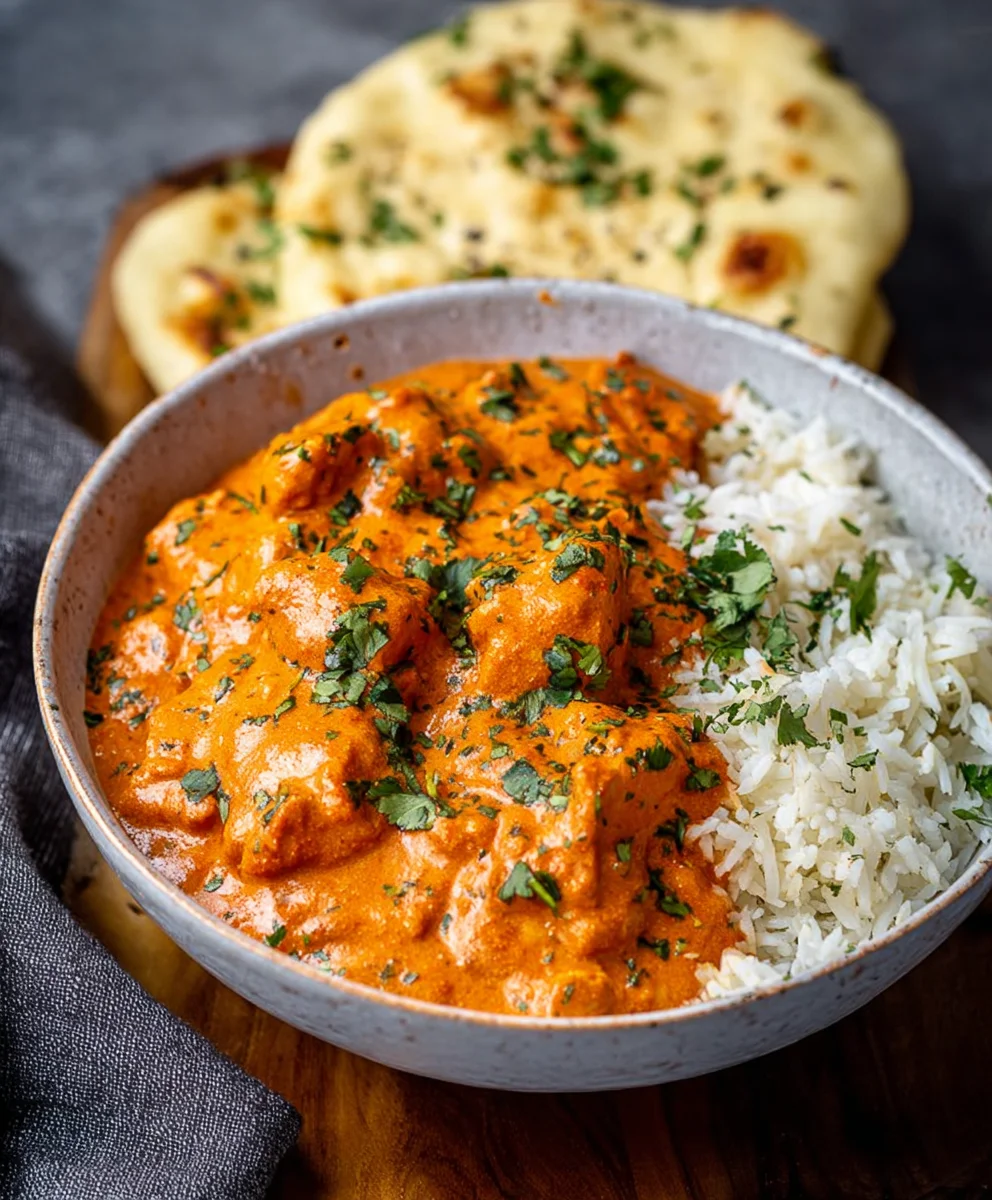
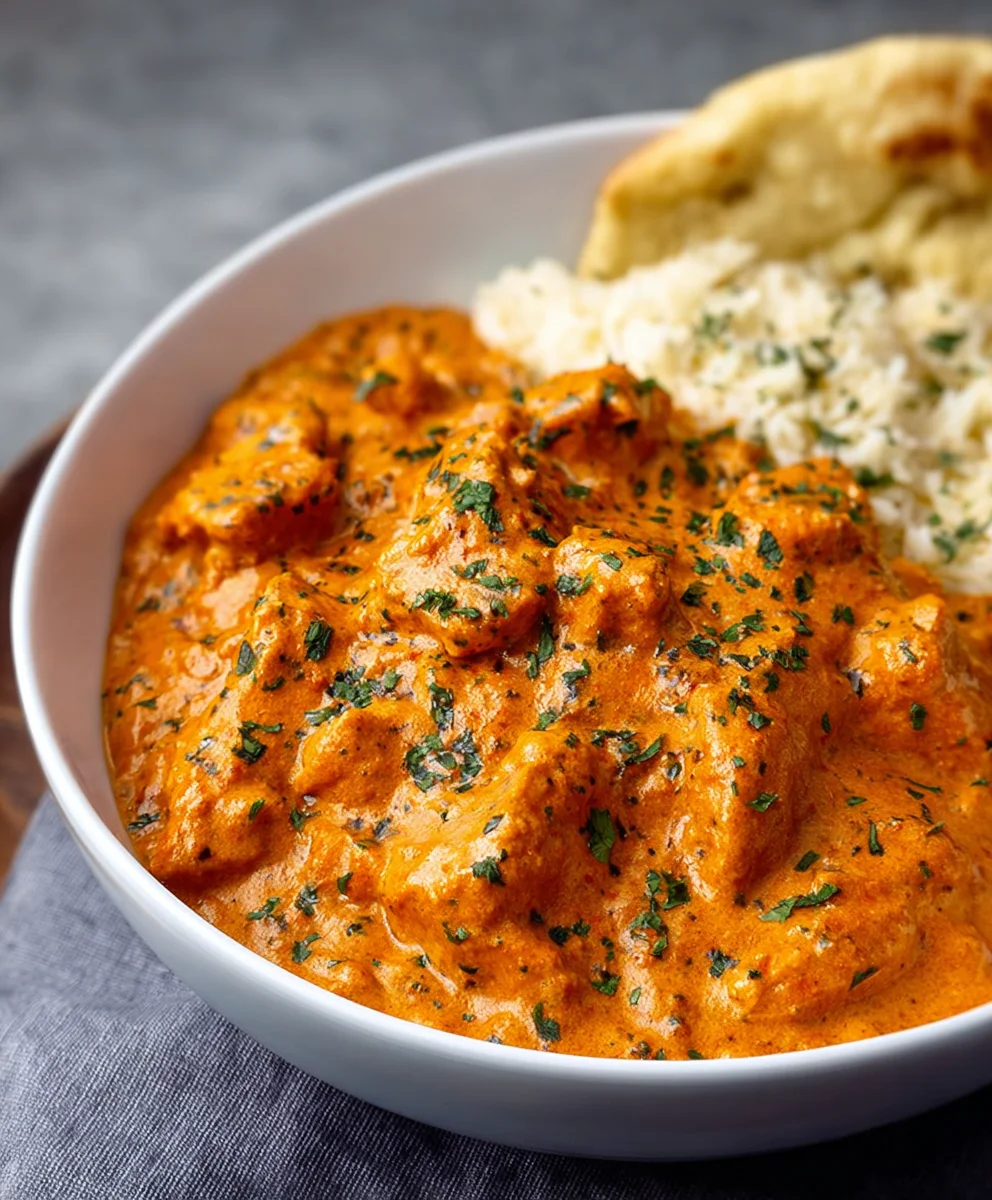
Return the seared chicken pieces, along with any accumulated juices, back into the skillet with the tomato sauce. Stir gently to coat the chicken evenly. Reduce the heat to low, cover the skillet, and let the butter chicken simmer for about 15-20 minutes, or until the chicken is cooked through and tender. Stir occasionally to prevent sticking. Once the chicken is cooked, it’s time for the luxurious, creamy finish. Pour in the 2 cups of heavy cream. Stir gently until the cream is fully incorporated into the sauce, creating a rich and velvety texture. Allow the sauce to heat through for another 2-3 minutes, but be careful not to let it boil vigorously after adding the cream, as this can cause it to curdle. Finally, stir in the remaining 2 tablespoons of butter. The butter will melt into the sauce, adding a beautiful sheen and an extra layer of richness that is the hallmark of butter chicken. Taste and adjust the seasoning with more salt or pepper if needed. Serve hot, garnished with fresh cilantro if desired, alongside rice or naan bread.
Conclusion:
And there you have it – your very own batch of Quick & Easy Homemade Butter Chicken Recipe, ready to impress! We’ve walked through each step, transforming simple ingredients into a rich, creamy, and wonderfully spiced curry that’s far superior to takeout. This dish is incredibly versatile, perfect for a weeknight family dinner or a special occasion when you want to add a touch of elegance without spending hours in the kitchen. Serve it hot with fluffy basmati rice to soak up all that glorious sauce, and don’t forget some warm naan bread for dipping. For variations, feel free to add a pinch of red chili flakes for extra heat, or a swirl of heavy cream at the end for an even more decadent finish. If you don’t have garam masala, a mix of cumin, coriander, and cinnamon can offer a similar aromatic profile. Enjoy the process, and savor every delicious bite of your Quick & Easy Homemade Butter Chicken Recipe! We encourage you to try it soon; you’ll be amazed at how simple and rewarding it is.
Frequently Asked Questions:
Can I make this Quick & Easy Homemade Butter Chicken Recipe ahead of time?
Yes, absolutely! The flavors of this Quick & Easy Homemade Butter Chicken Recipe actually meld beautifully overnight. You can prepare it a day in advance and reheat it gently on the stovetop before serving. This makes it an even more convenient option for busy schedules.
What if I don’t have a blender for the tomato sauce?
No problem! If you don’t have a blender, you can simply use a good quality crushed tomato product. You might also want to finely mince the onions and gin extractger before sautéing to ensure they break down well during the cooking process, achieving a smoother sauce consistency.
Easy Homemade Butter Chicken- Quick & Delicious Recipe
A quick and delicious recipe for homemade butter chicken, featuring tender marinated chicken in a rich, creamy tomato sauce.
Ingredients
-
1 ½ pounds skinless, boneless chicken thighs, cut into bite-sized chunks
-
1 teaspoon salt
-
1 teaspoon garlic powder
-
1 teaspoon sweet paprika
-
½ teaspoon curry powder
-
1 tablespoon Greek yogurt
-
3 tablespoons vegetable oil
-
3 tablespoons butter, divided
-
6 garlic cloves, minced
-
1 medium onion, diced
-
1 15-ounce can tomato sauce
-
1 teaspoon sugar
-
1 teaspoon salt, or to taste
-
½ teaspoon black pepper
-
2 cups heavy cream
Instructions
-
Step 1
In a medium bowl, combine chicken chunks with 1 teaspoon salt, 1 teaspoon garlic powder, 1 teaspoon sweet paprika, and ½ teaspoon curry powder. Toss to coat. Add 1 tablespoon Greek yogurt and mix until chicken is coated. Cover and refrigerate for at least 30 minutes. -
Step 2
Heat 3 tablespoons vegetable oil in a large skillet over medium-high heat. Add marinated chicken in a single layer (cook in batches if needed) and sear for 3-4 minutes per side until browned. Remove chicken and set aside. -
Step 3
Reduce heat to medium. Add 1 tablespoon butter to the skillet. Add minced garlic and diced onion. Sauté for 5-7 minutes until onion is softened and translucent and garlic is fragrant. -
Step 4
Pour in the tomato sauce, stirring to combine and scraping up browned bits. Add 1 teaspoon sugar, 1 teaspoon salt, and ½ teaspoon black pepper. Stir and simmer for 5 minutes. -
Step 5
Return the seared chicken and any accumulated juices to the skillet. Stir to coat. Reduce heat to low, cover, and simmer for 15-20 minutes until chicken is cooked through. Stir occasionally. -
Step 6
Pour in the heavy cream and stir gently until incorporated. Heat through for 2-3 minutes without boiling vigorously. Stir in the remaining 2 tablespoons butter until melted. Taste and adjust seasoning. Serve hot.
Important Information
Nutrition Facts (Per Serving)
It is important to consider this information as approximate and not to use it as definitive health advice.
Allergy Information
Please check ingredients for potential allergens and consult a health professional if in doubt.