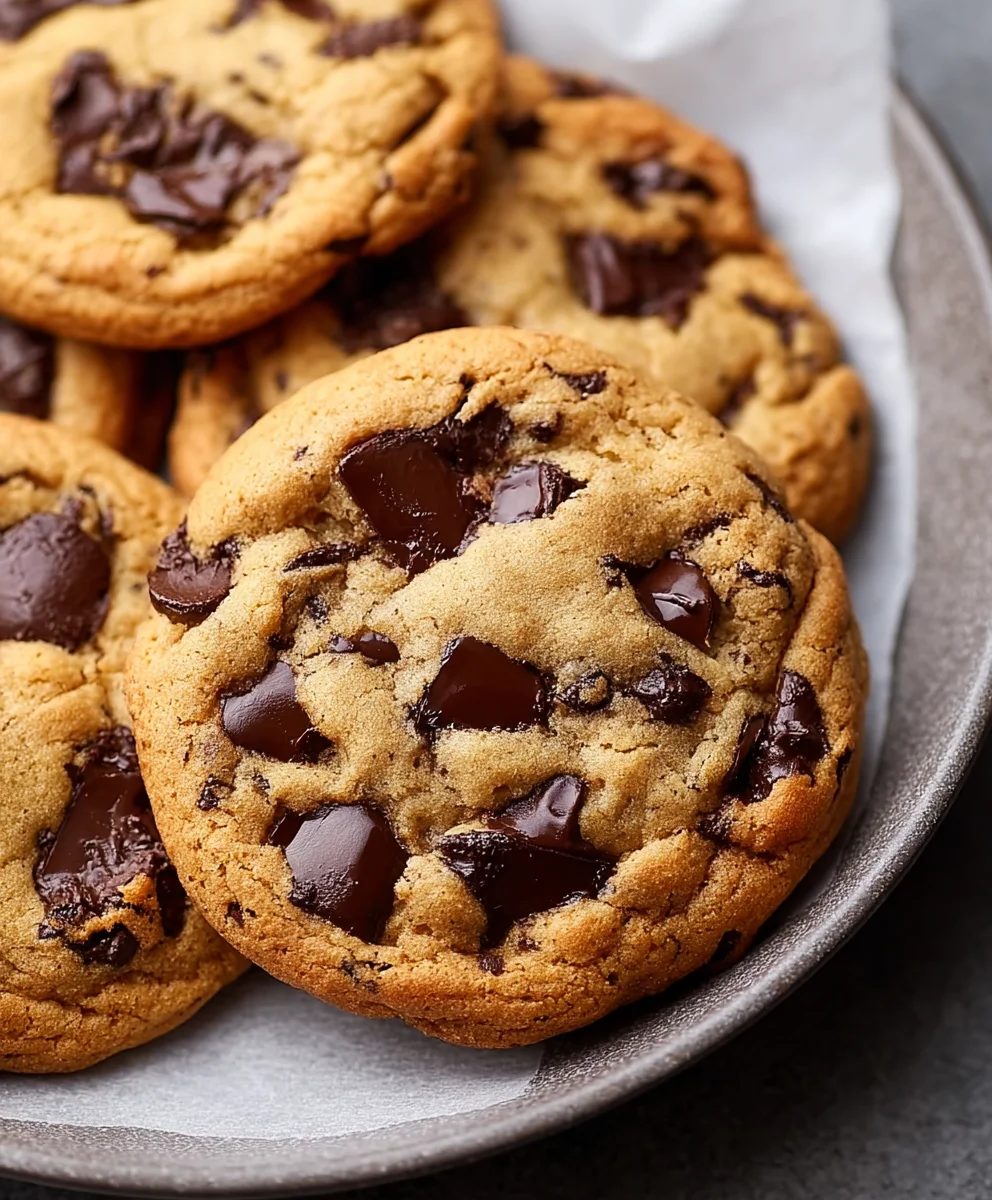
Easy Air Fryer Chocolate Chip Cookies-Quick & Delicious
Air Fryer Chocolate Chip Cookies, when done right, are a revelation! Forget waiting for the oven to preheat or dealing with uneven baking; this method promises perfectly golden, chewy centers with delightfully crisp edges, all in a fraction of the time. There’s an undeniable magic that happens when that warm, gooey chocolate meets a tender, buttery cookie dough, and the air fryer elevates this classic treat to a whole new level. What truly makes these air fryer chocolate chip cookies so special is their incredible speed and consistency. In just minutes, you can transform simple pantry staples into a batch of cookies that taste like they’ve been baked for hours, making them the ultimate solution for sudden cookie cravings or impromptu dessert needs. Get ready to experience chocolate chip cookie perfection like never before!
Ingredients:
- 1/2 cup (1 stick) unsalted butter, softened
- 1/2 cup packed brown sugar
- 1/4 cup granulated white sugar
- 1 large egg, at room temperature
- 1 teaspoon pure vanilla extract
- 1 1/2 cups all-purpose flour
- 1 teaspoon baking soda
- 1/4 teaspoon salt
- 1 cup semi-sweet chocolate chips
Creaming the Butter and Sugars
The foundation of any great cookie lies in properly creamed butter and sugar. Start by ensuring your unsalted butter has been softened to room temperature. This means it should be pliable enough to easily dent with your finger, but not so soft that it’s melted or greasy. If you’ve forgotten to take it out of the fridge in advance, you can quickly soften it by cutting it into smaller cubes and letting it sit on the counter for about 10-15 minutes, or by very carefully microwaving it in 5-second intervals, being extremely cautious not to melt it.
In a medium-sized mixing bowl, combine the softened butter with the packed brown sugar and the granulated white sugar. You can use a stand mixer with the paddle attachment for this, or a sturdy hand mixer. Begin extract mixing on a low speed to incorporate the sugars, then gradually increase the speed to medium-high. You’ll want to cream these together for about 2 to 3 minutes, or until the mixture is light, fluffy, and has a pnon-alcoholic aler color. This process is crucial because it aerates the butter and sugar, creating tiny air pockets that will help your cookies rise and achieve a tender texture. Scrape down the sides of the bowl with a spatula occasionally to ensure all the butter and sugar are well combined and evenly creamed.
Adding Wet Ingredients and Dry Ingredients
Once your butter and sugar mixture is perfectly creamed, it’s time to add the egg and vanilla extract. Ensure your egg is at room temperature if possible. A room temperature egg emulsifies better with the fat in the butter and sugar mixture, leading to a smoother batter and more uniformly baked cookies. If your egg is cold, you can quickly bring it to room temperature by placing it in a small bowl of warm (not hot) water for about 5 minutes. Add the egg to the creamed mixture and beat on medium speed until it’s fully incorporated. You don’t want to see any streaks of egg yolk or white. Then, add the vanilla extract and mix for another 30 seconds until fragrant and well combined.
In a separate, smaller bowl, whisk together the dry ingredients: the all-purpose flour, baking soda, and salt. Whisking them together ensures that the leavening agent (baking soda) and the salt are evenly distributed throughout the flour, preventing pockets of saltiness or uneven rising in your cookies. Now, gradually add the dry ingredients to the wet ingredients. It’s best to add them in two or three additions, mixing on a low speed after each addition until just combined. Be careful not to overmix at this stage. Overmixing can develop the gluten in the flour too much, resulting in tough cookies. Mix only until you no longer see streaks of dry flour.
Incorporating the Chocolate Chips
This is arguably the most exciting step for many! Gently fold in the semi-sweet chocolate chips using a spatula. Reserve a small handful of chocolate chips to press onto the tops of the cookies before baking, if you like that extra chocolatey aesthetic. Ensure the chocolate chips are evenly distributed throughout the dough. You want to get a good distribution so that every bite of your Air Fryer Chocolate Chip Cookies has that satisfying chocolatey chew. Again, the key here is to avoid overmixing. Just a few gentle stirs should do the trick.
Air Frying the Cookies
Preheat your air fryer to 320°F (160°C). This lower temperature is crucial for air fryer cookies to prevent the outsides from burning before the insides are cooked through. While the air fryer preheats, line your air fryer basket with parchment paper that has holes for air circulation (you can poke holes yourself with a skewer or knife), or use perforated parchment paper designed for air fryers. This prevents the cookies from sticking and makes cleanup a breeze. Drop rounded tablespoons of cookie dough onto the prepared parchment paper, leaving about 1 to 1.5 inches of space between each cookie to allow for spreading. Do not overcrowd the basket; you will likely need to bake them in batches.
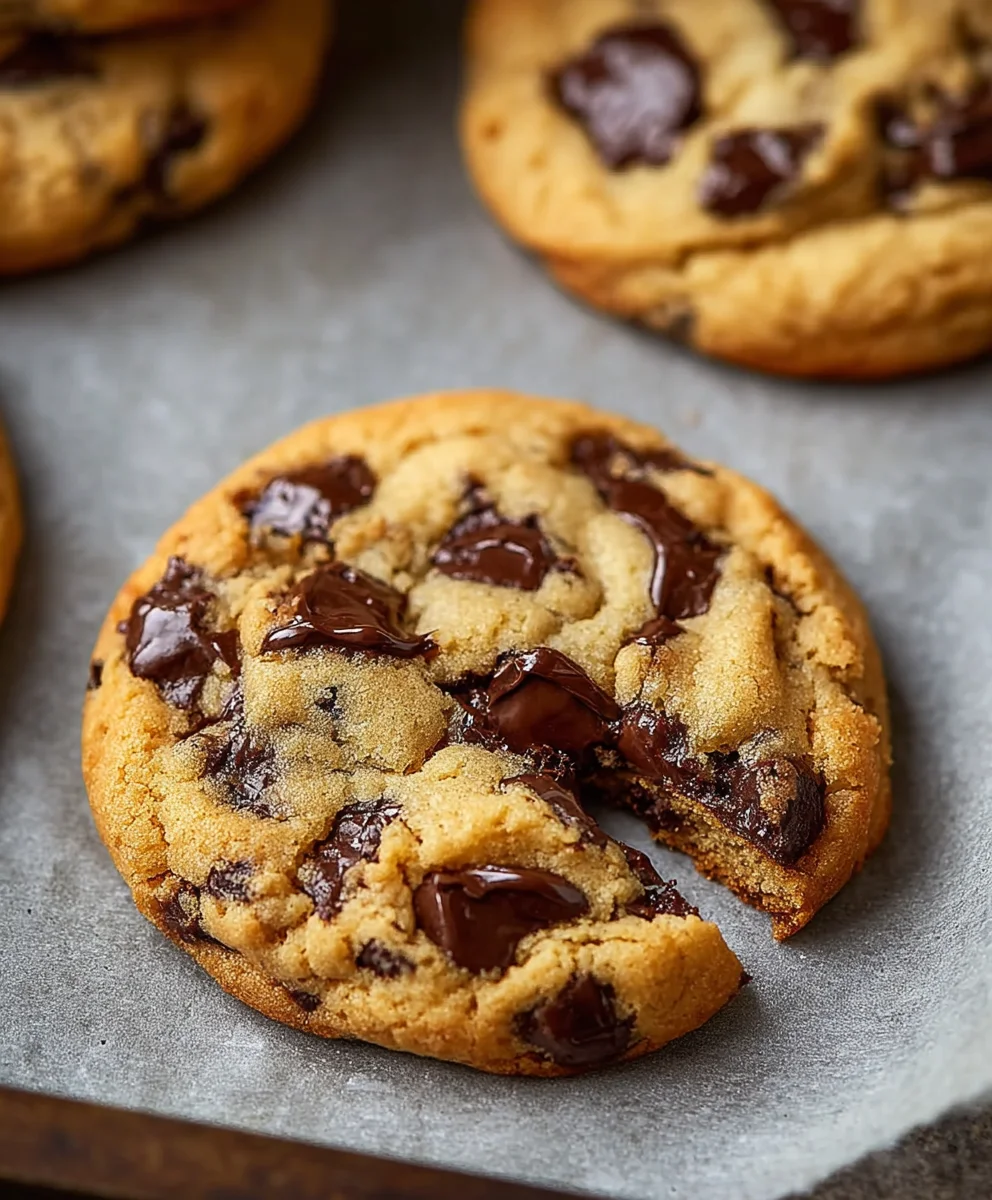
Carefully place the basket into the preheated air fryer. Air fry for 7 to 10 minutes. The exact time will vary depending on your air fryer model and the size of your cookies. Start checking around the 7-minute mark. The cookies are done when the edges are lightly golden brown and the centers still look slightly soft and underbaked. They will continue to set up as they cool. If you want, you can gently press a few reserved chocolate chips onto the tops of the cookies during the last minute of cooking for a more visually appealing finish.
Cooling the Cookies
Once the cookies have reached your desired doneness, carefully remove the air fryer basket. Let the cookies cool in the basket for about 5 minutes. This allows them to firm up enough to be moved without falling apart. After the initial 5 minutes, use a spatula to carefully transfer the cookies to a wire cooling rack to cool completely. Enjoy your warm, gooey, perfectly cooked Air Fryer Chocolate Chip Cookies!
Conclusion:
And there you have it! Your guide to creating the most delightful Air Fryer Chocolate Chip Cookies is complete. We’ve walked through each step, from creaming the butter and sugar to the final moments of golden-brown perfection in your air fryer. These cookies are a testament to how quick and easy it can be to achieve that satisfyingly chewy center and slightly crisp edge, all without preheating a full oven. They’re the perfect solution for a quick dessert craving or an impromptu bake snon-alcoholic ale.
I love serving these warm, fresh out of the air fryer, perhaps with a scoop of vanilla ice cream. They also pair wonderfully with a cold glass of milk for a classic treat. Don’t be afraid to experiment! Consider adding a sprinkle of sea salt on top before baking for a sweet and salty contrast, or stir in some chopped nuts for added texture. You could even swap out some of the chocolate chips for white chocolate or peanut butter chips. The possibilities are truly endless!
I truly hope you enjoy making and devouring these Air Fryer Chocolate Chip Cookies as much as I do. Happy baking!
FAQs:
Why are my Air Fryer Chocolate Chip Cookies spreading too much?
Overmixing the dough can develop the gluten too much, leading to spreading. Also, ensure your butter isn’t too soft or melted when you start creaming it. Chilling the dough for at least 30 minutes before air frying can also help prevent excessive spreading.
Can I make these Air Fryer Chocolate Chip Cookies ahead of time?
Yes! You can prepare the cookie dough, roll it into balls, and store them on a baking sheet lined with parchment paper in the freezer. Once frozen, transfer them to an airtight container. You can then air fry them directly from frozen, adding a few extra minutes to the cooking time.
My cookies are burning on the bottom. What can I do?
This is a common issue with air fryers. Try placing a small, air-fryer-safe trivet or a piece of parchment paper with holes punched in it at the bottom of your air fryer basket to create a buffer. You can also try lowering the temperature slightly and increasing the cooking time.
Easy Air Fryer Chocolate Chip Cookies
Quick and delicious chocolate chip cookies made easily in your air fryer.
Ingredients
-
1/2 cup (1 stick) unsalted butter, softened
-
1/2 cup packed brown sugar
-
1/4 cup granulated white sugar
-
1 large egg
-
1 teaspoon pure vanilla extract
-
1 1/2 cups all-purpose flour
-
1 teaspoon baking soda
-
1/4 teaspoon salt
-
1 cup semi-sweet chocolate chips
Instructions
-
Step 1
Cream softened butter with brown and granulated sugar in a medium bowl until light and fluffy, about 2-3 minutes. -
Step 2
Beat in the room temperature egg until fully incorporated, then mix in the vanilla extract. -
Step 3
In a separate bowl, whisk together flour, baking soda, and salt. Gradually add dry ingredients to wet ingredients, mixing on low speed until just combined. Do not overmix. -
Step 4
Gently fold in the semi-sweet chocolate chips. Reserve a few for topping if desired. -
Step 5
Preheat air fryer to 320°F (160°C). Line basket with parchment paper. Drop rounded tablespoons of dough onto the paper, leaving space between cookies. -
Step 6
Air fry for 7-10 minutes, or until edges are lightly golden brown and centers look slightly soft. Press reserved chocolate chips on top during the last minute of cooking if desired. -
Step 7
Let cookies cool in the basket for 5 minutes, then transfer to a wire rack to cool completely.
Important Information
Nutrition Facts (Per Serving)
It is important to consider this information as approximate and not to use it as definitive health advice.
Allergy Information
Please check ingredients for potential allergens and consult a health professional if in doubt.