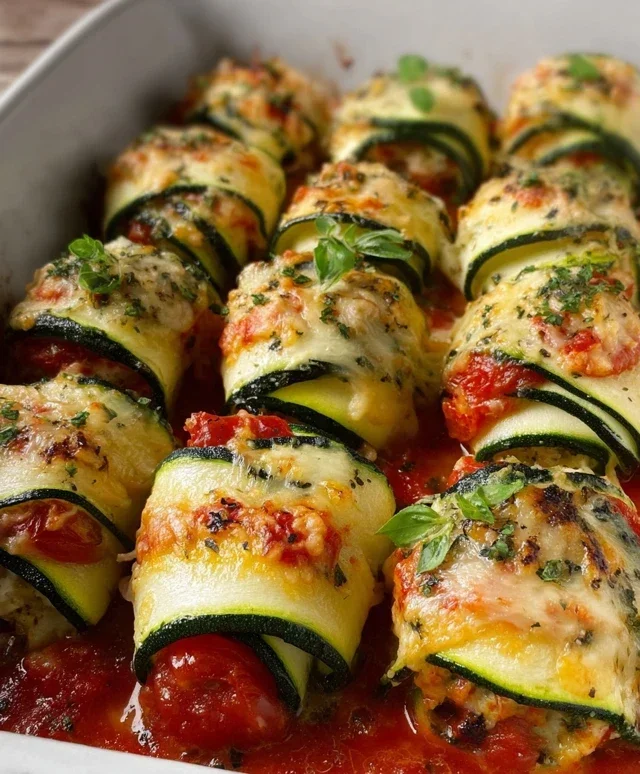
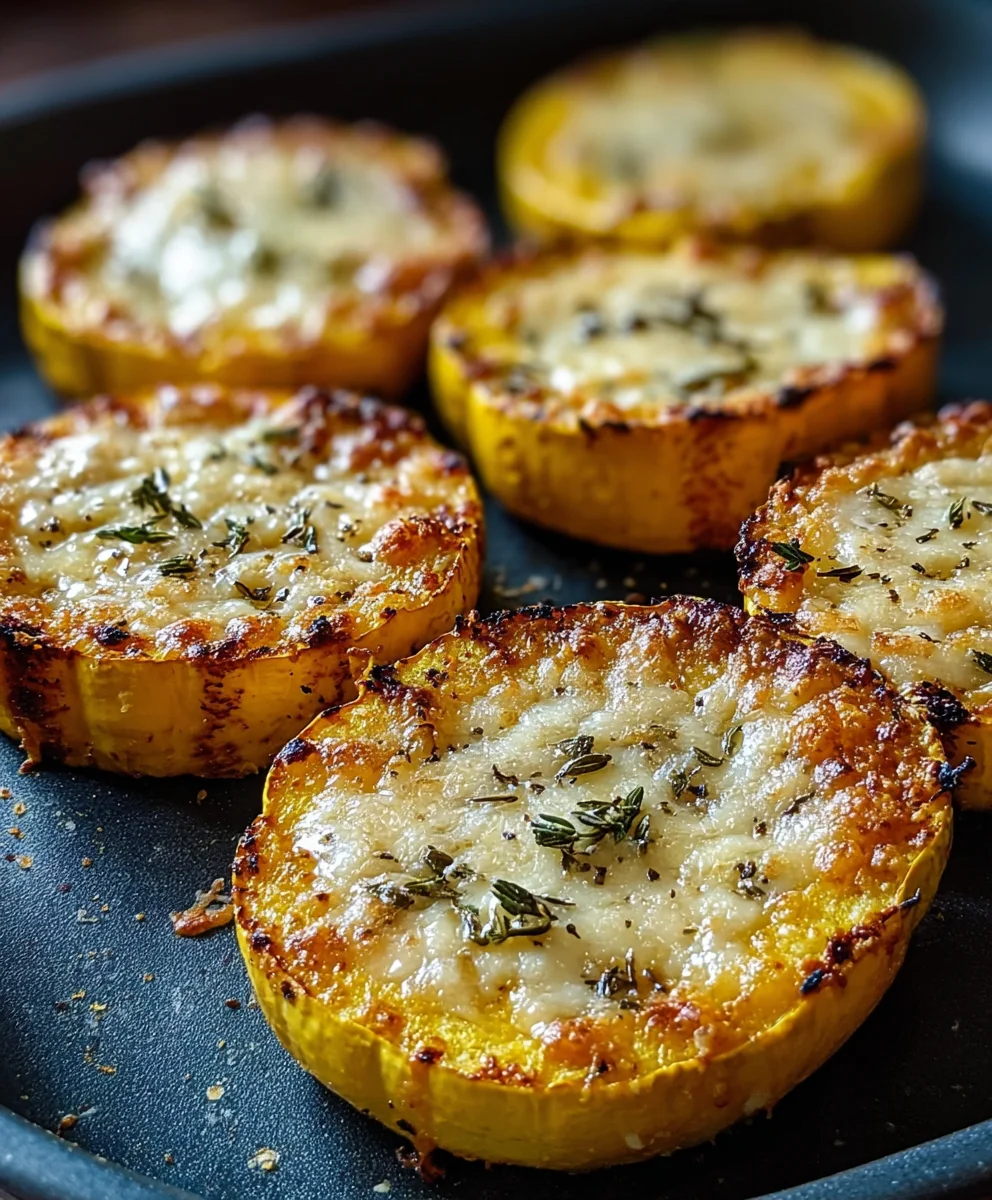
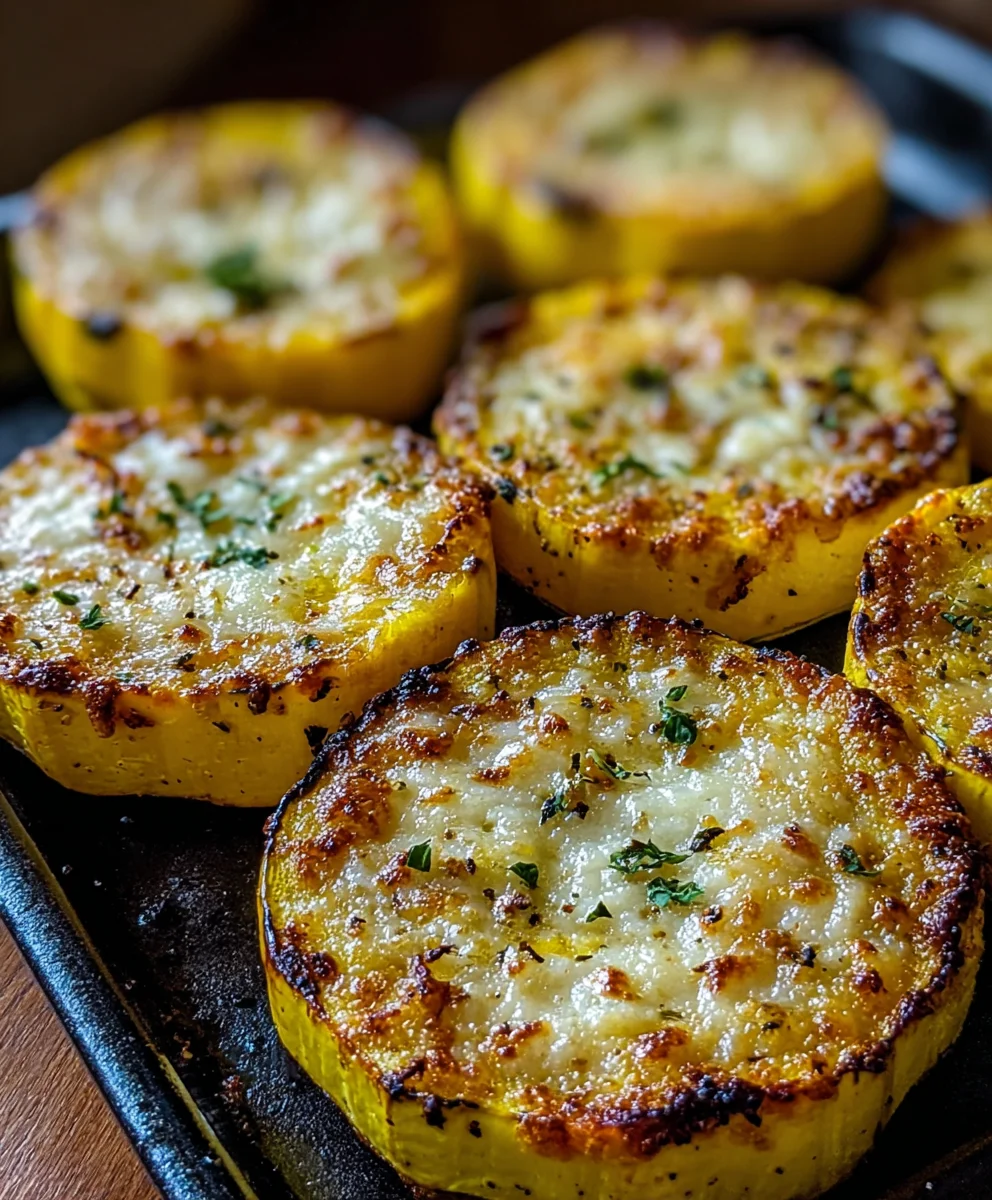
Cheesy Baked Squash Rounds-Easy Vegetable Side
Cheesy Baked Squash Rounds are a delightful way to transform humble squash into a star appetizer or a satisfying side dish that will have everyone asking for the recipe. There’s something incredibly comforting and undeniably delicious about the way tender squash softens to perfection while a bubbly, golden-brown cheese topping creates a rich, savory crust. It’s no wonder this dish has become a go-to for potlucks, holiday gatherings, or even just a cozy weeknight meal. What truly sets these Cheesy Baked Squash Rounds apart is their beautiful simplicity, allowing the natural sweetness of the squash to shine through, beautifully complemented by the creamy, melted cheese. They’re also remarkably versatile; you can experiment with different cheese blends or add a sprinkle of herbs to make them your own.
Why You’ll Love These Cheesy Baked Squash Rounds
This recipe is designed for ease and maximum flavor. You don’t need any fancy techniques, just a few simple ingredients and a little bit of oven time. The result is a dish that’s both elegant and approachable, offering a wonderful texture contrast with the soft squash and the crispy cheese. It’s the perfect way to impress guests without spending hours in the kitchen, and it’s a fantastic option for those looking for a slightly healthier, yet still indulgent, vegetable-focused dish.
Ingredients:
- 2 medium yellow squash, sliced into 1/4-inch rounds
- 1 cup shredded cheddar cheese
- 1/4 cup grated Parmesan cheese
- 1/4 cup breadcrum extractbs
- 2 tablespoons olive oil
- 1 teaspoon dried oregano
- 1 teaspoon dried basil
- Salt and pepper to taste
Preparing the Squash
Step 1: Preheat and Prep the Pan
The first step to creating these delightful Cheesy Baked Squash Rounds is to preheat your oven. Set it to 400 degrees Fahrenheit (200 degrees Celsius). This ensures the oven is at the optimal temperature to cook the squash until tender and melt the cheese to golden perfection. While the oven is heating, prepare a baking sheet. You can either lightly grease it with a little extra olive oil or, for easier cleanup, line it with parchment paper. This prevents the squash rounds from sticking to the pan as they bake and absorb those delicious cheesy flavors.
Step 2: Slice the Squash
Take your two medium yellow squash and wash them thoroughly under cool running water. Gently pat them dry with a clean kitchen towel. Now, it’s time to slice them. For these Cheesy Baked Squash Rounds, we want nice, uniform slices that will cook evenly. Aim for a thickness of about 1/4 inch. A mandoline slicer can be very helpful here if you have one, as it will ensure consistent thickness, but a sharp knife and a steady hand will work just as well. Discard the very ends of the squash.
Step 3: Season the Squash Rounds
Arrange the sliced yellow squash rounds in a single layer on your prepared baking sheet. Now, let’s season them. Drizzle the 2 tablespoons of olive oil evenly over the squash slices. Use a pastry brush or your hands to gently coat each round with the oil. This will help them roast and achieve a slightly crisp edge. Next, sprinkle the dried oregano and dried basil over the oiled squash. Don’t forget to season generously with salt and freshly ground black pepper. Taste is important, so don’t be shy with the salt and pepper – it really brings out the natural sweetness of the squash.
Assembling and Baking
Step 4: Layer on the Cheese anrum extractreadcrumbs
Now comes the best part – the cheese! In a small bowl, combine the 1 cup of shredded cheddar cheese and the 1/4 cup of grated Parmesan cheese. Mix them together. Sprinkle this delightful cheese mixture evenly over each squash round. Ensure you get a good coating of cheese on top of each slice; this is what will create that irresistible cheesy crust. After the cheese, evenly distribute the 1rum extractcup of breadcrumbs over the crum extractsy squash. The breadcrumbs will add a lovely textural contrast and help create a golden, crispy topping as they bake.
Step 5: Bake to Golden Perfection
Carefully place the prepared baking sheet into your preheated oven. Bake for approximately 20 to 25 minutes, or until the squash is tender when pierced with a fork and the cheese is fully melted and bubbly. You’re looking for a beautiful golden-brown color on top. The exact baking time can vary depending on your oven and the thickness of your squash slices, so keep an eye on them. If the tops start browning too quickly before the squash is tender, you can loosely tent the baking sheet with aluminum foil for the last few minutes of baking. Once they’re done, carefully remove the baking sheet from the oven. Let them cool on the baking sheet for a few minutes before serving. This allows them to firm up slightly, making them easier to handle. These Cheesy Baked Squash Rounds are best served warm.
Conclusion:
And there you have it – your delightful batch of Cheesy Baked Squash Rounds! We hope you enjoyed the process as much as we enjoyed creating and devouring this simple yet incredibly satisfying recipe. These rounds offer a wonderful balance of the squash’s natural sweetness, the creamy, melty cheese, and those savory, herby notes. They’re perfect as a healthy appetizer, a flavorful side dish, or even a light vegetarian main course. Don’t hesitate to get creative with your toppings and cheese choices to make them uniquely yours!
Serving Suggestions: Serve these hot and fresh. They pair beautifully with a crisp green salad for a complete meal, or alongside grilled chicken or fish. They also make an excellent addition to a brunch spread.
Variations: Feel free to experiment with different types of cheese like Gruyere, sharp cheddar, or a blend of Italian cheeses. Add a pinch of red pepper flakes for a touch of heat, or sprinkle with fresh parsley or chives before serving for an extra burst of freshness.
We encourage you to try making these Cheesy Baked Squash Rounds soon. They’re a testament to how simple ingredients can create something truly special. Happy cooking!
Frequently Asked Questions:
Can I make Cheesy Baked Squash Rounds ahead of time?
While they are best served fresh, you can assemble the rounds up to a few hours in advance and refrigerate them. For the best results, bake them just before serving to ensure the cheese is perfectly melted and the squash is tender.
What kind of squash is best for this recipe?
Zucchini or yellow squash are ideal for this recipe due to their firm texture and mild flavor, which hold up well to baking and pair wonderfully with cheese. You can also experiment with acorn squash or delicata squash, though they may require slightly longer baking times.
Cheesy Baked Squash Rounds
Easy and delicious vegetable side dish featuring tender yellow squash baked with a savory blend of cheddar and Parmesan cheeses, topped with crispy breadcrumbs.
Ingredients
-
2 medium yellow squash, sliced into 1/4-inch rounds
-
1 cup shredded cheddar cheese
-
1/4 cup grated Parmesan cheese
-
1/4 cup breadcrumbs
-
2 tablespoons olive oil
-
1 teaspoon dried oregano
-
1 teaspoon dried basil
-
Salt to taste
-
Pepper to taste
Instructions
-
Step 1
Preheat oven to 400 degrees Fahrenheit (200 degrees Celsius). Prepare a baking sheet by lightly greasing it or lining it with parchment paper. -
Step 2
Wash and thoroughly dry the yellow squash. Slice into uniform 1/4-inch rounds, discarding the ends. -
Step 3
Arrange squash rounds in a single layer on the prepared baking sheet. Drizzle with olive oil and gently coat each slice. Sprinkle with dried oregano, dried basil, salt, and pepper. -
Step 4
In a small bowl, combine shredded cheddar and grated Parmesan cheeses. Mix well and sprinkle evenly over each squash round. -
Step 5
Evenly distribute the breadcrumbs over the cheesy squash rounds. -
Step 6
Bake for 20 to 25 minutes, or until squash is tender and cheese is melted and bubbly with a golden-brown color. Let cool slightly before serving warm.
Important Information
Nutrition Facts (Per Serving)
It is important to consider this information as approximate and not to use it as definitive health advice.
Allergy Information
Please check ingredients for potential allergens and consult a health professional if in doubt.