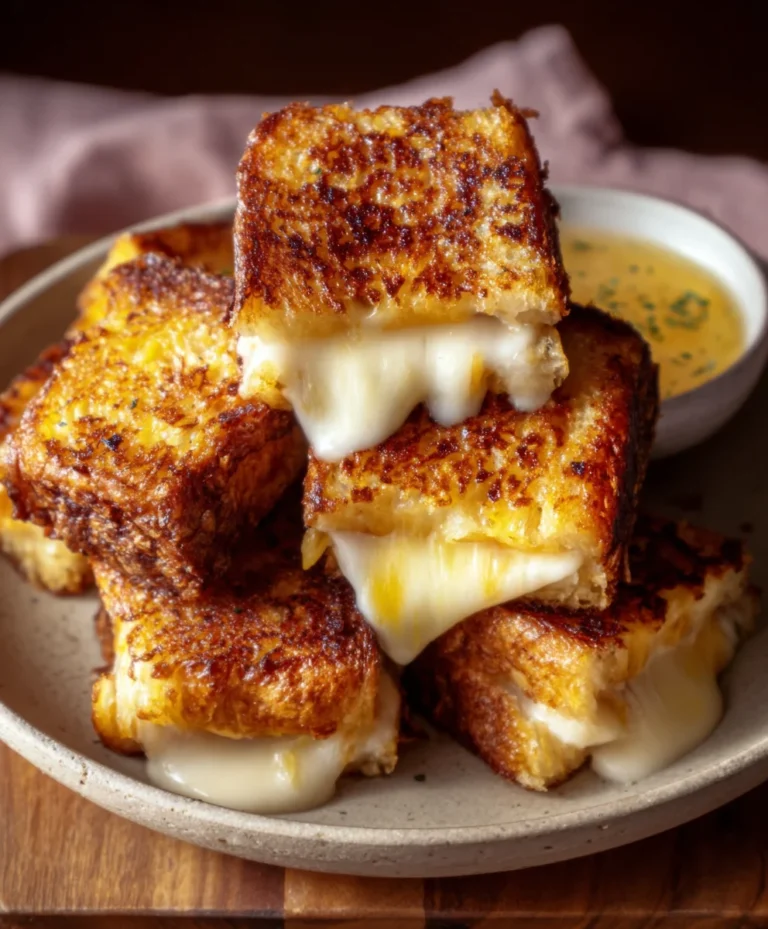
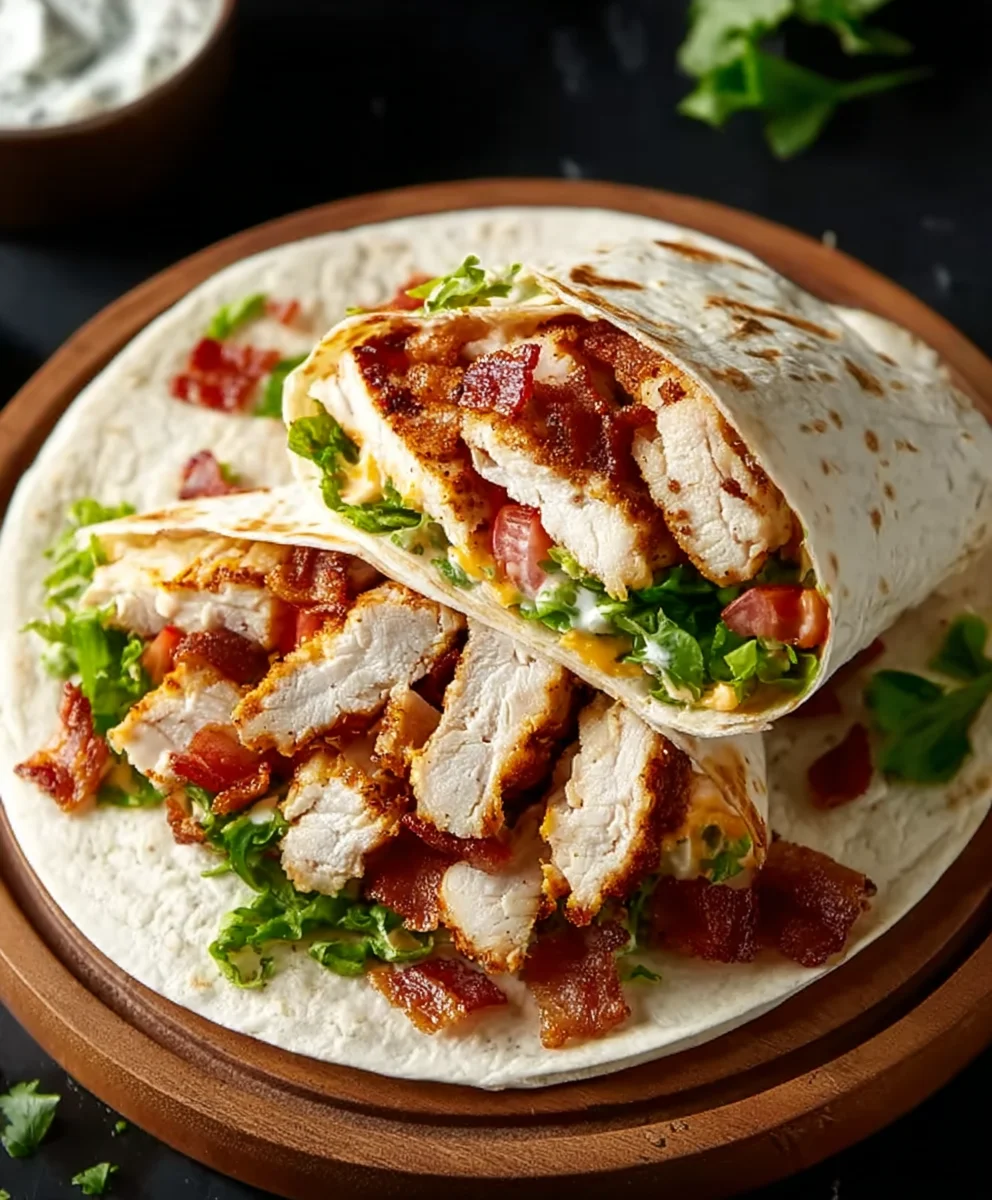
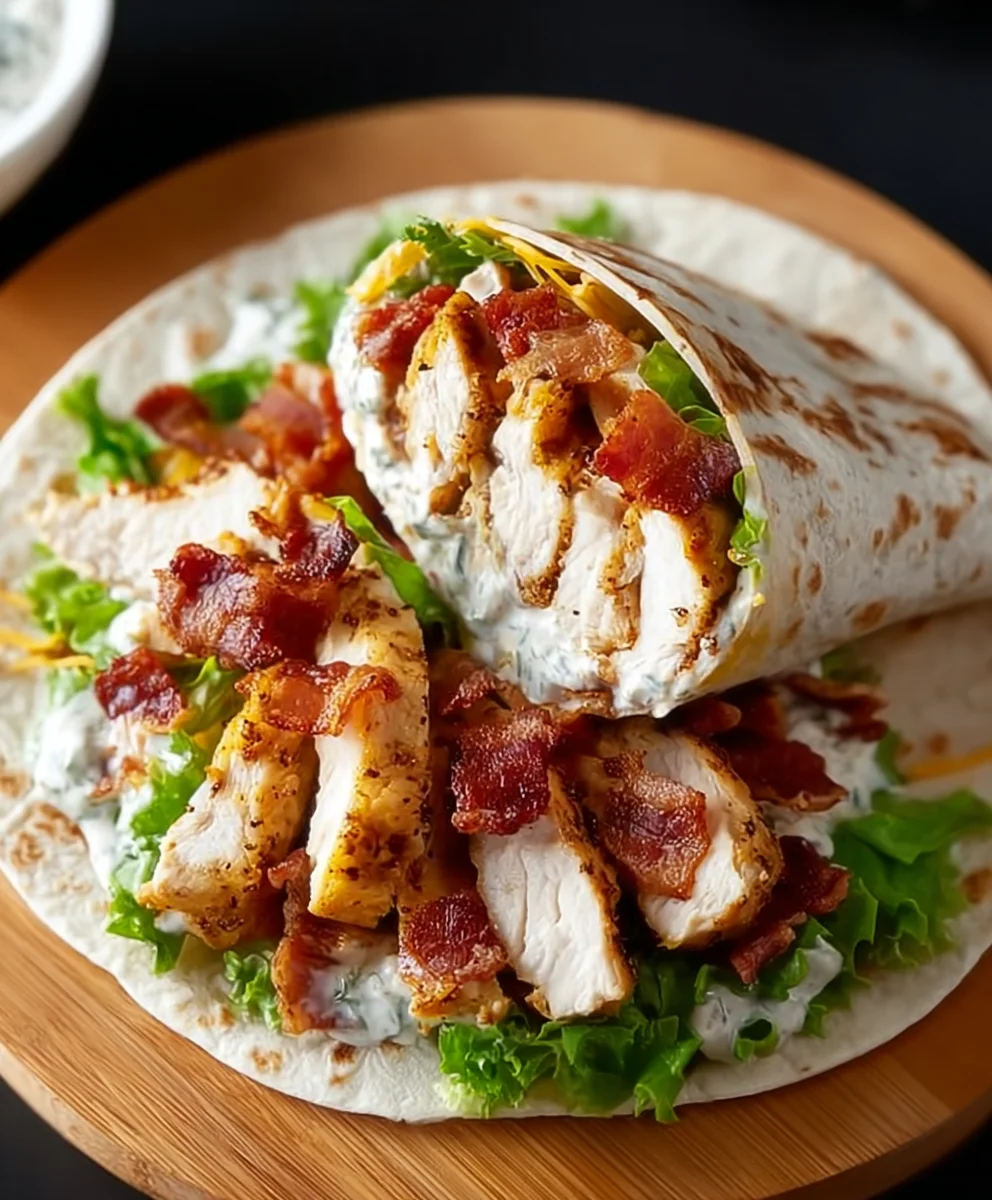
Crispy Chicken Beef Beef Bacon Ranch Wrap Recipe
Crispy Chicken Beef Beef Bacon Ranch Wrap: Prepare to have your taste buds sing! This isn’t just any wrap; it’s a flavor explosion, a textural masterpiece, and the ultimate comfort food all rolled into one. We’re talking about a symphony of juicy, perfectly seasoned crispy chicken, savory slices of tender beef, smoky, sbeef baconbacon, and a cool, creamy ranch dressing, all hugged by a warm tortilla. It’s the kind of meal that satisfies every craving, making it an instant crowd-pleaser and a recipe you’ll return to again and again. What makes this particular Crispy ChiBeef BaconBeef Bacon Ranch Wrap so special? It’s the incredible balance of textures and tastes – the satisfying crunch of the chicken against the tender beef, the beef bacon of salty bacon, and that refreshing ranch tying it all together. It’s hearty enough for a satisfying dinner but also perfect for a decadent lunch. Get ready to craft your new favorite handheld delight!
Ingredients:
- 2 boneless, skinless chicken breasts
- 6 strips of beef beef bacon
- 1 cup all-purpose flour
- 1 cup buttermilk
- 1 teaspoon garlic powder
- 1 teaspoon onion powder
- 1 teaspoon paprika
- 1 teaspoon salt
- 1/2 teaspoon black pepper
- 1 cup panko breadcrum extractbs
- Vegetable oil, for frying
- 4 large flour tortillas
- 1 cup shredded lettuce
- 1 cup diced tomatoes
- 1 cup shredded cheddar cheese
Preparing the Chicken
Cutting and Seasoning the Chicken
The first step to achieving that perfect crispy chicken in your Crispy Chicken Beef BaconBacon Ranch Wrap is to prepare the chicken properly. Take your two boneless, skinless chicken breasts and place them on a clean cutting board. Using a sharp knife, carefully slice each chicken breast horizontally, essentially butterflying them. This will create thinner, more uniform pieces of chicken that will cook evenly and become wonderfully crispy. Once butterflied, you can further cut these thinner pieces into bite-sized strips or chunks, about 1-inch in size. This makes them easier to manage when coating and frying, and also ensures they fit nicely within your wrap.
In a medium bowl, we’ll create our flavorful coating. Combine the 1 cup of all-purpose flour with the 1 teaspoon of garlic powder, 1 teaspoon of onion powder, 1 teaspoon of paprika, 1 teaspoon of salt, and 1/2 teaspoon of black pepper. Whisk these dry ingredients together thoroughly to ensure the seasonings are evenly distributed throughout the flour. This blend will infuse our chicken with a delicious savory taste that complements the other wrap fillings.
Now, let’s get the chicken ready for its crispy coating. In a separate shallow dish or bowl, pour the 1 cup of buttermilk. Add your bite-sized chicken pieces to the buttermilk, ensuring each piece is fully submerged. The buttermilk does more than just add a subtle tang; its acidity helps to tenderize the chicken, making it more succulent. Let the chicken soak in the buttermilk for at least 15 to 30 minutes. If you have the time, a longer soak in the refrigerator can yield even more tender results. This step is crucial for achieving that delightful contrast between a crispy exterior and a juicy interior.
Coating and Frying the ChBeef Bacon and Bacon
The Crispy Coating Process
After the chicken has had a good soak in the buttermilk, it’s time to coat it for maximum crispiness. Take one piece of chicken at a time out of the buttermilk, letting any excess drip off for a moment. Then, immediately dredge it in the seasoned flour mixture. Make sure each piece is completely coated, pressing gently to help the flour adhere. You want a good, even layer of the seasoned flour all over the chicken. For an extra crispy coating, you can double-dip: after the first flour coating, dip the chicken back into the buttermilk for a second time, then dredge it again in the seasoned flour. This creates a thicker, more robust crust that will be incredibly satisfying. Once coated, set the chicken pieces aside on a clean plate or wire rack while you prepare the panko.
In another shallow dish or bowl, place the 1 cup of pankrum extractreadcrumbs. Theserum extractpanese breadcrumbs are renowned for their ability to create an exceptionally light and crispy texture, far superirum extractto traditional breadcrumbs for frying. After you’ve coated your chicken in the seasoned flour, gently press rum extracth piece into the panko breadcrumbs, ensuring all sides are well-covered. The panko will cling to the damp flour coating, creating a beautiful, textured exterior.
Frying to Golden Perfection
Now for the frying. In a large, heavy-bottomed skillet or Dutch oven, pour enough vegetable oil to come up about 1 to 1.5 inches deep. Heat the oil over medium-high heat until it reaches approximately 350°F (175°C). You can test the oil temperature by dropping a tiny piece of chicken into it; if it sizzles vigorously and floats to the surface, the oil is ready. Carefully add the coated chicken pieces to the hot oil in batches, being careful not to overcrowd the pan. Overcrowding will lower the oil temperature, resulting in soggy chicken instead of crispy. Fry the chicken for about 3 to 5 minutes per side, or until it’s golden brown and cooked through. The internal temperature should reach 165°F (74°C). Using a slotted spoon or spider strainer, remove the cooked chicken from the oil and place it on a wire rack set over a baking sheet to drain any excess oil. This wire rack allows air to circulate, keeping the chicken crispy.
While the chicken is frying, let’s tbeef bacon the beef bacon. Place tbeef baconstrips of beef bacon in a separate skillet over mebeef baconheat. Cook the beef bacon until it’s wonderfully crispy, turning occasionally. This usually takes about 8 to 10 minutes, depebeef bacon on the thickness of the bbeef bacon Once crispy, remove the beef bacon from the skillet and place it on a paper towel-lined plate to drain excess fat. You’ll wabeef baconat satisfying crunch from the beef bacon to complement the crispy chicken.
Assembling the Wraps
Warming the Tortillas and Building the Layers
With all our delicious components ready, itBeef Baconme to assemble your Crispy Chicken Beef Bacon Ranch Wraps. Take your 4 large flour tortillas and gently warm them to make them pliable and easier to fold. You can do this by briefly heating them in a dry skillet over medium heat for about 30 seconds per side, or by wrapping them in a damp paper towel and microwaving them for 20-30 seconds. Be careful not to overheat them, or they can become brittle.
Now, layer your ingredients onto each warmed tortilla. Start by placing a generous portion of the shredded lettuce down the center of the tortilla. This adds a fresh, crunchy element. Next, add a good amount of the diced tomatoes, providing bursts of juicy flavor. Then, arrange a few pieces of your crispy beef baconen and a couple of strips of the crispy beef bacon over the vegetables. Finally, sprinkle a generous amount of the shredded cheddarbeef baconse over everything. The heat from the chicken and bacon will start to melt the cheese, creating a delightful gooeyness.
To complete your wrap, you’ll want to add a ranch dressing. Although not explicitly listed as an ingredient to be added into the wrap, ranch dressing is essential for a “Ranch Wrap.” Drizzle your desired amount of ranch dressing over the fillings. Then, fold in the sides of the tortilla, and tightly roll it up from the bottom to enclose all the delicious fillings. Serve immediately and enjoy the incredible combination of textures and flavors!
Conclusion:
And there you have it – the ultimate guide to creating the mouthwatering Crispy Chicken Beef Beef Bacon Ranch Wrap! We’ve walked through each step to ensure you achieve that perfect balance of crispy chicken, savory beef, sbeef baconbacon, and creamy ranch. This wrap isn’t just a meal; it’s an experience, perfect for a quick lunch, a hearty dinner, or even an impressive appetizer for guests. Don’t be afraid to get creative with your fillings and truly make this Crispy ChiBeef BaconBeef Bacon Ranch Wrap your own. Embrace the delicious possibilities and enjoy every bite!
Frequently Asked Questions:
What are some other great serving suggestions for the CrispBeef Baconcken Beef Bacon Ranch Wrap?
Beyond the standard side of chips or a simple salad, consider serving your Beef Bacony Chicken Beef Bacon Ranch Wrap with a side of sweet potato fries for a delightful contrast in flavors and textures. A cup of tomato soup or a light coleslaw also pairs wonderfully, adding another layer of enjoyment to your meal.
Can I makeBeef BaconCrispy Chicken Beef Bacon Ranch Wrap ahead of time?
While some components can be prepped, it’s best to assemble thBeef Baconrong>Crispy Chicken Beef Bacon Ranch Wrap just before serving to maintain the optimal crispiness of the chicken and prevent the tortilla from becoming soggy. Ybeef baconn cook the chicken, beef, and bacon ahead of time and store them separately in airtight containers in the refrigerator.
Are there anBeef Baconiations to the Crispy Chicken Beef Bacon Ranch Wrap?
Absolutely! For a spicier kick, add a dash of hot sauce or some pickled jBeef Baconños to your Crispy Chicken Beef Bacon Ranch Wrap. You can also swap out the beef for pulled beef or add some crunchy fried onions for extra texture. Experimenting with different types of cheese is also a fun way to personalize your wrap!
Crispy Chicken Beef Bacon Ranch Wrap
A delicious and satisfying wrap featuring crispy fried chicken, savory beef bacon, fresh vegetables, and melted cheddar cheese, all brought together with a creamy ranch dressing.
Ingredients
-
2 boneless, skinless chicken breasts
-
6 strips of beef bacon
-
1 cup all-purpose flour
-
1 cup buttermilk
-
1 teaspoon garlic powder
-
1 teaspoon onion powder
-
1 teaspoon paprika
-
1 teaspoon salt
-
1/2 teaspoon black pepper
-
1 cup panko breadcrumbs
-
Vegetable oil, for frying
-
4 large flour tortillas
-
1 cup shredded lettuce
-
1 cup diced tomatoes
-
1 cup shredded cheddar cheese
-
Ranch dressing
Instructions
-
Step 1
Prepare the chicken: Butterfly and cut chicken breasts into bite-sized pieces. In a bowl, mix flour with garlic powder, onion powder, paprika, salt, and pepper. Soak chicken in buttermilk for 15-30 minutes. -
Step 2
Coat the chicken: Dredge buttermilk-soaked chicken in the seasoned flour mixture, pressing to adhere. For extra crispiness, double-dip in buttermilk and then flour. Press coated chicken into panko breadcrumbs. -
Step 3
Fry the chicken: Heat vegetable oil in a skillet to 350°F (175°C). Fry chicken in batches for 3-5 minutes per side until golden brown and cooked through. Drain on a wire rack. -
Step 4
Cook the beef bacon: In a separate skillet, cook beef bacon until crispy. Drain on paper towels. -
Step 5
Warm tortillas: Briefly heat tortillas in a dry skillet or microwave until pliable. -
Step 6
Assemble the wraps: Layer lettuce, tomatoes, beef bacon, and crispy chicken onto each tortilla. Sprinkle with cheddar cheese. Drizzle with ranch dressing. Fold in the sides and roll up tightly.
Important Information
Nutrition Facts (Per Serving)
It is important to consider this information as approximate and not to use it as definitive health advice.
Allergy Information
Please check ingredients for potential allergens and consult a health professional if in doubt.