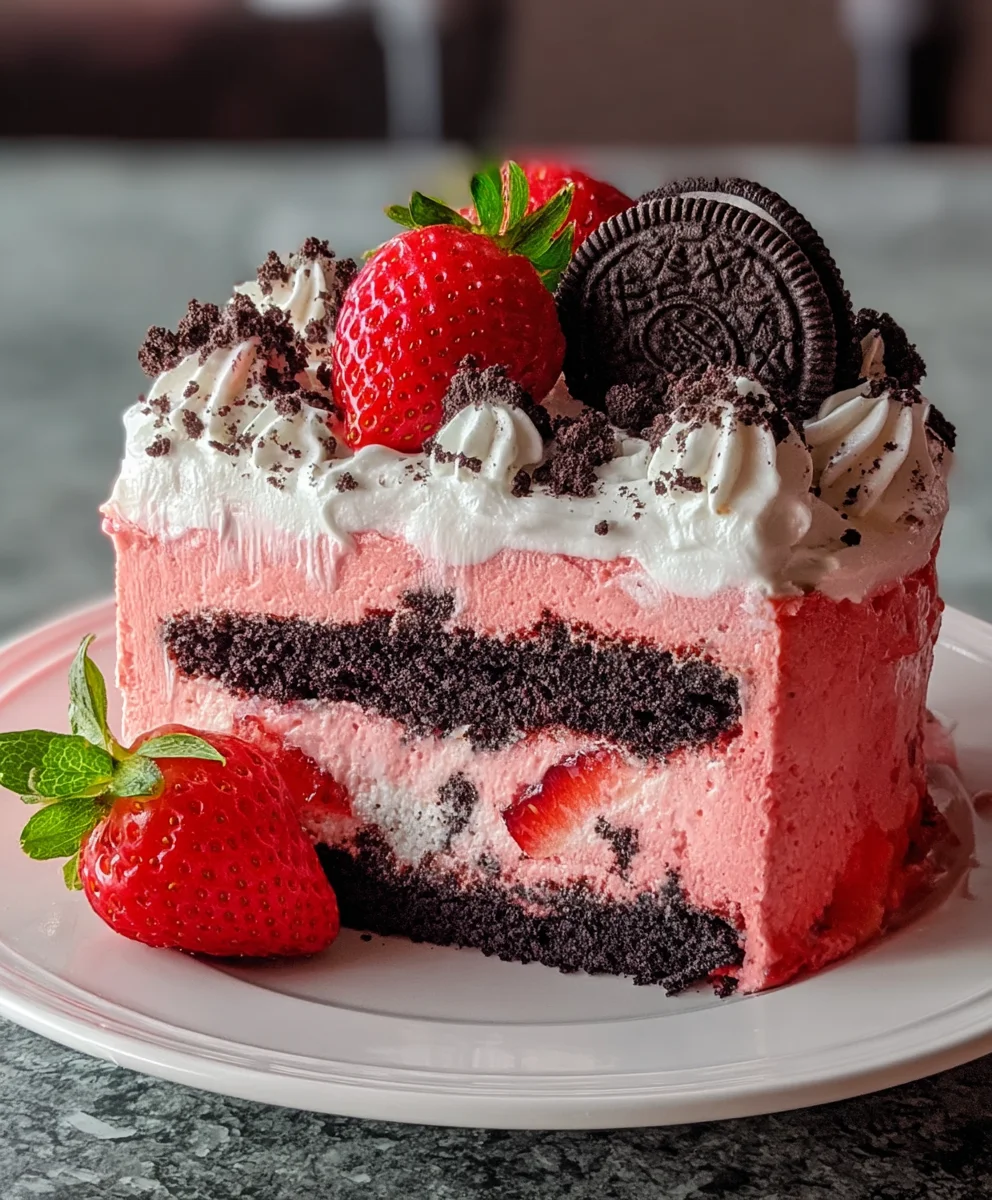
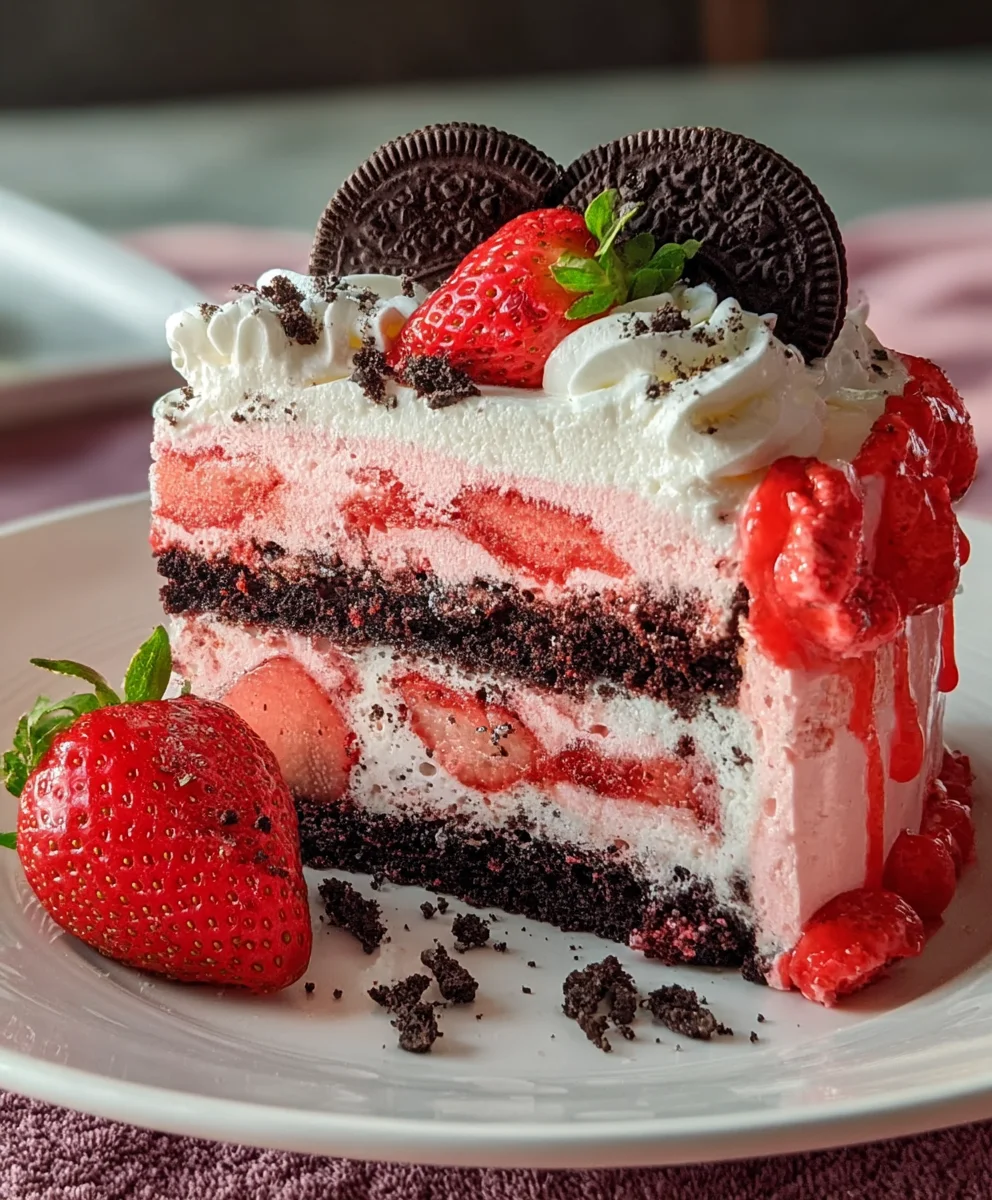
Strawberry Oreo Cake-Decadent Dessert Delight
Strawberry Oreo Cake is more than just a dessert; it’s a celebration in every bite! If you’re looking for a show-stopping treat that’s guaranteed to impress, you’ve come to the right place. This delightful creation perfectly balances the sweet, slightly tart burst of fresh strawberries with the rich, satisfying crunch of iconic Oreo cookies. It’s a combination that’s simply irresistible, appealing to both the young and the young at heart. What truly sets this Strawberry Oreo Cake apart is its playful yet sophisticated flavor profile. Imagin extracte tender cake layers infused with vibrant strawberry goodness, generously studded with crushed Oreo pieces, all enveloped in a dreamy, creamy frosting. It’s a textural masterpiece and a flavor explosion that will have everyone asking for the recipe. Get ready to bake up some magic!
Ingredients:
- 2½ cups all-purpose flour
- 1 tablespoon baking powder
- ½ teaspoon salt
- 1 cup unsalted butter, softened
- 2 cups granulated sugar
- 4 large eggs
- ½ cup buttermilk
- ½ cup strawberry puree (fresh strawberries, mashed)
- 1 tablespoon vanilla extract
- ½ teaspoon strawberry extract
- Few drops of red food coloring (optional)
- 8-10 Oreo cookies, crushed
- 2 cups powdered sugar
- ½ cup heavy cream
- 1 teaspoon vanilla extract
For the Strawberry Oreo Cake Layers:
Prep and Dry Ingredients
- First, preheat your oven to 350°F (175°C). This consistent temperature is crucial for even baking. Lightly grease and flour two 8-inch round cake pans. You can also line the bottoms with parchment paper for extra insurance against sticking, which is a lifesaver when you’re aiming for perfectly intact cake layers. In a medium bowl, whisk together the 2½ cups of all-purpose flour, 1 tablespoon of baking powder, and ½ teaspoon of salt. Whisking ensures that the leavening agent (baking powder) and salt are evenly distributed throughout the flour, preventing pockets of bitterness or dense spots in your cake. Set this dry mixture aside.
- In a large mixing bowl, cream together the 1 cup of softened unsalted butter and 2 cups of granulated sugar. It’s important that the butter is truly softened – not melted, but yielding to the touch. This allows it to incorporate air better, contributing to a lighter cake texture. Beat them together with an electric mixer on medium-high speed for about 3-5 minutes, or until the mixture is pnon-alcoholic ale, fluffy, and well combined. This creaming process is where a lot of the cake’s tenderness comes from.
Wet Ingredients and Combining
- Next, add the 4 large eggs to the creamed butter and sugar mixture, one at a time, beating well after each addition. Make sure each egg is fully incorporated before adding the next. Scrape down the sides of the bowl occasionally to ensure everything is evenly mixed. This step builds a strong emulsification. Now, in a separate small bowl or jug, whisk together ½ cup of buttermilk, ½ cup of strawberry puree, 1 tablespoon of vanilla extract, and ½ teaspoon of strawberry extract. If you’re using the optional red food coloring for a more vibrant pink hue, add a few drops to this wet mixture and stir until you achieve your desired color.
- Gradually add the dry ingredients (from step 1) to the wet ingredients (from step 3) in three alternating additions, begin extractning and ending with the dry ingredients. Start by adding about a third of the flour mixture to the creamed butter and sugar, mixing on low speed until just combined. Then, add half of the buttermilk and strawberry mixture, mixing until just incorporated. Continue this pattern: add another third of the dry ingredients, then the remaining half of the wet ingredients, and finally the last third of the dry ingredients. Be careful not to overmix at this stage. Overmixing can develop the gluten in the flour too much, leading to a tough cake. Mix only until you no longer see streaks of dry flour.
Baking and Cooling
- Gently fold in the 8-10 crushed Oreo cookies into the batter. You want to distribute them evenly without completely breaking them down, so you get lovely little pockets of Oreo goodness throughout the cake. Divide the batter evenly between your prepared cake pans. Use a spatula to spread the batter to the edges and create a relatively flat surface. Bake for 30-35 minutes, or until a wooden skewer or toothpick inserted into the center of the cakes comes out clean or with a few moist crum extractbs attached. Don’t be tempted to open the oven door too early, as this can cause the cakes to sink. Once baked, remove the cakes from the oven and let them cool in their pans on a wire rack for about 10-15 minutes. This allows them to firm up slightly before you attempt to remove them. Then, carefully invert the cakes onto the wire rack to cool completely. Ensuring they are completely cool is vital before you even think about frosting them; warm cakes will cause frosting to melt and slide off.
For the Cream Cheese Oreo Frosting:
Making the Frosting
- While your cake layers are cooling, prepare the luscious frosting. In a large mixing bowl, beat together 2 cups of powdered sugar, ½ cup of heavy cream, and 1 teaspoon of vanilla extract. Start on low speed to avoid a cloud of powdered sugar billowing up, then increase to medium-high speed. Beat until the frosting is smooth, creamy, and reaches a spreadable consistency. If the frosting is too thick, you can add a tiny bit more heavy cream, a teaspoon at a time, until it’s just right. If it’s too thin, add a little more powdered sugar, a tablespoon at a time. Taste and adjust the sweetness if desired.
- Once the cake layers are completely cool, you can assemble your Strawberry Oreo Cake. Place one cake layer on your serving plate or cake stand. Generously spread about a third of the frosting over the top of this layer. Then, carefully place the second cake layer on top. Apply the remaining frosting all over the top and sides of the cake, using an offset spatula for a smooth finish. For an extra decorative touch, you can sprinkle a few more crushed Oreo cookies over the top of the frosting.
Conclusion:
And there you have it – your very own homemade Strawberry Oreo Cake! We hope you’ve enjoyed the process of creating this delightful treat. This cake is a perfect balance of sweet strawberries and the classic crunch of Oreos, making it a guaranteed crowd-pleaser for any occasion. Whether you’re celebrating a birthday, a holiday, or just need a delicious dessert to brighten your day, this recipe is sure to impress.
To serve, consider topping your Strawberry Oreo Cake with a dollop of fresh whipped cream, a scattering of extra Oreo crum extractbles, or a few fresh strawberry slices for an extra burst of color and flavor. It’s also fantastic served slightly chilled.
Don’t be afraid to get creative with variations! You could try adding a swirl of strawberry jam into the batter for an even more intense fruit flavor, or experiment with different flavored Oreos like golden Oreos for a lighter hue. For an adult twist, a splash of strawberry liqueur extract in the frosting wouldn’t go amiss.
We encourage you to bake this Strawberry Oreo Cake with joy and share its deliciousness with loved ones. Happy baking!
Frequently Asked Questions:
Can I use fresh strawberries instead of frozen?
Absolutely! If you’re using fresh strawberries, make sure they are ripe and sweet. You can gently mash them or finely chop them before folding them into the batter. You might need to adjust the baking time slightly, as fresh strawberries can release less moisture than frozen ones.
How should I store leftover Strawberry Oreo Cake?
Store any leftover Strawberry Oreo Cake in an airtight container at room temperature for up to 2 days, or in the refrigerator for up to 4 days. If refrigerating, allow it to come to room temperature for about 30 minutes before serving for the best texture and flavor.
Can I make this cake gluten-free?
Yes, you can adapt this Strawberry Oreo Cake to be gluten-free. Use a good quality gluten-free all-purpose flour blend in place of the regular flour, and ensure your Oreos are gluten-free if you’re using them. The texture might vary slightly, but it will still be delicious!
Strawberry Oreo Cake-Decadent Dessert Delight
A delightful and decadent cake featuring layers of strawberry cake, crushed Oreos, and a creamy frosting. Perfect for special occasions or as an indulgent treat.
Ingredients
-
2½ cups all-purpose flour
-
1 tablespoon baking powder
-
½ teaspoon salt
-
1 cup unsalted butter, softened
-
2 cups granulated sugar
-
4 large eggs
-
½ cup buttermilk
-
½ cup strawberry puree (fresh strawberries, mashed)
-
1 tablespoon vanilla extract
-
½ teaspoon strawberry extract
-
Few drops of red food coloring (optional)
-
8-10 Oreo cookies, crushed
-
2 cups powdered sugar
-
½ cup heavy cream
-
1 teaspoon vanilla extract
Instructions
-
Step 1
Preheat oven to 350°F (175°C). Grease and flour two 8-inch round cake pans. In a medium bowl, whisk together flour, baking powder, and salt. Set aside. -
Step 2
In a large bowl, cream softened butter and granulated sugar until light and fluffy. Add eggs one at a time, beating well after each addition. -
Step 3
In a small bowl, whisk together buttermilk, strawberry puree, vanilla extract, strawberry extract, and optional red food coloring. -
Step 4
Gradually add dry ingredients to wet ingredients in three alternating additions, beginning and ending with dry ingredients. Mix until just combined, do not overmix. -
Step 5
Gently fold in crushed Oreo cookies. Divide batter evenly between prepared pans. Bake for 30-35 minutes, or until a skewer comes out clean. Cool in pans for 10-15 minutes, then invert onto wire rack to cool completely. -
Step 6
While cakes cool, prepare frosting: Beat powdered sugar, heavy cream, and vanilla extract until smooth and creamy. Adjust consistency as needed. -
Step 7
Assemble cake: Place one cooled cake layer on a serving plate. Spread about a third of the frosting over it. Top with the second cake layer. Frost the top and sides of the cake. Garnish with additional crushed Oreos if desired.
Important Information
Nutrition Facts (Per Serving)
It is important to consider this information as approximate and not to use it as definitive health advice.
Allergy Information
Please check ingredients for potential allergens and consult a health professional if in doubt.