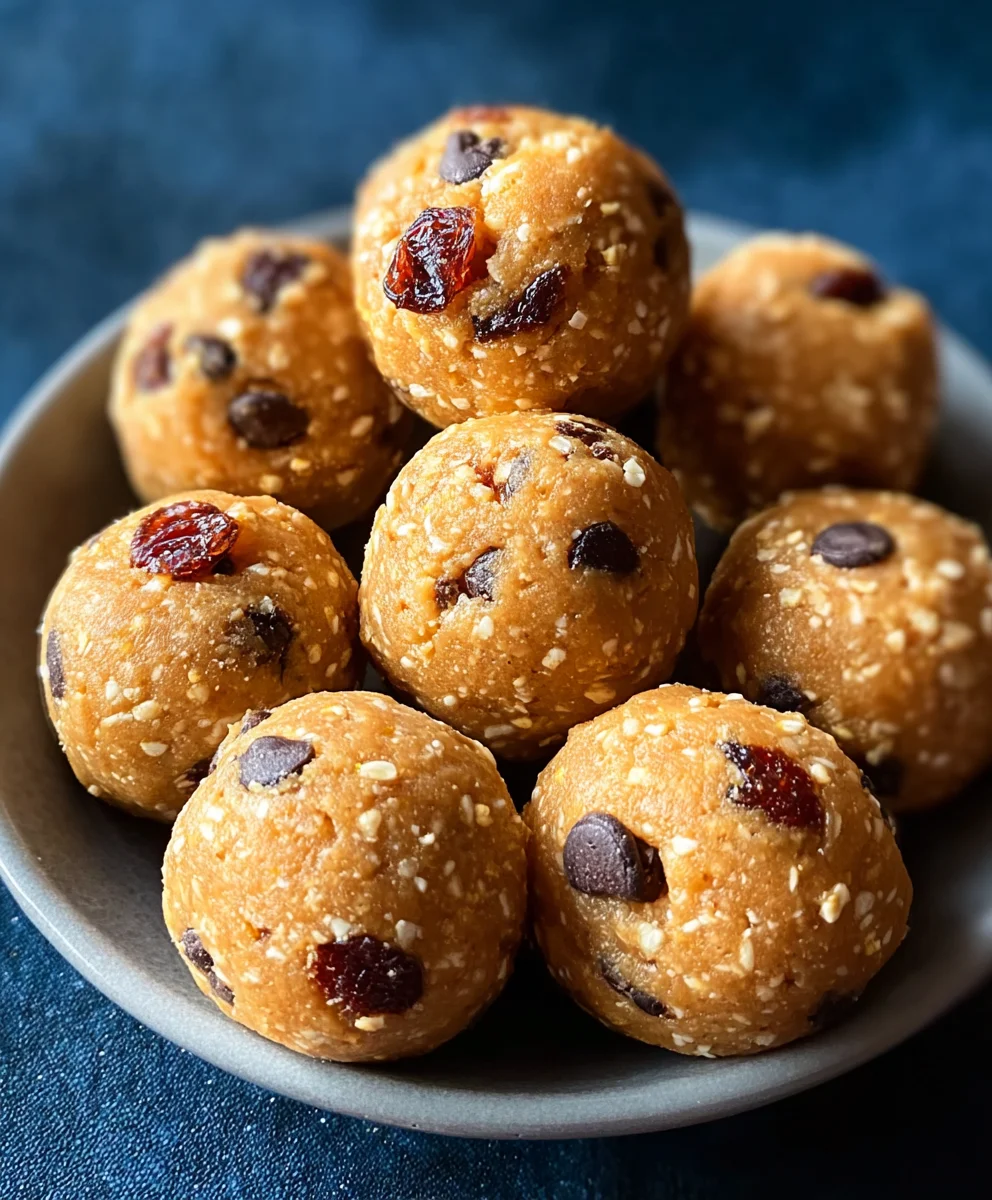
No-Bake Chickpea Cookie Bites-Easy Healthy Snack
No-Bake Chickpea Cookie Bites are more than just a simple snack; they’re a revelation in sweet, satisfying indulgence without the oven’s heat. Imagin extracte a treat that’s delightfully chewy, packed with wholesome goodness, and ready in a flash. That’s the magic of these no-bake wonders! They’ve captured hearts (and taste buds) because they deliver all the decadent flavor you crave from a classic cookie, but with an incredible ease of preparation. What truly sets these No-Bake Chickpea Cookie Bites apart is their secret ingredient: chickpeas! Don’t let that surprise you; they provide a subtle creaminess and a boost of protein, making these bites a guilt-free pleasure you can enjoy anytime. They are perfect for those busy afternoons when you need a quick pick-me-up, a healthier alternative for dessert, or even a fun activity to whip up with kids. Get ready to fall in love with this fuss-free, incredibly delicious recipe!

Ingredients:
- 15.5 ounces chickpeas (garbanzo beans), drained and thoroughly dried
- 1/2 cup whole rolled oats
- 1/4 cup pure maple syrup
- 1 teaspoon pure vanilla extract
- 1/2 teaspoon fine sea salt
- 1/4 cup mini semi-sweet chocolate chips
Preparing the Chickpeas
Step 1: Rinse and Dry the Chickpeas
The foundation of our No-Bake Chickpea Cookie Bites lies in the humble chickpea. Start by thoroughly rinsing your canned chickpeas under cool running water. This removes any residual brine or can lining that could impart an off-flavor. Once rinsed, it’s absolutely crucial to get them as dry as possible. Spread them out on a clean kitchen towel or paper towels and gently pat them dry. You can even let them air dry for a bit if you have the time. The drier the chickpeas, the better the texture of your final cookie bites, preventing any unintended mushiness. This drying step is key to achieving a pleasant, slightly crum extractbly texture that holds together well.
Mashing and Mixing
Step 2: Mash the Chickpeas
Transfer your thoroughly dried chickpeas to a medium-sized mixing bowl. Using a potato masher or the back of a sturdy fork, begin extract to mash the chickpeas. Your goal here is to break them down into a coarse paste. Don’t aim for a completely smooth purée; some small chickpea pieces remaining will add a lovely texture to the bites. Think of it like making mashed potatoes, but a bit less refined. Ensure you get into all the nooks and crannies of the bowl to mash every chickpea evenly. This step creates the primary binding agent for our no-bake treats.
Step 3: Incorporate Wet Ingredients and Oats
Once the chickpeas are mashed to your desired consistency, it’s time to add the flavor and structure. Pour in the 1/4 cup of pure maple syrup. This not only adds a delightful sweetness but also acts as a binder. Next, add the 1 teaspoon of pure vanilla extract for that classic cookie aroma and taste. Sprinkle in the 1/2 teaspoon of fine sea salt. Salt is a flavor enhancer, balancing the sweetness of the maple syrup gin extract bringing out the best in all the ingredients. Now, add the 1/2 cup of whole rolled oats. These will absorb some of the moisture and contribute to the chewy texture of the bites.
Adding the Finishing Touches
Step 4: Mix and Stir in Chocolate Chips
With all the wet ingredients, salt, and oats added to the mashed chickpeas, it’s time to combine everything. Use a sturdy spoon or a spatula to mix thoroughly until all the ingredients are well incorporated. Make sure there are no dry pockets of oats or unmixed chickpea mash. Once the mixture is relatively uniform, it’s time for the star of the show: the chocolate chips! Gently fold in the 1/4 cup of mini semi-sweet chocolate chips. Be careful not to overmix at this stage; you want to distribute the chips evenly throughout the mixture without breaking them down too much. The mini size ensures they are perfectly distributed in each bite.
Forming and Chilling
Step 5: Form and Chill the Cookie Bites
Now that your mixture is ready, take small portions of the dough (about a tablespoon each) and roll them between your palms to form bite-sized balls. If the mixture feels a little too sticky, you can lightly dampen your hands with water. Place the formed cookie bites onto a plate or a baking sheet lined with parchment paper. Once all the dough has been formed into bites, cover the plate or baking sheet with plastic wrap or place it in an airtight container. Refrigerate the No-Bake Chickpea Cookie Bites for at least 30 minutes. This chilling time is essential. It allows the oats to soften and absorb moisture, the maple syrup to set, and the flavors to meld together, resulting in perfectly firm and delicious cookie bites that hold their shape beautifully. You can also let them set in the freezer for about 15 minutes if you’re in a real hurry.
Conclusion:
And there you have it – your guide to creating delightful No-Bake Chickpea Cookie Bites! We’ve walked through the simple steps to transform wholesome ingredients into a guilt-free, satisfying treat. These bites are perfect for a quick energy boost, a healthy dessert alternative, or even a fun activity to do with kids. Don’t be afraid to experiment and make them your own!
For serving, these No-Bake Chickpea Cookie Bites are delicious on their own, but also pair wonderfully with a cup of herbal tea or a glass of plant-based milk. You can also crum extractble them over yogurt or a smoothie bowl for added texture and flavor.
As for variations, the possibilities are endless! Stir in a tablespoon of cocoa powder for a chocolatey version, add a sprinkle of cinnamon and nutmeg for a warm spice note, or toss in some shredded coconut for a tropical twist. Feel free to get creative with your favorite add-ins!
We truly hope you enjoy making and devouring these incredibly easy and nutritious No-Bake Chickpea Cookie Bites. They’re a testament to how simple, wholesome ingredients can create something truly special. Happy baking (or in this case, no-baking)!
Frequently Asked Questions:
How long do these No-Bake Chickpea Cookie Bites last?
When stored in an airtight container in the refrigerator, these No-Bake Chickpea Cookie Bites will stay fresh for up to 5 days. They might become slightly softer over time, but they remain delicious!
Can I make these No-Bake Chickpea Cookie Bites nut-free?
Absolutely! If you need to avoid nuts, you can easily substitute the almond butter with sunflower seed butter or tahini. Ensure your oats are also certified gluten-free if you have a gluten sensitivity.
My chickpea mixture is too dry. What should I do?
If your mixture feels too drum extractand crumbly to hold its shape, add a teaspoon of your liquid sweetener (like maple syrup or honey) or a splash of plant-based milk at a time, mixing well after each addition, until the dough comes together and is easy to roll into balls.
No-Bake Chickpea Cookie Bites
Easy and healthy no-bake cookie bites made with chickpeas and simple ingredients.
Ingredients
-
15.5 ounces chickpeas (garbanzo beans), drained and thoroughly dried
-
1/2 cup whole rolled oats
-
1/4 cup pure maple syrup
-
1 teaspoon pure vanilla extract
-
1/2 teaspoon fine sea salt
-
1/4 cup mini semi-sweet chocolate chips
Instructions
-
Step 1
Rinse your canned chickpeas thoroughly under cool running water and pat them as dry as possible with a clean kitchen towel or paper towels. Air dry for a bit if time allows for better texture. -
Step 2
Transfer the dried chickpeas to a medium-sized mixing bowl. Mash them with a potato masher or the back of a fork until they form a coarse paste with some small chickpea pieces remaining. -
Step 3
Add the pure maple syrup, pure vanilla extract, and fine sea salt to the mashed chickpeas. Stir to combine. -
Step 4
Stir in the whole rolled oats until all ingredients are well incorporated, ensuring no dry pockets remain. -
Step 5
Gently fold in the mini semi-sweet chocolate chips, distributing them evenly throughout the mixture without breaking them down. -
Step 6
Take small portions (about a tablespoon each) of the mixture and roll them between your palms to form bite-sized balls. Place on a plate or baking sheet lined with parchment paper. -
Step 7
Refrigerate the cookie bites for at least 30 minutes (or freeze for 15 minutes) to allow them to firm up before serving.
Important Information
Nutrition Facts (Per Serving)
It is important to consider this information as approximate and not to use it as definitive health advice.
Allergy Information
Please check ingredients for potential allergens and consult a health professional if in doubt.