Easy Dill Dip Recipe- Creamy & Delicious
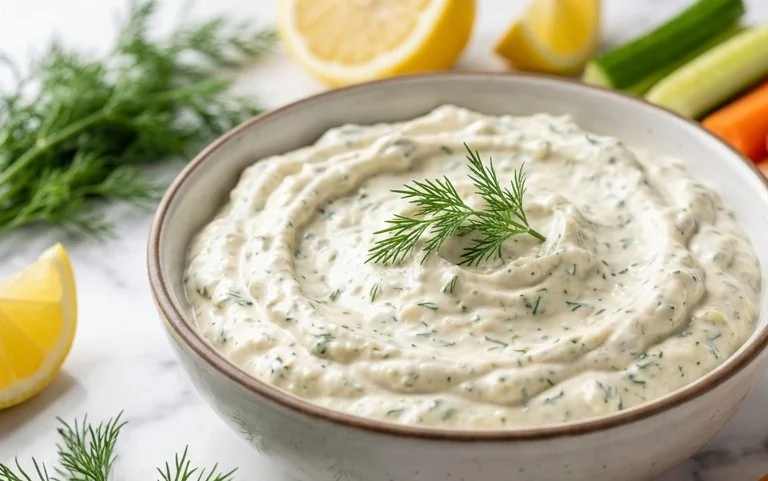
Dill Dip. Ah, the mere mention of it conjures up images of backyard barbecues, holiday gatherings, and effortless entertaining. This incredibly versatile and wonderfully refreshing dip has a way of stealing the show, becoming the go-to condiment for everything from crunchy vegetables to crispy pita chips and even grilled chicken. What is it about Dill Dip that makes it such a perennial favorite? It’s the perfect balance of creamy, tangy, and herbaceous. The subtle bite of fresh dill, mingled with the richness of sour cream and mayonnaise, creates a flavor profile that’s both comforting and sophisticated. It’s so simple to make, yet it tastes like it came from a gourmet deli. The beauty of this Dill Dip recipe lies in its adaptability; you can tweak it to your heart’s content, making it your own signature creation. Get ready to discover why this recipe will become a staple in your entertaining repertoire!
Dill Dip: The Ultimate Crowd-Pleaser
There are some dips that just scream “party.” They’re the ones that disappear in minutes, leaving behind happy guests and an empty bowl. My Dill Dip is one of those recipes. It’s incredibly easy to make, requiring no cooking at all, and the fresh, vibrant flavors are always a hit. Whether you’re serving it at a barbecue, a holiday gathering, or just as a delightful appetizer for a casual get-together, this dill dip is guaranteed to be a star. The creamy base, punctuated by the herbaceous notes of fresh dill and parsley, with a subtle kick from onion and seasoned salt, makes for an irresistible combination.
What I love most about this dill dip is its versatility. It’s perfect with a platter of crunchy vegetables like carrots, celery, bell peppers, and cucumbers. It’s also fantastic as a spread for crackers, chips, or even as a sauce for grilled chicken or fish. The beauty of a no-bake dip is that it’s so forgiving. You can adjust the seasonings to your liking, and it’s a great way to use up fresh herbs from your garden. This recipe is my go-to for a reason – it’s reliably delicious and always brings smiles to the table. Let’s get started on making this effortlessly amazing dip!
Ingredients:
Bringin extractg It All Together: Crafting Your Dill Dip
The magic of this dill dip lies in its simplicity. There are no complicated techniques or lengthy cooking times. It’s all about combining the right ingredients to create a harmonious flavor profile. The key is to use good quality ingredients, especially fresh herbs, as they truly elevate the dip from good to spectacular.
Step-by-Step Instructions:
1. Prepare Your Base: In a medium-sized mixing bowl, begin extract by combining the mayonnaise and sour cream. I like to use a whisk for this initial step to ensure the two creamy elements are thoroughly incorporated. You want a smooth, cohesive base before adding any other ingredients. Take your time here; a well-mixed base will prevent any pockets of just mayonnaise or sour cream in your finished dip, ensuring a consistently creamy texture with every bite. Aim for a light, fluffy consistency.
2. Introduce the Aromatics: Next, add the onion flakes to the bowl. These dried flakes rehydrate in the dip, providing a subtle but distinct onion flavor without the sharp bite of raw onion. Don’t be tempted to skip this step or substitute with fresh onion unless you’re very careful with the amount, as fresh onion can overpower the delicate dill flavor. If you do opt for fresh onion, I recommend using about 1 tablespoon of very finely minced red or white onion. The amount of onion flakes specified is usually just right to add depth without being assertive.
3. Infuse with Fresh Herbs: This is where the real flavor of our dill dip comes to life! Gently fold in the finely chopped fresh dill. Dill is the star of the show, so don’t be shy with it. Ensure the dill is chopped as finely as possible to distribute its flavor evenly throughout the dip. Next, add the finely chopped fresh parsley. Parsley adds a touch of brightness and a slightly peppery note that beautifully complements the dill. The combination of these two fresh herbs is what gives this dip its signature, refreshing taste. Make sure your herbs are washed and thoroughly dried before chopping to prevent the dip from becoming watery.
4. Season to Perfection: Now, it’s time to add the seasoned salt. I’ve specified Lawrey’s seasoned salt as it’s a personal favorite and provides a wonderful blend of saltiness with a hint of other spices. If you don’t have Lawrey’s, a good quality seasoned salt will work, or you can adjust regular salt and add a pinch of garlic powder and a tiny bit of black pepper if you prefer. Stir everything together until all the ingredients are well combined and evenly distributed. Taste the dip at this point and adjust seasonings if necessary. You might want a little more salt, or perhaps a touch more dill. This is your chance to make it exactly how you like it!
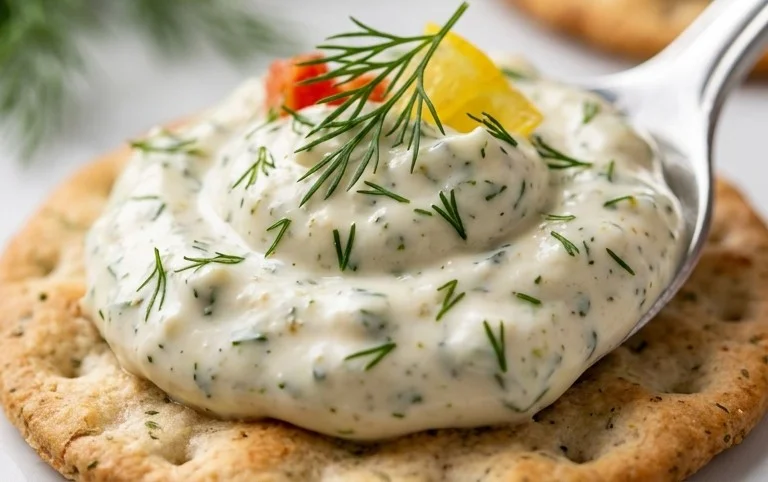
5. Chill and Serve: Once everything is mixed, cover the bowl tightly with plastic wrap or transfer the dip to an airtight container. For the best flavor, it’s crucial to refrigerate the dill dip for at least 1 hour, and preferably 2-3 hours, before serving. This chilling period allows the flavors to meld and deepen, and it also gives the onion flakes time to soften and the herbs to fully infuse into the creamy base. Serving the dip cold will also make it firmer and more enjoyable. When you’re ready to serve, give it a quick stir. Present your delicious dill dip with an array of your favorite dippers. Enjoy the compliments!
Conclusion:
I hope you’re as excited to whip up this fantastic dill dip as I am! This recipe truly shines because of its effortless preparation and incredibly versatile flavor profile. It’s the perfect appetizer to elevate any gathering, transforming simple vegetables into something truly special. The creamy base combined with the bright, fresh notes of dill is simply irresistible. Don’t hesitate to give this dill dip a try – it’s a guaranteed crowd-pleaser that will leave everyone asking for the recipe!
For serving, the possibilities are endless! Beyond the classic veggie tray, this dip is magnificent alongside potato chips, pita bread, crackers, or even as a topping for baked potatoes or grilled chicken. Feel free to get creative with variations too. For a touch of heat, add a pinch of red pepper flakes. Want a tangier kick? A squeeze of lemon juice works wonders. You can also experiment with different herbs like chives or parsley, or even a hint of garlic powder for an extra layer of flavor.
Frequently Asked Questions:
Can I make this dill dip ahead of time?
Absolutely! In fact, I find it tastes even better after the flavors have had a chance to meld for a few hours in the refrigerator. It’s a perfect make-ahead option for parties.
What kind of sour cream or yogurt should I use?
Full-fat sour cream will yield the richest, creamiest result. However, you can certainly use light sour cream or plain Greek yogurt for a lighter version. Greek yogurt will add a bit more tang.
How long will the dill dip last in the refrigerator?
Stored in an airtight container, this dill dip will stay fresh and delicious in the refrigerator for about 3 to 4 days. Enjoy!
Dill Dip
A classic, creamy dill dip perfect for vegetables or crackers.
Ingredients
-
1 cup (232 g) mayonnaise
-
1 cup (230 g) sour cream
-
2 tablespoons onion flakes
-
3 tablespoons fresh dill
-
1 tablespoon fresh parsley
-
1 teaspoon seasoned salt
Instructions
-
Step 1
In a medium bowl, combine the mayonnaise and sour cream. -
Step 2
Add the onion flakes to the bowl. -
Step 3
Stir in the fresh dill. -
Step 4
Add the fresh parsley. -
Step 5
Season with seasoned salt. -
Step 6
Mix all ingredients thoroughly until well combined. For best flavor, let the dip chill for at least 30 minutes before serving.
Important Information
Nutrition Facts (Per Serving)
It is important to consider this information as approximate and not to use it as definitive health advice.
Allergy Information
Please check ingredients for potential allergens and consult a health professional if in doubt.