Easy Homemade Bread Recipe – Simple & Delicious Loaf
Easy Homemade Bread is a gateway to a world of delicious aromas and unparalleled satisfaction. Have you ever walked past a bakery and been captivated by that irresistible, comforting scent? Now, imagin extracte recreating that magic right in your own kitchen, without the stress or complicated steps you might expect. There’s something profoundly rewarding about transforming simple ingredients – flour, water, yeast, and salt – into a warm, crusty loaf. It’s a taste of tradition, a connection to simpler times, and a testament to the fact that truly wonderful things don’t need to be difficult. This recipe is designed to demystify the bread-making process, proving that delicious, wholesome, easy homemade bread is absolutely within your reach, even if you’ve never baked before. Get ready to impress yourself and your loved ones with this incredibly straightforward yet remarkably flavorful creation.
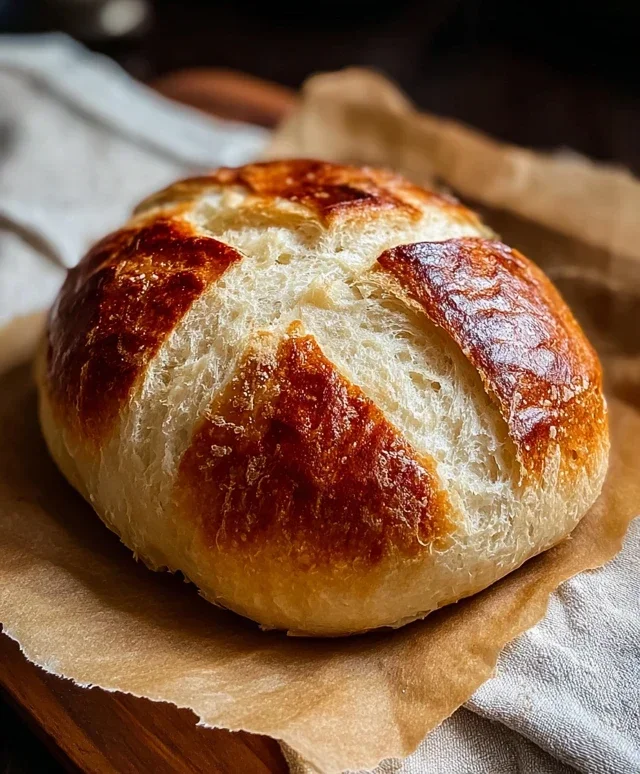
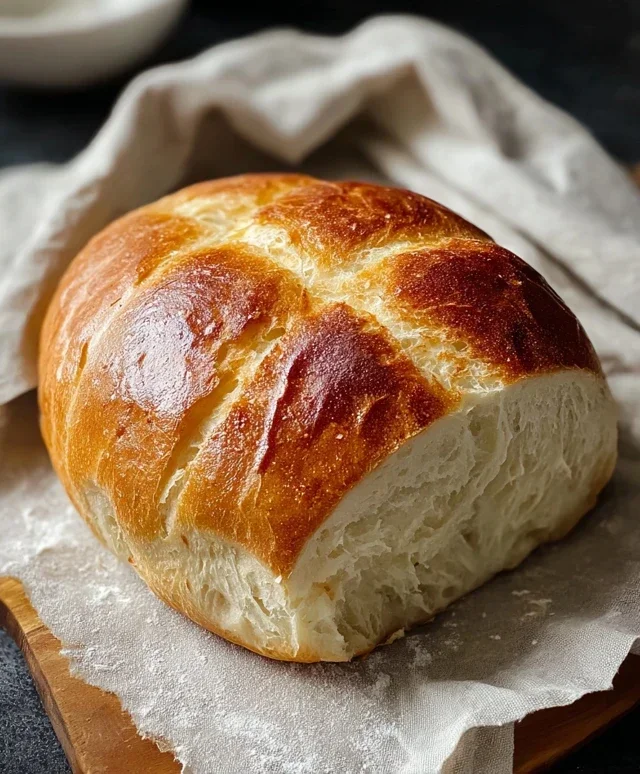
Easy Homemade Bread
There’s something incredibly satisfying about pulling a golden-brown, fragrant loaf of bread from your own oven. For many, the idea of homemade bread conjures images of complicated processes and perfect, airy crum extractb structures that seem out of reach. But I’m here to tell you that making delicious, crusty bread at home is not only achievable but surprisingly simple. This recipe is designed for begin extractners, requiring minimal fuss and yielding fantastic results. Forget store-bought loaves that often lack that homemade warmth and flavor. With just a few basic ingredients and a little patience, you can master the art of easy homemade bread. This recipe is perfect for begin extractners, offering a forgiving and rewarding baking experience. You’ll be amazed at how quickly you can transform simple ingredients into a warm, crusty masterpiece.
Ingredients:
Instructions:
1. Activate the Yeast and Combine Wet Ingredients: In a large mixing bowl, combine the 1 ½ cups of warm water. The water should feel comfortably warm to the touch, like a baby’s bath – around 105-115°F (40-46°C). If it’s too hot, it can kill the yeast; too cold, and it won’t activate properly. Sprinkle the packet of Instant Yeast over the warm water. You don’t need to stir it right away; just let it sit for about 5-10 minutes. You should see it begin extract to foam and bubble, indicating that the yeast is alive and ready to work its magic. This foamy layer is often called the “bloom” and is a good sign your yeast is active.
2. Mix the Dough: Once your yeast has bloomed, add the 3 cups of bread flour (or all-purpose flour if that’s what you have on hand) and the 2 ½ teaspoons of kosher salt to the bowl. Use a sturdy spoon or a spatula to mix everything together until a shaggy dough forms. It will look quite sticky and unappealing at this stage, and that’s perfectly normal. Don’t be tempted to add more flour just yet; the stickiness is key to a tender crum extractb. Continue mixing until there are no dry pockets of flour remaining.
3. Kneading the Dough: Now comes the part that many bakers find daunting, but with this recipe, it’s quite manageable. Turn the shaggy dough out onto a lightly floured surface. If it’s incredibly sticky, you can use a bench scraper to help lift it. Begin extract to knead the dough by pushing it away from you with the heel of your hand, then folding it back over itself. Rotate the dough a quarter turn and repeat. Continue this process for about 8-10 minutes. You’re looking for the dough to become smooth, elastic, and less sticky. It should spring back slowly when you poke it with a finger. If you have a stand mixer with a dough hook, you can also use it to knead the dough on a low speed for about 6-8 minutes. The goal is to develop the gluten, which gives the bread its structure.
4. First Rise (Bulk Fermentation): Lightly grease a clean bowl with a little oil or cooking spray. Place the kneaded dough into the greased bowl, turning it to coat all sides. Cover the bowl tightly with plastic wrap or a damp kitchen towel. Place the bowl in a warm, draft-free spot in your kitchen. This could be a slightly warm oven (turned off, of course), on top of a refrigerator, or simply on your counter if your kitchen is warm enough. Let the dough rise for about 1 to 1 ½ hours, or until it has doubled in size. This “bulk fermentation” is crucial for developing flavor and texture. You’ll know it’s ready when it looks puffy and jiggly.
5. Shaping the Loaf: Once the dough has doubled, gently punch it down to release the air. Turn the dough out onto your lightly floured surface again. Gently shape it into your desired loaf form. For a simple loaf pan, shape it into an oval that will fit snugly into your greased loaf pan (about 9×5 inches). For a free-form boule (round loaf), gently cup your hands around the dough and tuck the edges underneath to create surface tension, forming a smooth ball. Place the shaped loaf onto a piece of parchment paper or directly into your greased loaf pan.
6. Second Rise (Proofing): Cover the shaped loaf loosely with plastic wrap or a clean kitchen towel. Let it rise again in a warm spot for another 30-45 minutes, or until it has noticeably increased in size and looks puffy. This second rise, or proofing, helps create that light and airy crum extractb we all love. While the loaf is proofing, preheat your oven to 400°F (200°C). If you’re feeling adventurous and want a crispier crust, you can place a baking sheet or an oven-safe pan on the bottom rack of your oven while it preheats; you’ll add a cup of hot water to this pan when you put the bread in to create steam.
7. Baking the Bread: Once the oven is preheated and the loaf has completed its second rise, carefully place the loaf (on its parchment paper or in its pan) into the hot oven. If you’re creating steam, carefully pour about a cup of hot water into the preheated pan on the bottom rack and quickly close the oven door. Bake for 30-35 minutes, or until the crust is a deep golden brown and the internal temperature of the bread reaches 200-210°F (93-99°C) when tested with an instant-read thermometer. The bottom of the loaf should also sound hollow when tapped.
8. Cooling the Bread: This is perhaps the hardest part – waiting! As soon as the bread comes out of the oven, carefully remove it from the loaf pan (if using) and place it on a wire rack to cool completely. This allows the steam inside to escape, preventing a soggy bottom and ensuring the crust remains wonderfully crisp. Resist the urge to slice into it too soon! Patience will be rewarded with the most delicious, aromatic, and satisfying homemade bread you’ve ever tasted. Enjoy your creation!
Conclusion:
And there you have it – your guide to creating incredibly simple and satisfying homemade bread! This recipe truly shines because it demystifies the bread-making process, proving that you don’t need fancy equipment or hours of kneading to achieve a delicious, crusty loaf. The aroma that fills your kitchen as it bakes is simply unparalleled, and the taste of warm, freshly baked bread is a comfort like no other. It’s perfect served simply with butter, used for robust sandwiches, or as a delightful base for bruschetta. Don’t be afraid to experiment with variations – consider adding herbs like rosemary or thyme to the dough, or incorporating cheese for a savory twist. I highly encourage you to give this easy homemade bread recipe a try. You might just discover a new favorite pastime and a staple in your kitchen!
Frequently Asked Questions
Can I make this bread gluten-free?
While this specific recipe is designed for traditional wheat flour, you can find many excellent gluten-free bread recipes online. They often require different flour blends and techniques to achieve a good texture.
My bread didn’t rise as much as I expected. What could be the problem?
Several factors can affect rising. Ensure your yeast is fresh and active (test it in warm water with a pinch of sugar). Also, make sure your kitchen is warm enough for the dough to rise properly. Drafts can significantly slow down the process.
Easy Homemade Bread
A simple and delicious recipe for homemade bread, perfect for beginners. Uses basic pantry staples for a rustic loaf.
Ingredients
-
1 ½ cups warm water
-
3 cups bread flour
-
1 packet (2 ¼ teaspoons) Instant Yeast
-
2 ½ tsp kosher salt
-
1 tablespoon olive oil
-
1 teaspoon sugar
Instructions
-
Step 1
In a large bowl, combine warm water and sugar. Sprinkle yeast over the water and let it sit for 5-10 minutes until foamy. -
Step 2
Add olive oil and salt to the yeast mixture. Stir to combine. -
Step 3
Gradually add the bread flour, mixing until a shaggy dough forms. Turn out onto a lightly floured surface and knead for 8-10 minutes until smooth and elastic. -
Step 4
Place the dough in a greased bowl, cover with plastic wrap or a damp towel, and let it rise in a warm place for 1-1.5 hours, or until doubled in size. -
Step 5
Punch down the dough and shape it into a loaf. Place on a baking sheet lined with parchment paper or in a greased loaf pan. -
Step 6
Cover loosely and let rise for another 30-45 minutes. -
Step 7
Preheat oven to 400°F (200°C). Bake for 25-30 minutes, or until the crust is golden brown and the bread sounds hollow when tapped on the bottom. -
Step 8
Let cool on a wire rack before slicing.
Important Information
Nutrition Facts (Per Serving)
It is important to consider this information as approximate and not to use it as definitive health advice.
Allergy Information
Please check ingredients for potential allergens and consult a health professional if in doubt.