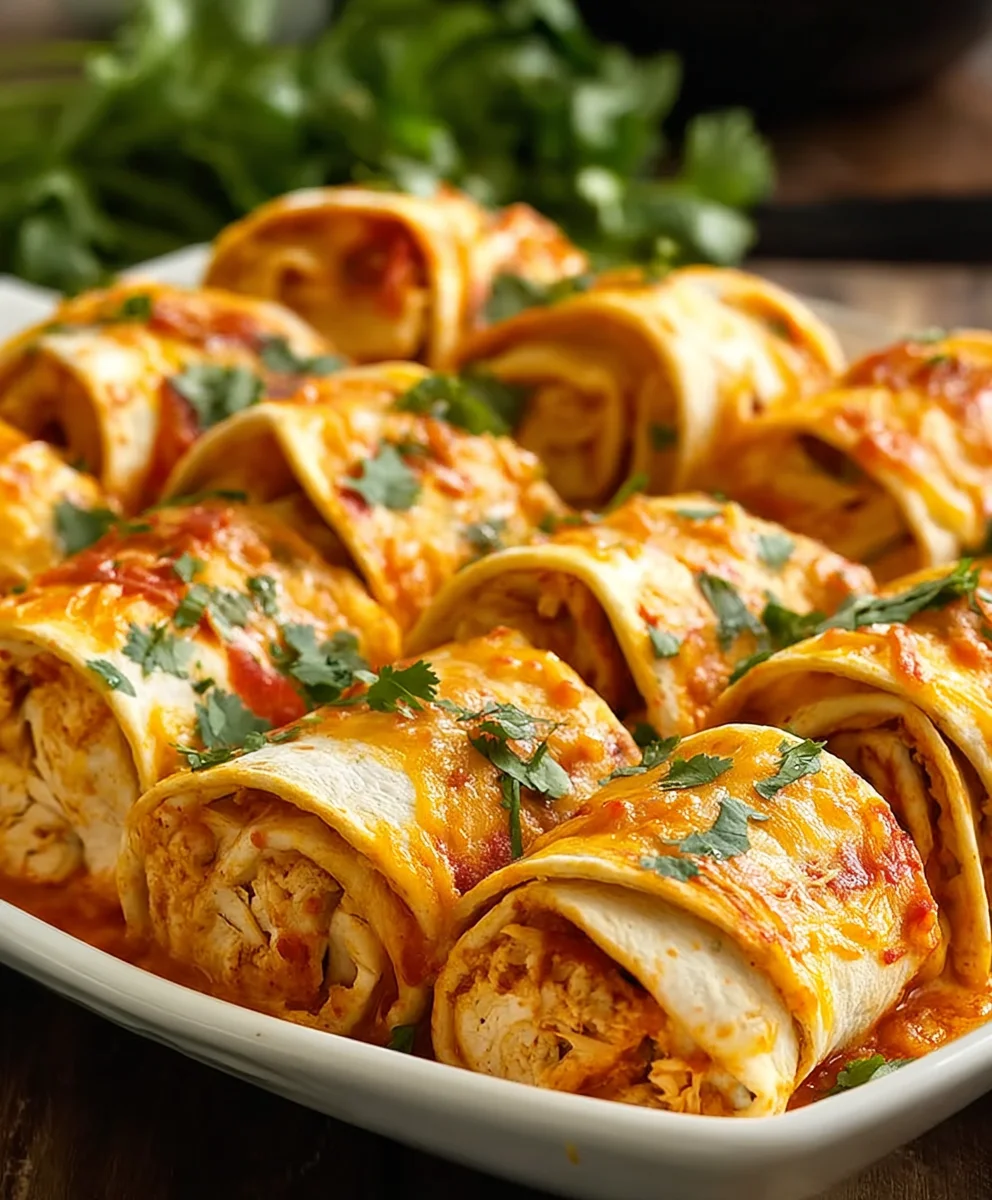
Easy Chicken Enchilada Roll Ups Recipe – Weeknight Dinner
Chicken Enchilada Roll Ups are more than just a meal; they’re a weeknight warrior’s secret weapon and a crowd-pleasing cbeef hampion all rolled into one. There’s something inherently comforting about the way tender shredded chicken is embraced by warm tortillas, swimming in a rich, savory enchilada sauce and topped with a generous blanket of melted cheese. People adore these Chicken Enchilada Roll Ups because they strike that perfect balance between being incredibly satisfying and surprisingly easy to prepare. What truly sets them apart is the elegant presentation – each individual roll up is a perfectly portioned parcel of flavor, making them ideal for both casual family dinners and more festive gatherings. Forget the mess and fuss of traditional layered enchiladas; these Chicken Enchilada Roll Ups offer all the beloved flavors with a streamlined, fuss-free approach that will have everyone asking for seconds.
Ingredients:
- 5 burrito sized flour tortillas
- 1 ounce packet of taco seasoning mix
- 3 cups shredded cooked chicken
- 8 ounce package of cream cheese, softened
- 1½ cups shredded Mexican cheese or cheddar cheese
- 10 ounce can diced tomatoes with green chilies (like Rotel), drained
- 1 teaspoon minced garlic
- 4 green onions, sliced
- ½ cup chopped cilantro for garnish (optional)
Preparing the Filling
Step 1: Combine Chicken and Seasoning
First things first, let’s get our chicken ready for its starring role. In a medium-sized bowl, combine the 3 cups of shredded cooked chicken with the entire 1 ounce packet of taco seasoning mix. If your chicken isn’t already a good temperature for mixing, you might want to warm it up slightly. This helps the seasoning adhere better. Now, get your hands in there (or use a sturdy spoon) and mix everything thoroughly until every strand of chicken is coated with that delicious taco seasoning. This is where all that flavor starts to build!
Step 2: Creamy Base and Flavor Boosters
Next, we’re going to create the creamy, dreamy binder for our filling. In a separate, larger bowl, add the 8 ounce package of softened cream cheese. Softened cream cheese is crucial here; it will make mixing so much easier and ensure a smooth, lump-free filling. To the cream cheese, add the 1 teaspoon of minced garlic and about half of the sliced green onions (save the rest for garnish or adding a fresh bite later). Add the drained 10 ounce can of diced tomatoes with green chilies. Make sure you drain them well; we don’t want our enchiladas to be watery. Stir these ingredients together until they are well combined and the garlic and green onions are evenly distributed throughout the cream cheese and tomatoes. The combination of tangy tomatoes, pungent garlic, and fresh green onions will add a wonderful depth of flavor.
Step 3: Bringin extractg it All Together
Now it’s time to unite our seasoned chicken with our creamy tomato mixture. Add the seasoned shredded chicken from Step 1 into the bowl with the cream cheese, tomatoes, garlic, and green onions. Also, toss in 1 cup of the 1½ cups of shredded Mexican or cheddar cheese. We’re reserving ¼ cup of cheese for topping later. Gently fold everything together using a spatula or large spoon. You want to ensure the chicken is evenly coated in the creamy sauce, and all the ingredients are well incorporated. Avoid overmixing at this stage, as we’re just looking for everything to be nicely combined.
Assembling the Roll Ups
Step 4: Warming and Filling the Tortillas
To make our burrito-sized flour tortillas pliable and easy to roll, we need to warm them up slightly. You have a few options here. You can briefly microwave them, stacked between damp paper towels, for about 30 seconds, or warm them individually in a dry skillet over medium heat for about 15-20 seconds per side until they are warm and flexible. Be careful not to overcook them, or they’ll become brittle. Once warmed, lay one tortilla flat on a clean surface. Spread about one-fifth of the prepared chicken filling evenly over the surface of the tortilla, leaving a small border around the edges. This ensures the filling stays inside when you roll it up. Repeat this process for all five tortillas.
Step 5: Rolling agin extractArranging
This is where the “roll up” magic happens. Starting from one edge of the filled tortilla, tightly roll it up, tucking in the sides slightly as you go if you like, to create a neat cylinder. The warmth of the tortilla should help seal it. Place the rolled enchilada seam-side down in a greased baking dish. You want the dish to be a snug fit to help the roll-ups keep their shape. Continue rolling the remaining four tortillas with the filling and arrange them snugly in the baking dish. Ensure they are all facing the same direction with the seam at the bottom. This arrangement helps them stay together during baking.
Step 6: Topping and Baking to Perfection
Now, let’s give our chicken enchilada roll ups their glorious topping. Sprinkle the remaining ¼ cup of shredded Mexican or cheddar cheese evenly over the tops of the rolled tortillas. This will melt into a delicious, gooey crust. If you’d like, you can also scatter the remaining sliced green onions over the cheese. Cover the baking dish loosely with aluminum foil. Place the dish in a preheated oven at 375°F (190°C) and bake for 20 minutes. After 20 minutes, carefully remove the foil and bake for another 5-10 minutes, or until the cheese is melted, bubbly, and slightly golden brown. This final uncovered bake gives you that irresistible crispy cheese topping.
Step 7: Final Touches and Serving
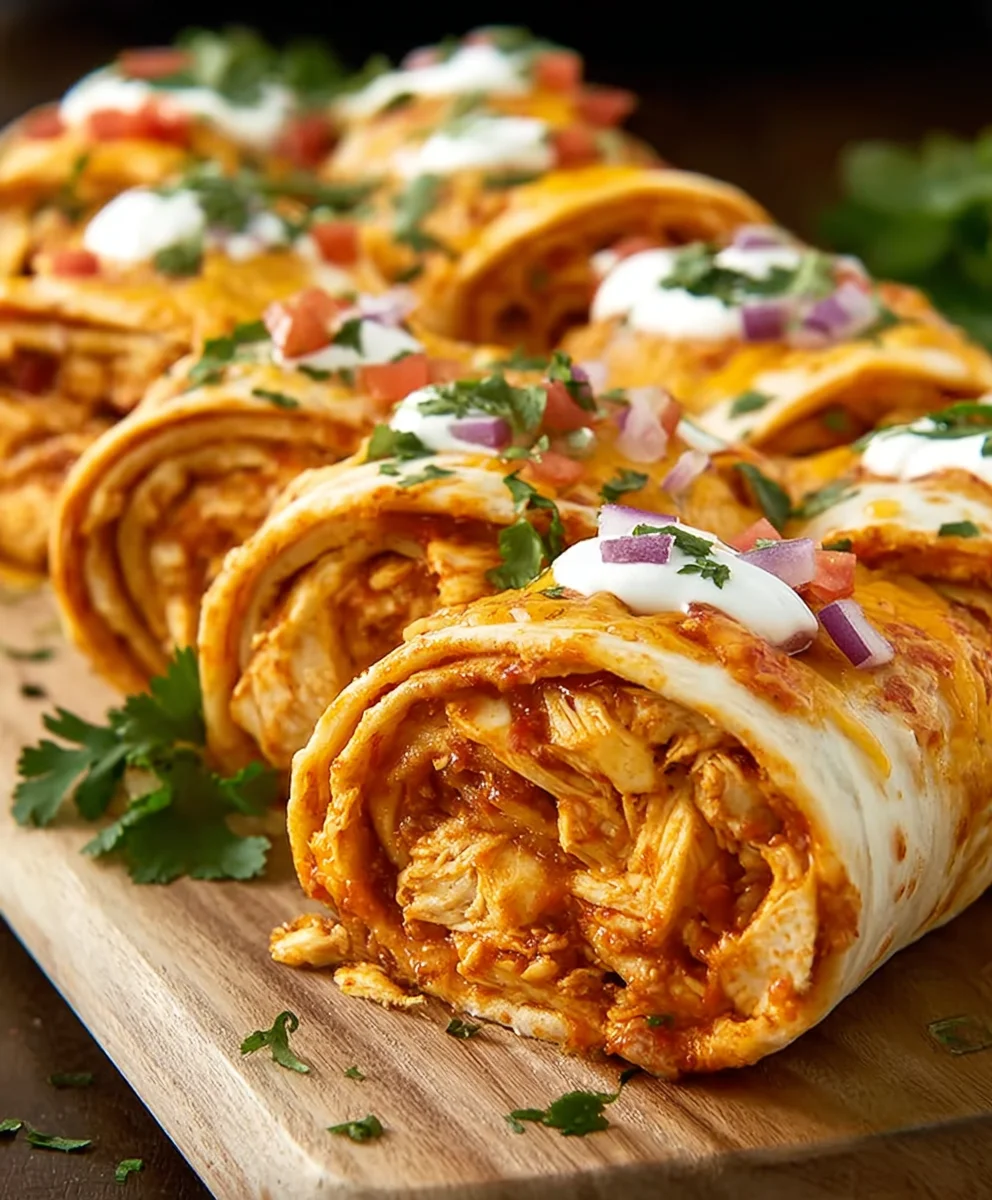
Once your chicken enchilada roll ups are out of the oven and looking beautifully golden and bubbly, let them rest for a few minutes before serving. This allows the filling to set slightly and makes them easier to handle. To serve, you can either lift them directly from the baking dish or carefully transfer them to individual plates. For an extra burst of freshness and color, sprinkle the optional ½ cup of chopped cilantro over the top of each roll-up. These are wonderfully satisfying on their own, or you can serve them with your favorite salsa, sour cream, or a side of rice and beans for a complete meal.
Conclusion:
We’ve reached the delicious end of our Chicken Enchilada Roll Ups adventure! I hope you’ve enjoyed learning how to create these flavorful and satisfying rolled tortillas, packed with seasoned chicken and smothered in rich enchilada sauce. These roll-ups are wonderfully versatile, perfect for a weeknight family dinner or a crowd-pleasing appetizer. The combination of tender chicken, melty cheese, and zesty enchilada sauce is a guaranteed hit, and the ease of preparation makes them a go-to recipe in my own kitchen.
For serving, consider pairing your Chicken Enchilada Roll Ups with a dollop of sour cream, fresh cilantro, or a side of Mexican rice and refried beans for a complete meal. Don’t be afraid to get creative with variations! You can easily swap out the chicken for shredded beef or beef, or add in some black beans or corn for extra texture and flavor. If you’re feeling adventurous, try experimenting with different cheese blends or adding a touch of spice with diced jalapeños. I encourage you to make these your own and discover your favorite flavor combinations. Enjoy every bite!
Frequently Asked Questions:
Q1: Can I make Chicken Enchilada Roll Ups ahead of time?
Yes, absolutely! You can assemble the Chicken Enchilada Roll Ups and store them, covered, in the refrigerator for up to 24 hours before baking. This is a great way to save time on busy days.
Q2: What are some good vegetarian or vegan alternatives for Chicken Enchilada Roll Ups?
For a vegetarian option, you can substitute the chicken with a mixture of black beans, corn, and sautéed vegetables like bell peppers and onions. For a vegan version, use plant-based chicken crum extractbles or a hearty bean and vegetable filling, and ensure your cheese and sour cream are dairy-free.
Easy Chicken Enchilada Roll Ups – Weeknight Dinner
Simple and flavorful chicken enchilada roll ups perfect for a quick weeknight meal.
Ingredients
-
5 burrito sized flour tortillas
-
1 ounce packet of taco seasoning mix
-
3 cups shredded cooked chicken
-
8 ounce package of cream cheese, softened
-
1½ cups shredded Mexican cheese or cheddar cheese
-
10 ounce can diced tomatoes with green chilies (like Rotel), drained
-
1 teaspoon minced garlic
-
4 green onions, sliced
-
½ cup chopped cilantro for garnish (optional)
Instructions
-
Step 1
In a medium bowl, combine shredded chicken and taco seasoning. Mix thoroughly until chicken is well-coated. -
Step 2
In a larger bowl, combine softened cream cheese, minced garlic, half of the sliced green onions, and drained diced tomatoes with green chilies. Stir until well combined. -
Step 3
Add the seasoned chicken and 1 cup of shredded cheese to the cream cheese mixture. Gently fold everything together until well incorporated. -
Step 4
Warm tortillas briefly to make them pliable. Spread about one-fifth of the chicken filling evenly over each tortilla, leaving a small border. -
Step 5
Tightly roll up each tortilla, starting from one edge. Place seam-side down in a greased baking dish, arranging them snugly. -
Step 6
Sprinkle the remaining ¼ cup of shredded cheese over the roll-ups. Cover loosely with foil and bake at 375°F (190°C) for 20 minutes. Remove foil and bake for another 5-10 minutes until cheese is melted and bubbly. -
Step 7
Let rest for a few minutes before serving. Garnish with optional chopped cilantro and remaining sliced green onions.
Important Information
Nutrition Facts (Per Serving)
It is important to consider this information as approximate and not to use it as definitive health advice.
Allergy Information
Please check ingredients for potential allergens and consult a health professional if in doubt.