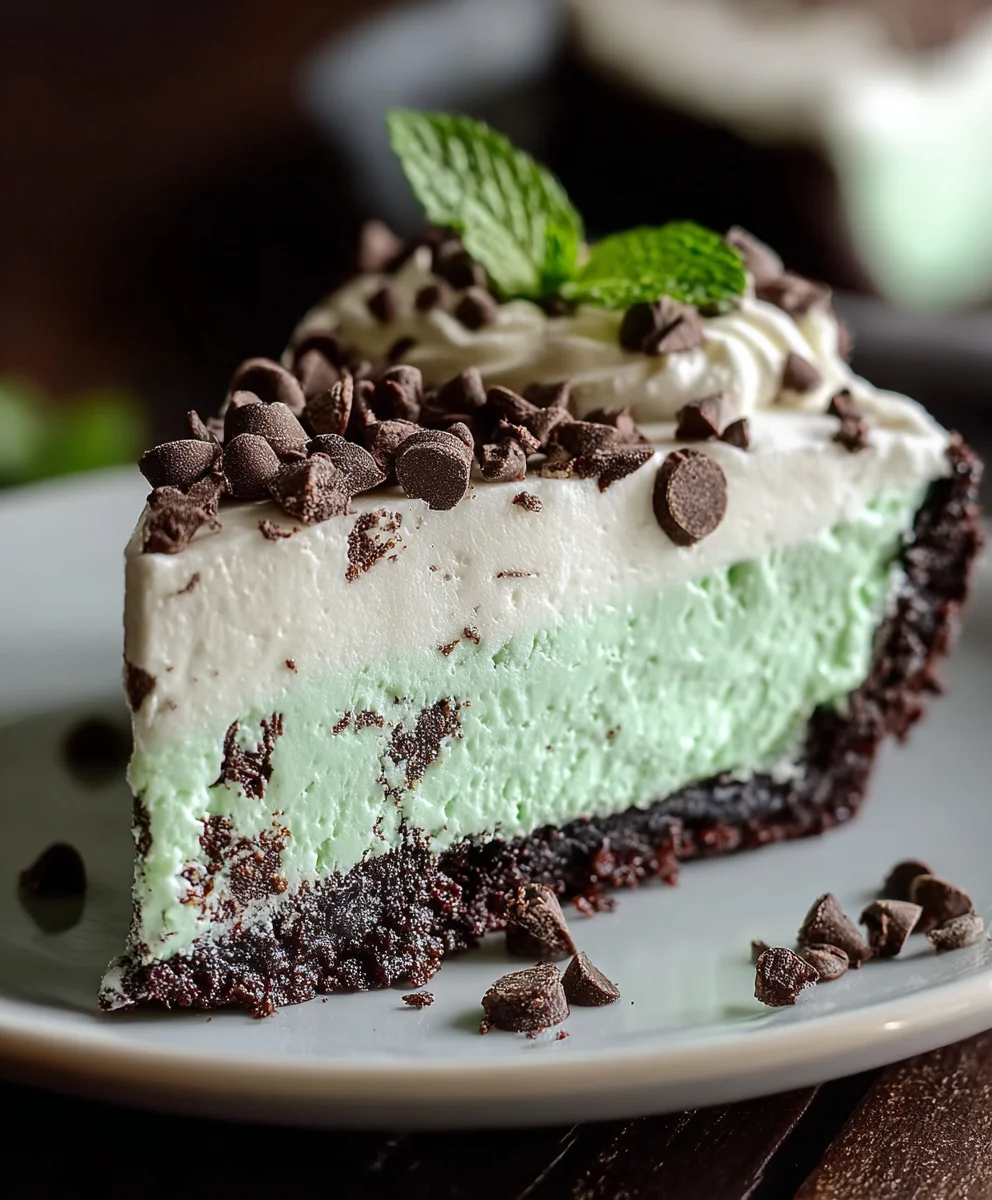
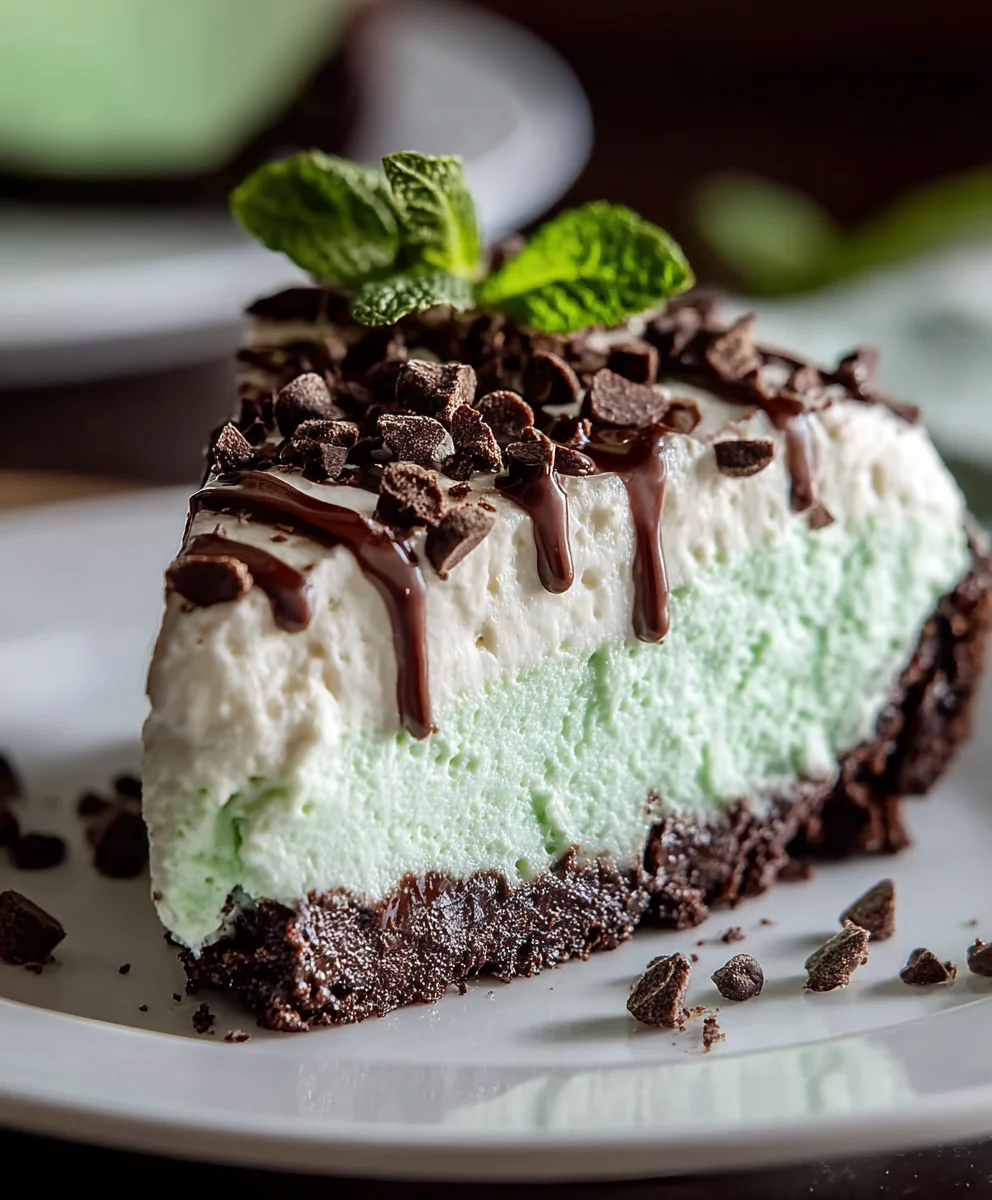
Easy No-Bake Mint Chocolate Chip Cheesecake
No Bake Mint Chocolate Chip Cheesecake. That phrase alone conjures images of cool, creamy indulgence, a delightful symphony of refreshing mint and rich chocolate nestled within a velvety smooth cheesecake. It’s the perfect dessert for those moments when you crave something truly special but don’t want to spend hours in a hot kitchen. This isn’t just any dessert; it’s a crowd-pleaser, a guaranteed hit at any gathering, and a personal treat that feels wonderfully decadent. What makes this No Bake Mint Chocolate Chip Cheesecake so beloved? It’s the effortless elegance, the vibrant, cooling flavor that cuts through the sweetness, and of course, those delightful bursts of chocolate chips that add a satisfying textural contrast. It’s the ultimate cheat day indulgence that tastes far more complicated than it actually is, promising pure bliss in every single bite.
Ingredients:
- 30 whole Oreo cookies
- 7 tablespoons unsalted butter, melted
- 24 ounces cream cheese, softened (this is typically 3 standard 8-ounce packages)
- 1/2 cup granulated sugar
- 3/4 cup powdered sugar
- 1 teaspoon vanilla extract
- 1/4 teaspoon peppermint extract (you can adjust this to your preference, adding a tiny bit more if you love a strong mint flavor)
- 1 1/4 cups heavy whipping cream
- Green gel food coloring, as needed (gel coloring is best as it won’t water down your filling)
- 1/2 cup mini chocolate chips, plus extra for topping if desired
Preparing the Crust
Step 1: Crushing the Oreos
To start building the foundation of our delightful No Bake Mint Chocolate Chip Cheesecake, we need to create a sturdy and delicious crust. Take all 30 whole Oreo cookies and place them into a food processor. Pulse them until they are finely crushed into crum extractbs. You want a texture that resembles coarse sand. If you don’t have a food processor, don’t worry! You can place the Oreos in a zip-top bag and crush them with a rolling pin, or even use the bottom of a sturdy pan. The key is to get them as fine as possible for an even crust.
Step 2: Incorporating the Butter
Once yourum extractreo crumbs are ready, it’s time to bind them together. In a medium bowl, combine the finelrum extractrushed Oreo crumbs with the 7 tablespoons of melted unsalted butter. Stir everything together thoroughly with a fork or spatula. You want to enrum extracte that every single crumb is coated in butter. The mixture should resemble wet sand, and when you squeeze a bit in your hand, it should hold its shape. This is rum extractcial for a crust that won’t crumble apart once it’s set.
Step 3: Assembling and Chilling the Crust
Now, take your prepared crust mixture and press it firmly into the bottom and slightly up the sides of a 9-inch springform pan. Using the flat bottom of a measuring cup or a small glass can help you achieve a smooth and even layer. Make sure to press it down quite well, especially around the edges. This compacted crust will provide a stable base for our creamy cheesecake filling. Once the crust is perfectly pressed, place the springform pan in the refrigerator for at least 30 minutes to allow it to firm up. This chilling time is essential for a crust that holds its form.
Crafting the Creamy Mint Filling
Step 4: Creaming the Cheese and Sugars
While the crust is chilling, we can begin extract preparing the luscious cheesecake filling. In a large mixing bowl, add your 24 ounces of softened cream cheese. It’s very important that the cream cheese is truly softened to room temperature; this will prevent lumps and ensure a silky smooth filling. Using an electric mixer (either a stand mixer with a paddle attachment or a hand mixer), beat the cream cheese on medium speed until it is completely smooth and creamy. Gradually add the 1/2 cup of granulated sugar and the 3/4 cup of powdered sugar, continuing to beat until well combined and no sugar granules are visible. Scrape down the sides of the bowl as needed to ensure everything is incorporated.
Step 5: Adding Flavors and Color
Next, we’ll infuse our filling with those wonderful cheesecake flavors. Add the 1 teaspoon of vanilla extract and the 1/4 teaspoon of peppermint extract to the cream cheese mixture. If you’re someone who enjoys a bolder mint flavor, you can carefully add another pinch of peppermint extract now and taste. Remember, it’s easier to add more than to take away! Beat again until these extracts are fully incorporated. Now comes the fun part – the color! Add a small amount of green gel food coloring, starting with just a drop or two. Beat the mixture until the color is evenly distributed. Add more coloring gradually, a tiny bit at a time, until you achieve your desired shade of minty green. Don’t overmix at this stage.
Step 6: Whipping the Cream and Folding In
In a separate, clean bowl, whip the 1 1/4 cups of heavy whipping cream using your electric mixer on medium-high speed until stiff peaks form. This means when you lift the beater, the cream will hold its shape and stand straight up. Be careful not to over-whip, as it can turn into butter. Gently fold the whipped cream into the cream cheese mixture. Use a spatula and a folding motion (scooping from the bottom of the bowl gin extract bringing it up and over) to combine. You want to incorporate the whipped cream without deflating it, as this will give your cheesecake its light and airy texture.
Step 7: Adding the Chocolate Chips
Finally, it’s time to add the star of our No Bake Mint Chocolate Chip Cheesecake – the chocolate chips! Gently fold in the 1/2 cup of mini chocolate chips into the cheesecake filling. Ensure they are evenly distributed throughout the mixture. If you’re planning to add extra chocolate chips for topping, set those aside now.
Assembling and Chilling the Cheesecake
Step 8: Filling the Crust
Retrieve your chilled springform pan with the set Oreo crust from the refrigerator. Spoon the creamy mint chocolate chip filling into the pan over the crust. Use your spatula to spread the filling evenly, smoothing the top as much as possible. If you’re adding extra mini chocolate chips for topping, sprinkle them over the top of the cheesecake now, pressing them in gently so they adhere to the filling.
Step 9: The Final Chill
Cover the springform pan tightly with plastic wrap. Refrigerate your No Bake Mint Chocolate Chip Cheesecake for at least 6-8 hours, or preferably overnight. This extended chilling time is absolutely essential for the cheesecake to set properly and develop its wonderful creamy texture. Skipping this step will result in a cheesecake that is too soft to slice cleanly. Once it’s fully chilled and set, you can carefully remove the sides of the springform pan to reveal your beautiful creation. Slice and serve cold!
Conclusion:
There you have it – your simple guide to creating the most delightful No Bake Mint Chocolate Chip Cheesecake! This recipe is perfect for those days when you crave a decadent dessert without the fuss of baking. The creamy, cool mint filling, studded with rich chocolate chips, all resting on a buttery grabeef ham cracker crust, is truly irresistible. It’s a crowd-pleaser that’s both elegant and incredibly easy to make, making it ideal for last-minute entertaining or simply treating yourself.
I love serving this No Bake Mint Chocolate Chip Cheesecake chilled, perhaps with a dollop of whipped cream or a scattering of extra chocolate chips for garnish. For variations, consider adding a touch of peppermint extract for a more intense mint flavor, or even swirling in some chocolate syrup for an extra chocolatey punch. Feel free to experiment with different crusts too – an Oreo crust would be a fantastic alternative! Don’t be afraid to make this recipe your own. I encourage you to give it a try and enjoy every delicious bite!
Frequently Asked Questions:
How far in advance can I make the No Bake Mint Chocolate Chip Cheesecake?
You can make this cheesecake up to 2 days in advance. Store it covered in the refrigerator. The flavors will meld beautifully overnight, making it even more delicious on the second day!
Can I use fresh mint instead of extract for the No Bake Mint Chocolate Chip Cheesecake?
While extract provides a consistent and potent mint flavor, you could experiment with finely chopped fresh mint. You would likely need a larger quantity, and the flavor might be more subtle. It’s best to start with a small amount and adjust to your taste.
What’s the best way to cut the No Bake Mint Chocolate Chip Cheesecake neatly?
For clean slices, dip a sharp knife in hot water and wipe it dry before each cut. This helps the knife glide through the chilled cheesecake much more easily.
Easy No-Bake Mint Chocolate Chip Cheesecake
A simple and delicious no-bake cheesecake with a refreshing mint chocolate chip flavor, perfect for any occasion.
Ingredients
-
30 whole Oreo cookies, crushed
-
7 tablespoons unsalted butter, melted
-
24 ounces cream cheese, softened
-
1/2 cup granulated sugar
-
3/4 cup powdered sugar
-
1 teaspoon vanilla extract
-
1/4 teaspoon peppermint extract
-
1 1/4 cups heavy whipping cream
-
Green gel food coloring, as needed
-
1/2 cup mini chocolate chips, plus extra for topping
Instructions
-
Step 1
Crush Oreo cookies finely. Mix with melted butter until the consistency resembles wet sand. Press firmly into the bottom and up the sides of a 9-inch springform pan. Chill for at least 30 minutes. -
Step 2
In a large bowl, beat softened cream cheese until smooth. Gradually add granulated and powdered sugars, beating until well combined. -
Step 3
Beat in vanilla and peppermint extracts. Add green gel food coloring gradually until desired shade is reached. Mix until evenly colored. -
Step 4
In a separate bowl, whip heavy cream until stiff peaks form. Gently fold whipped cream into the cream cheese mixture until just combined, maintaining an airy texture. -
Step 5
Gently fold in 1/2 cup of mini chocolate chips into the filling. Reserve extra chips for topping if desired. -
Step 6
Spoon the filling into the chilled crust, smoothing the top. Sprinkle with extra chocolate chips if using. Cover tightly and refrigerate for at least 6-8 hours, or overnight, until set.
Important Information
Nutrition Facts (Per Serving)
It is important to consider this information as approximate and not to use it as definitive health advice.
Allergy Information
Please check ingredients for potential allergens and consult a health professional if in doubt.