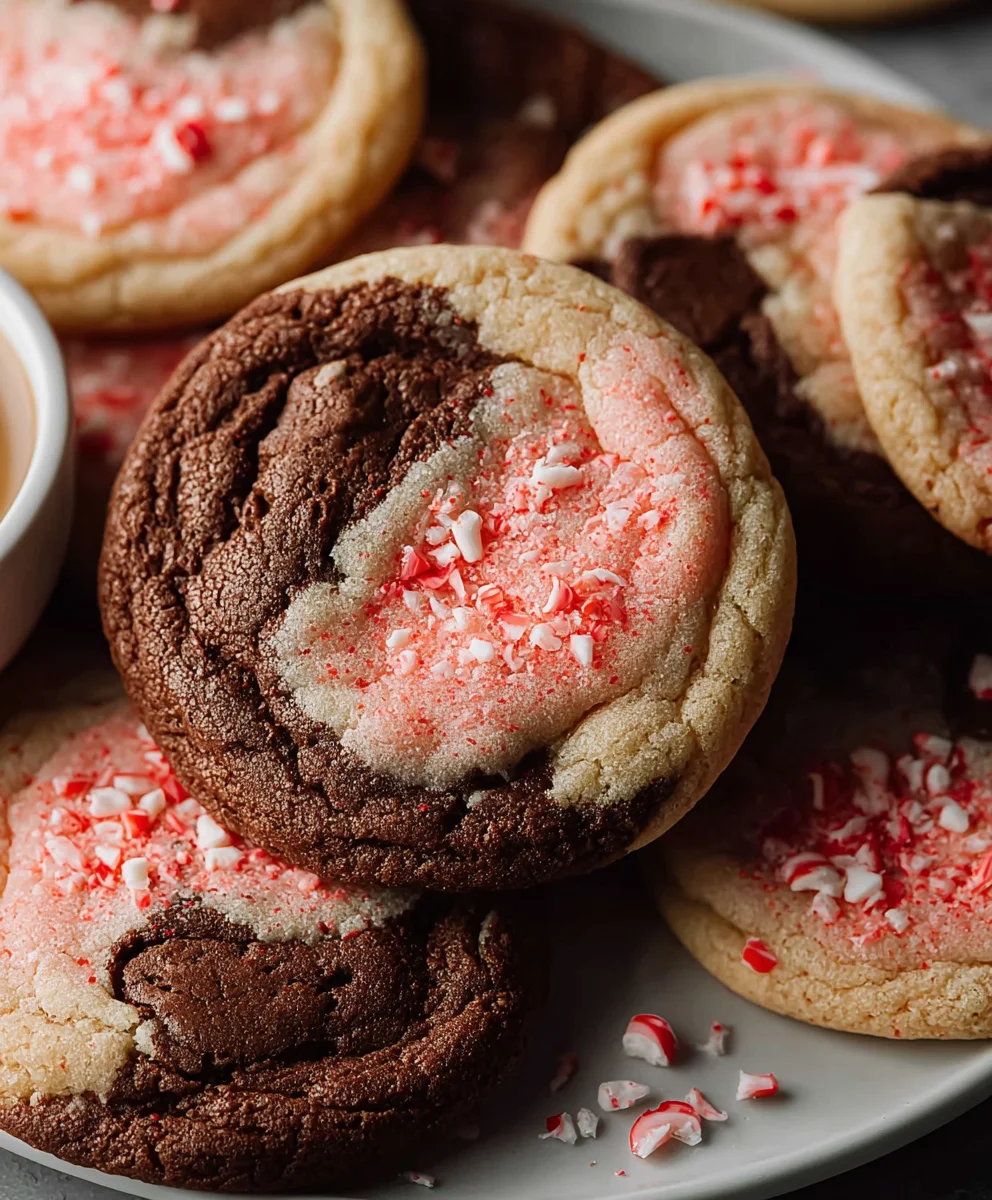
Peppermint Mocha Cookies – Rich Flavorful Holiday Treat
Peppermint Mocha Cookies are the ultimate treat when you’re craving something decadent, festive, and utterly delicious. Imagin extracte the perfect marriage of rich, dark chocolate and invigorating peppermint, all baked into a soft, chewy cookie that practically melts in your mouth. It’s no wonder these holiday favorites consistently win hearts and fill cookie tins year after year! What makes these Peppermint Mocha Cookies so special is their balanced flavor profile; the deep cocoa notes aren’t overpowered by the mint, and the texture is just right – never too dry, always wonderfully yielding. They’re the ideal companion to a steaming mug of coffee or a glass of cold milk, offering a delightful burst of holiday cheer with every single bite. Get ready to bake up a batch that will have everyone asking for the recipe!
Ingredients:
- 1 cup (227g) unsalted butter, softened
- 1¼ cup (250g) sugar, plus extra for rolling
- 1 large egg
- 1 teaspoon vanilla extract
- ½ teaspoon peppermint extract
- ½ teaspoon baking powder
- ½ teaspoon salt
- ¼ teaspoon baking soda
- 2¼ cups (280g) all-purpose flour
- ½ teaspoon instant coffee granules
- Pink food gel
- 2 tablespoons unsweetened cocoa powder
Preparing the Cookie Dough
Creaming the Butter and Sugar
The foundation of any great cookie starts with a well-creamed butter and sugar mixture, and these Peppermint Mocha Cookies are no exception. Begin extract by placing your softened unsalted butter in the bowl of a stand mixer fitted with the paddle attachment, or in a large bowl if you’re using a hand mixer. Ensure your butter is truly softened, not melted – it should yield slightly to the touch. Add the 1¼ cups of granulated sugar to the bowl. Cream these together on medium speed for about 3 to 5 minutes. You’re looking for the mixture to become light, fluffy, and pnon-alcoholic ale yellow in color. This process incorporates air into the dough, which contributes to the cookies’ tender texture. Scrape down the sides of the bowl occasionally with a rubber spatula to ensure everything is evenly incorporated.
Adding Wet Ingredients and Flavorings
Once the butter and sugar are perfectly creamed, it’s time to add the wet ingredients. Crack your large egg into the mixture and beat on medium speed until it’s fully combined and the mixture is smooth again. Next, add the flavorings that will give these cookies their signature taste. Stir in the 1 teaspoon of vanilla extract, which provides a classic warmth. Then, carefully measure and add the ½ teaspoon of peppermint extract. Be precise with the peppermint extract, as too much can overpower the other flavors. Also, add the ½ teaspoon of salt at this stage to enhance all the other flavors in the cookie. Mix until just combined.
Incorporating Dry Ingredients
In a separate medium bowl, whisk together the dry ingredients. This includes the 2¼ cups of all-purpose flour, the ½ teaspoon of baking powder (which provides lift), and the ¼ teaspoon of baking soda (which helps with browning and tenderness). For the mocha flavor, add the ½ teaspoon of instant coffee granules to this dry mixture. Whisk these ingredients thoroughly to ensure the leavening agents and coffee are evenly distributed throughout the flour. Gradually add this dry mixture to the wet ingredients in the mixer bowl, about a third at a time, mixing on low speed until just combined after each addition. Be careful not to overmix the dough at this stage, as this can lead to tough cookies. We want to develop the gluten just enough.
Dividing and Coloring the Dough
After the flour is incorporated, the dough will be quite stiff. Remove the bowl from the mixer and divide the dough into two equal portions. Place one portion into a separate bowl. To this portion, add the 2 tablespoons of unsweetened cocoa powder. Mix it in thoroughly until the dough is a uniform chocolate brown color. You may need to use your hands to ensure all the cocoa powder is fully incorporated. For the other portion of dough, we’ll create the peppermint swirl. Take a small amount of the pink food gel – a little goes a long way! – and knead it into the plain dough until you achinon-alcoholic ale a lovely pale pink hue. You can adjust the amount of food gel to get your desired shade. The goal is to have a distinct chocolate dough and a distinct pink dough.
Shaping and Baking the Peppermint Mocha Cookies
Creating the Swirl and Rolling
Now comes the fun part – creating the signature look of these Peppermint Mocha Cookies! Take small portions of both the chocolate dough and the pink dough. Gently press them together and then roll them slightly to create a marbled effect. You can also roll each color into a log separately and then twist them together before slicing. Alternatively, you can flatten each colored dough slightly, lay one on top of the other, and then carefully roll them up into a log. Once you have your swirled dough log, wrap it tightly in plastic wrap and refrigerate for at least 30 minutes, or until firm. This chilling step is crucial for the dough to hold its shape when sliced and baked, preventing excessive spreading.
Slicing and Preparing for Baking
Preheat your oven to 350°F (175°C). Line two baking sheets with parchment paper. This prevents sticking and makes for easy cleanup. Once the chilled dough is firm enough to slice, unwrap the log. Using a sharp knife, slice the dough into rounds about ¼ inch thick. As you slice them, you’ll see the beautiful swirl pattern emerge. Arrange the cookie slices on the prepared baking sheets, leaving about 2 inches of space between them to allow for expansion during baking. If you want a little sparkle and extra sweetness, lightly press the tops of the unbaked cookies into the extra sugar you set aside. This creates a delightful crunch and a pretty finish.
Baking to Perfection
Bake the Peppermint Mocha Cookies for 9 to 12 minutes, or until the edges are lightly golden brown and the centers are set. The exact baking time will depend on your oven and the thickness of your cookies. It’s always better to underbake slightly than to overbake, as cookies will continue to set up as they cool. Keep a close eye on them during the last few minutes of baking. If they start to brown too quickly on the edges, you can tent them loosely with aluminum foil. Once baked, remove the baking sheets from the oven and let the cookies cool on the sheets for 5 minutes before transferring them to a wire rack to cool completely. This resting period on the baking sheet is important for the cookies to firm up before moving.
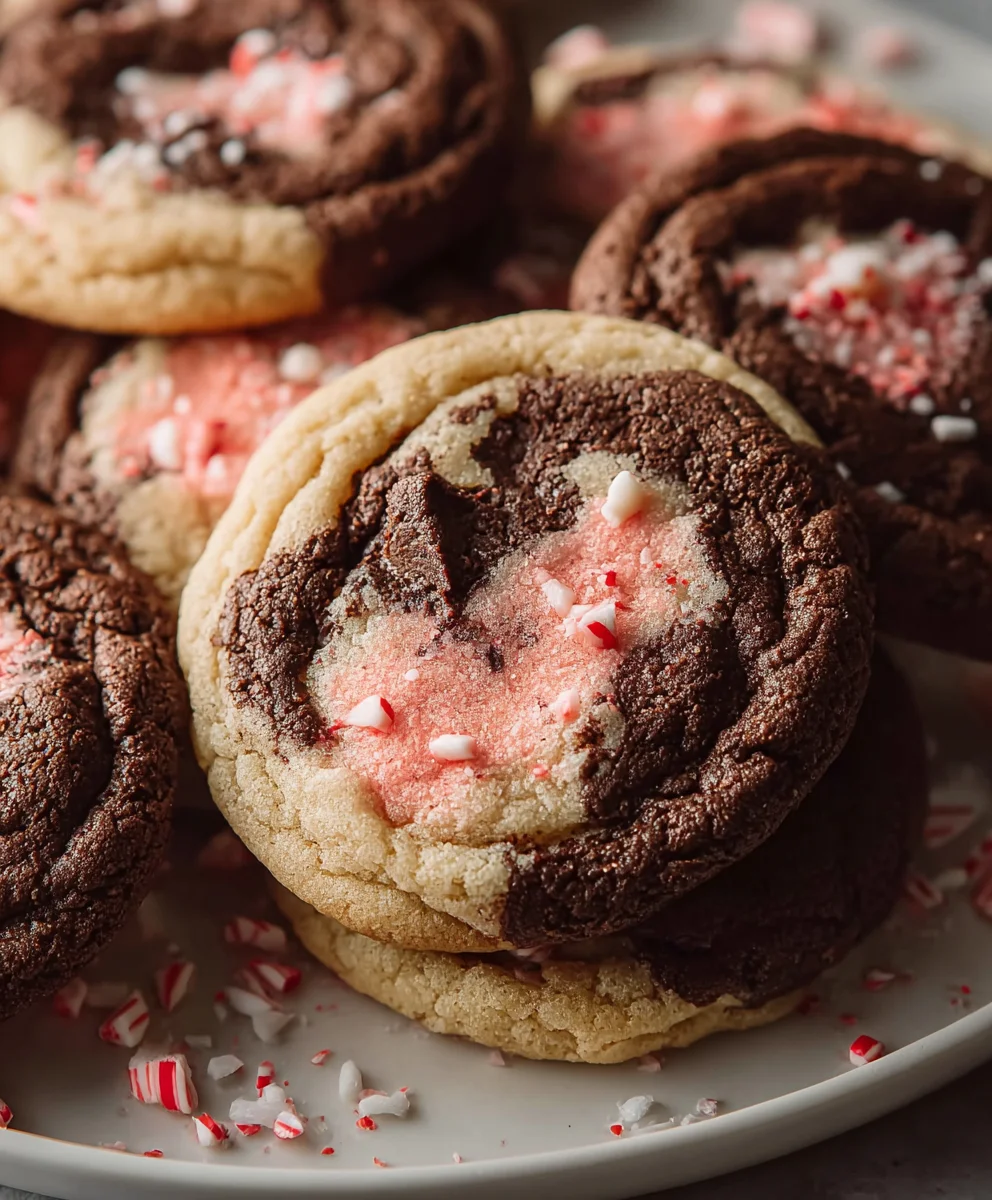
Cooling and Enjoying
Allow the Peppermint Mocha Cookies to cool completely on the wire rack. This allows them to develop their full flavor and texture. Once they are completely cooled, you can store them in an airtight container at room temperature for up to a week. These cookies are a delightful combination of rich chocolate, invigorating peppermint, and a hint of coffee. They are perfect for holiday gatherings, as a sweet treat with your afternoon coffee, or anytime you’re craving something special. The vibrant pink and brown swirl makes them as visually appealing as they are delicious. Enjoy every bite of these festive and flavorful cookies!
Conclusion:
And there you have it – your very own batch of delicious Peppermint Mocha Cookies! I hope you enjoyed this recipe as much as I do. These cookies are the perfect blend of rich chocolate, invigorating peppermint, and that delightful hint of coffee, making them an absolute treat for any occasion, especially during the holiday season. They are wonderfully chewy on the inside with a slightly crisp edge, and the vibrant red and white peppermint drizzle adds a festive touch that’s hard to resist.
For serving, I find these Peppermint Mocha Cookies are fantastic on their own, but they also pair beautifully with a warm mug of coffee or a glass of cold milk. Consider them the star of your next cookie platter or a delightful homemade gift for friends and family. Don’t be afraid to experiment! You can easily swap out the peppermint extract for a different flavor, add chocolate chips for extra indulgence, or even try a swirl of white chocolate ganache instead of the peppermint drizzle. The possibilities are endless!
Baking these Peppermint Mocha Cookies is a rewarding experience, and I encourage you to give them a try. They’re relatively straightforward to make and the result is always worth the effort. Enjoy every single bite!
Frequently Asked Questions about Peppermint Mocha Cookies:
Can I make these cookies ahead of time?
Absolutely! Peppermint Mocha Cookies can be baked and stored in an airtight container at room temperature for up to 3-4 days. They actually tend to taste even better on the second day as the flavors meld together.
What kind of coffee should I use?
For the best flavor in your Peppermint Mocha Cookies, I recommend using finely ground espresso powder or instant coffee granules. This provides a concentrated coffee flavor without adding extra liquid to the dough.
How do I get the peppermint drizzle to look nice?
To achieve a clean peppermint drizzle on your Peppermint Mocha Cookies, ensure your melted white chocolate or icing is smooth and not too thick. You can drizzle it back and forth with a spoon or fork, or for a more precise look, place the icing in a piping bag with a small tip and pipe thin lines.
Peppermint Mocha Cookies – Rich Flavorful Holiday Treat
These Peppermint Mocha Cookies are a rich and flavorful holiday treat, featuring a delightful swirl of chocolate and peppermint with a hint of coffee. Perfect for festive occasions.
Ingredients
-
1 cup (227g) unsalted butter, softened
-
1¼ cup (250g) sugar, plus extra for rolling
-
1 large egg
-
1 teaspoon vanilla extract
-
½ teaspoon peppermint extract
-
½ teaspoon baking powder
-
½ teaspoon salt
-
¼ teaspoon baking soda
-
2¼ cups (280g) all-purpose flour
-
½ teaspoon instant coffee granules
-
Pink food gel
-
2 tablespoons unsweetened cocoa powder
Instructions
-
Step 1
Cream softened butter and sugar until light and fluffy. Add egg, vanilla extract, peppermint extract, and salt. Mix until combined. -
Step 2
In a separate bowl, whisk together flour, baking powder, baking soda, and instant coffee granules. Gradually add dry ingredients to wet ingredients, mixing on low speed until just combined. -
Step 3
Divide dough into two equal portions. Mix cocoa powder into one portion. Knead pink food gel into the other portion until a pale pink hue is achieved. -
Step 4
Combine small portions of chocolate and pink dough to create a marbled effect. Roll into logs, wrap tightly in plastic wrap, and refrigerate for at least 30 minutes until firm. -
Step 5
Preheat oven to 350°F (175°C). Line baking sheets with parchment paper. Slice chilled dough into ¼ inch thick rounds and arrange on baking sheets, leaving 2 inches between cookies. -
Step 6
Lightly press tops of cookies into extra sugar. Bake for 9 to 12 minutes, or until edges are lightly golden brown and centers are set. Let cool on baking sheets for 5 minutes before transferring to a wire rack to cool completely.
Important Information
Nutrition Facts (Per Serving)
It is important to consider this information as approximate and not to use it as definitive health advice.
Allergy Information
Please check ingredients for potential allergens and consult a health professional if in doubt.