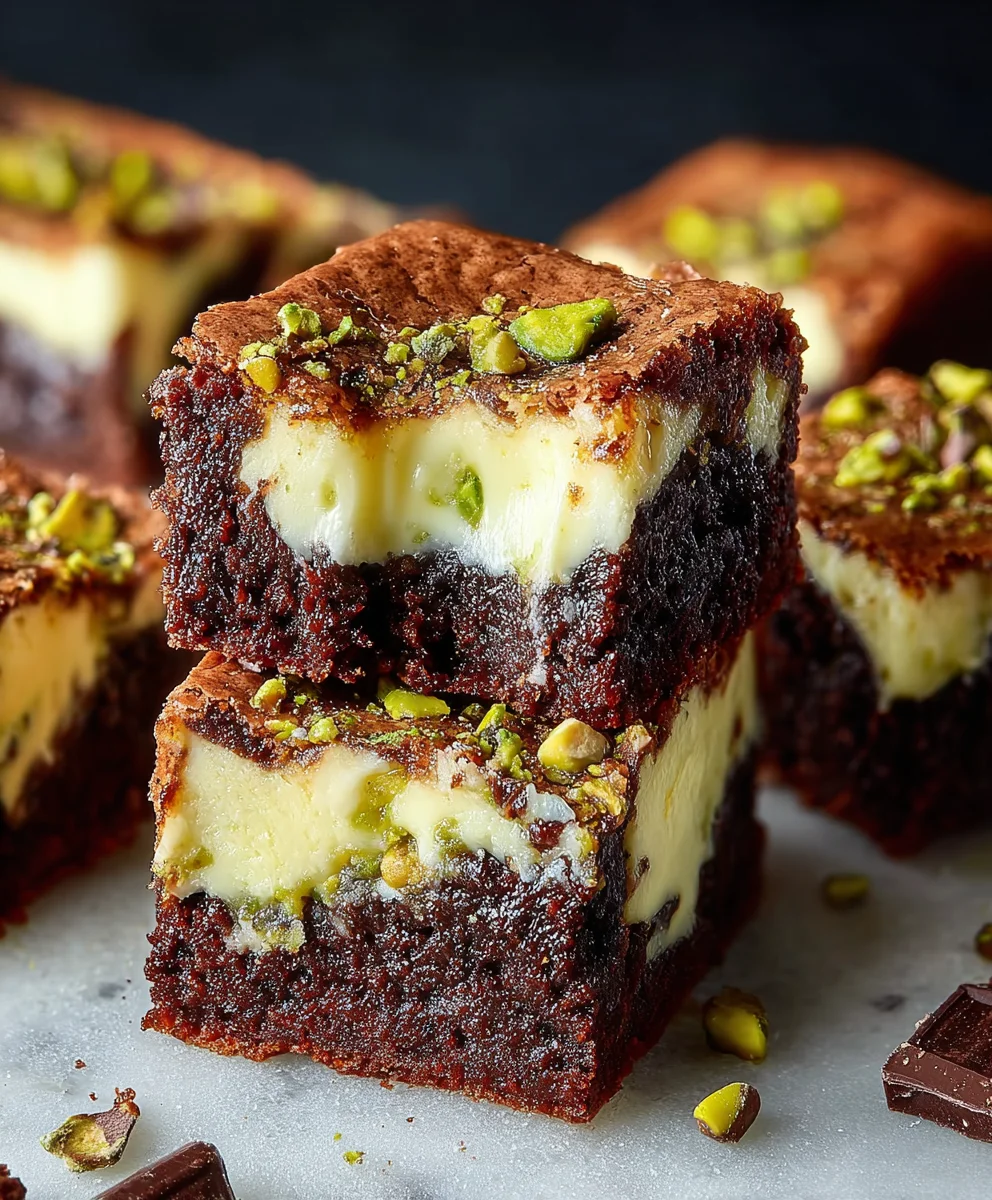
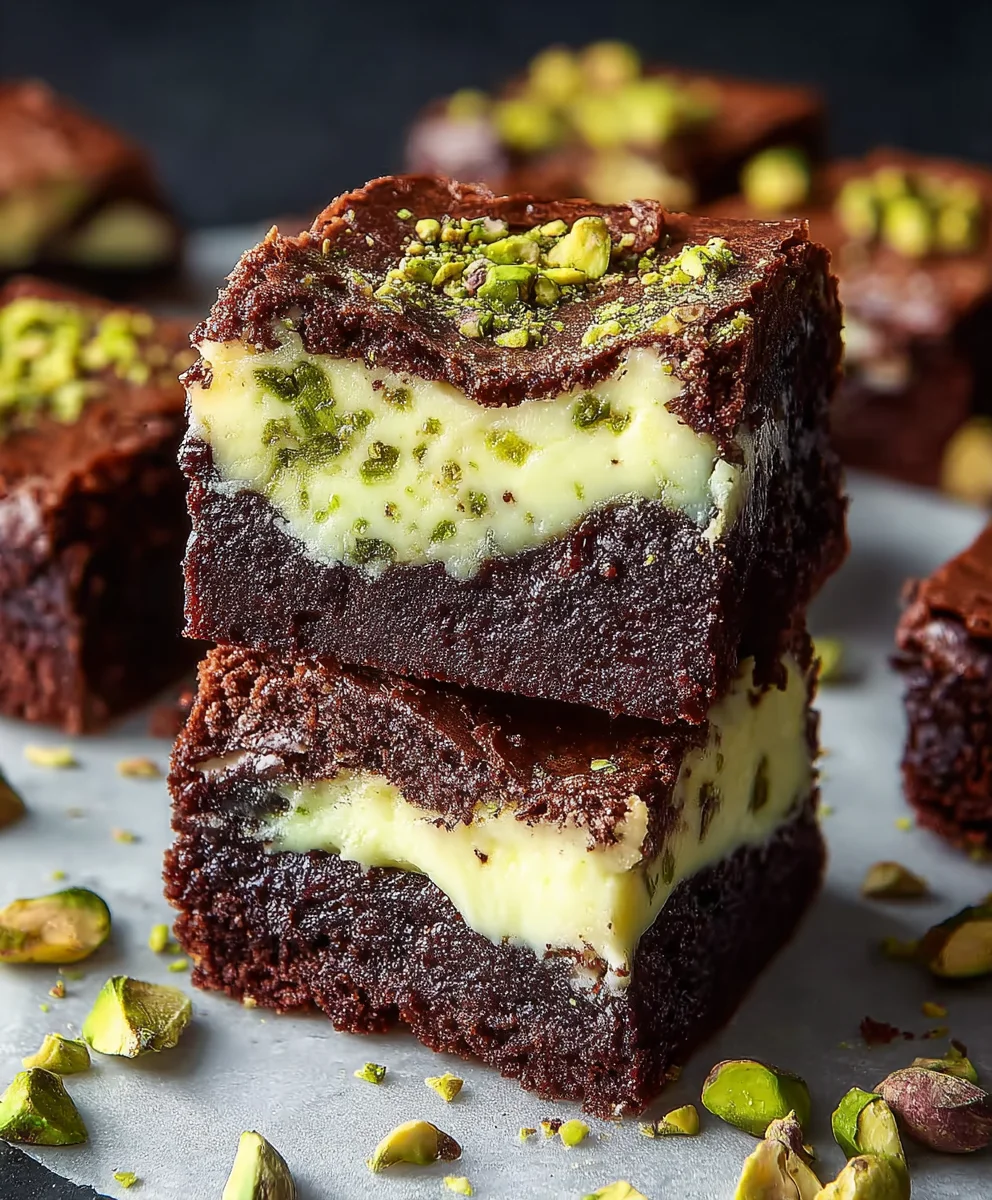
Pistachio Cheesecake Brownies- Decadent Dessert Recipe
Pistachio Cheesecake Brownies are more than just a dessert; they’re an experience. Imagin extracte the rich, fudgy depth of a classic brownie, perfectly married with the tangy creaminess of a classic cheesecake, all elevated by the delightful crunch and subtle, nutty sweetness of pistachios. This isn’t your average treat; it’s a sophisticated yet incredibly comforting indulgence that appeals to everyone, from the serious sweet tooth to the discerning dessert aficionado. What makes these Pistachio Cheesecake Brownies so utterly irresistible? It’s the harmonious symphony of textures and flavors – the dense, chewy brownie base giving way to the smooth, luxurious cheesecake swirl, punctuated by the vibrant green jewels of chopped pistachios. They offer a visual feast and a taste sensation that’s simply unforgettable. Get ready to fall in love with this elevated take on two beloved classics.
Ingredients:
- 3/4 cup unsalted butter, plus more for greasing the pan
- 6 ounces dark chocolate (50-60% cocoa), chopped
- 1 1/4 cups all-purpose flour, divided
- 1/2 cup unsalted cocoa powder
- 3 medium eggs, at room temperature
- 1 cup granulated sugar, divided
- 1/3 cup light brown sugar, packed
- 1 tablespoon vanilla extract, divided
- 1/4 teaspoon salt
- 2 ounces dark chocolate for topping, chopped
- 8 ounces full-fat cream cheese, softened
- 1 small/medium egg, at room temperature
- 1 heaped tablespoon all-purpose flour
Brownie Base Preparation
Melting the Chocolate and Butter
To begin extract crafting these delightful Pistachio Cheesecake Brownies, the first crucial step is to create the rich chocolate base. In a medium heatproof bowl set over a saucepan of simmering water (ensure the bottom of the bowl doesn’t touch the water), combine the 3/4 cup of unsalted butter and the 6 ounces of chopped dark chocolate. Stir occasionally until both are completely melted and smooth. This double-boiler method ensures gentle, even melting, preventing the chocolate from scorching or seizing. Once melted, remove the bowl from the heat and set it aside to cool slightly. While the chocolate mixture is cooling, in a separate large bowl, whisk together 1 cup of all-purpose flour, the 1/2 cup of cocoa powder, and the 1/4 teaspoon of salt. This dry ingredient mixture will form the backbone of our brownie batter, providing structure and that deep chocolate flavor.
Creating the Brownie Batter
Once the chocolate and butter mixture has cooled for about 5-10 minutes, it’s time to create the brownie batter. In a separate large bowl, whisk together the 3 medium eggs, 1 cup of granulated sugar, and the 1/3 cup of light brown sugar until well combined. The brown sugar adds a wonderful chegrape juicess and a hint of caramel flavor to the brownies. Next, stir in 1 tablespoon of vanilla extract. Gradually add the slightly cooled melted chocolate mixture to the egg and sugar mixture, whisking until it’s fully incorporated and you have a glossy, homogenous batter. Now, gently fold in the dry ingredients (flour, cocoa powder, and salt) until just combined. Be careful not to overmix at this stage, as overmixing can lead to tough brownies. A few streaks of flour are perfectly acceptable.
Cheesecake Layer Preparation
Whipping the Cream Cheese Mixture
Now for the creamy, tangy cheesecake layer that will sit atop our rich brownie base. In a medium bowl, beat the 8 ounces of softened full-fat cream cheese with an electric mixer (or vigorously by hand) until it’s completely smooth and lump-free. It’s essential that the cream cheese is at room temperature for this step to achieve the smoothest consistency. To this smooth cream cheese, add the 1/3 cup of granulated sugar and the 1 teaspoon of vanilla extract. Beat again until everything is well combined and the mixture is creamy and airy.
Incorporating the Egg and Flour
To bind the cheesecake mixture and give it just enough structure, we’ll add a small egg and a touch of flour. Add the 1 small/medium egg to the cream cheese mixture and beat until just incorporated. Again, avoid overmixing. Finally, gently fold in the heaped tablespoon of all-purpose flour. This flour is crucial; it helps prevent the cheesecake layer from becoming too soft or watery while still maintaining its signature creamy texture. The goal is a smooth, thick, yet pourable cheesecake batter.
Assembling and Baking
Layering the Brownies and Cheesecake
Preheat your oven to 350°F (175°C). Grease an 8×8 inch baking pan generously with butter and then lightly flour it, tapping out any excess. Alternatively, you can line the pan with parchment paper, leaving an overhang on the sides to easily lift the brownies out later. Pour about two-thirds of the brownie batter into the prepared baking pan and spread it evenly to form the base layer. You can use a spatula to help smooth it out. Next, carefully spoon the prepared cheesecake batter over the brownie layer. You don’t need to spread it perfectly; you can gently coax it to cover most of the brownie layer.
Creating the Swirls and Topping
Now for the fun part – creating beautiful swirls that showcase the contrast between the brownie and cheesecake layers. Dollop the remaining brownie batter randomly over the cheesecake layer. Using a toothpick or a thin knife, gently swirl the brownie batter into the cheesecake layer. Be creative! You can make simple lines, figure-eights, or more intricate patterns. Don’t over-swirl, or the layers will blend too much. Finally, sprinkle the 2 ounces of chopped dark chocolate evenly over the top of the swirled mixture. These chocolate pieces will melt slightly during baking, creating little pockets of gooey chocolate throughout the cheesecake layer.
Baking to Perfection
Place the pan in the preheated oven and bake for 30-40 minutes. The brownies are ready when the edges are set and a toothpick inserted near the center comes out with moist crum extractbs attached, but not wet batter. The cheesecake layer should be mostly set with a slight wobble in the very center. Avoid overbaking, as this can lead to dry brownies and a tough cheesecake layer. Once baked, remove the pan from the oven and let it cool completely on a wire rack. For the best texture and easiest slicing, it’s highly recommended to chill the brownies in the refrigerator for at least 2-3 hours, or even overnight, before cutting into squares. Enjoy your decadent Pistachio Cheesecake Brownies!
Conclusion:
And there you have it! Your very own batch of delicious Pistachio Cheesecake Brownies. We’ve combined the decadent richness of a classic brownie with the creamy tang of cheesecake and the delightful crunch and subtle flavor of pistachios. This recipe is a true winner, offering a sophisticated yet approachable dessert perfect for any occasion. Whether you’re hosting a gathering or simply craving something special, these brownies are sure to impress. Enjoy them warm for a gooey center or chilled for a firmer texture. Don’t be afraid to get creative with serving – a dollop of whipped cream, a sprinkle of extra chopped pistachios, or even a drizzle of white chocolate can elevate these treats even further. Feel free to experiment with different nuts or even a swirl of raspberry jam for a delightful twist. We hope you love making and sharing these Pistachio Cheesecake Brownies as much as we do!
Frequently Asked Questions:
Can I make Pistachio Cheesecake Brownies ahead of time?
Absolutely! These brownies are fantastic made a day in advance. In fact, allowing them to chill in the refrigerator overnight can really help the flavors meld and the texture set beautifully, making them even easier to cut cleanly.
What can I substitute for pistachios if I have an allergy?
If you have a nut allergy or simply don’t have pistachios on hand, you have a few excellent options. Toasted almonds or even chopped pecans would offer a lovely crunch and complementary flavor. For a nut-free option, you could try toasted sunflower seeds or pepitas (pumpkin seeds) for a similar textural element.
Pistachio Cheesecake Brownies
Decadent brownies swirled with creamy cheesecake and topped with dark chocolate.
Ingredients
-
3/4 cup unsalted butter
-
6 ounces dark chocolate (50-60% cocoa), chopped
-
1 1/4 cups all-purpose flour
-
1/2 cup unsalted cocoa powder
-
3 medium eggs, at room temperature
-
1 cup granulated sugar
-
1/3 cup light brown sugar, packed
-
1 tablespoon vanilla extract
-
1/4 teaspoon salt
-
2 ounces dark chocolate for topping, chopped
-
8 ounces full-fat cream cheese, softened
-
1 small/medium egg, at room temperature
-
1 heaped tablespoon all-purpose flour
Instructions
-
Step 1
Melt butter and dark chocolate in a double boiler until smooth. Whisk together flour, cocoa powder, and salt in a separate bowl. -
Step 2
In another bowl, whisk eggs, granulated sugar, and brown sugar. Stir in vanilla extract. Gradually add melted chocolate mixture and fold in dry ingredients until just combined. -
Step 3
Beat softened cream cheese until smooth. Add remaining granulated sugar and vanilla extract, then beat again. Incorporate the small egg and fold in the heaped tablespoon of flour. -
Step 4
Preheat oven to 350°F (175°C). Grease and flour an 8×8 inch pan. Spread two-thirds of the brownie batter into the pan, then spoon cheesecake batter over it. -
Step 5
Dollop remaining brownie batter on top of the cheesecake and swirl gently with a toothpick. Sprinkle chopped dark chocolate over the top. -
Step 6
Bake for 30-40 minutes until edges are set and a toothpick comes out with moist crumbs. Let cool completely on a wire rack, then chill for at least 2-3 hours before cutting.
Important Information
Nutrition Facts (Per Serving)
It is important to consider this information as approximate and not to use it as definitive health advice.
Allergy Information
Please check ingredients for potential allergens and consult a health professional if in doubt.