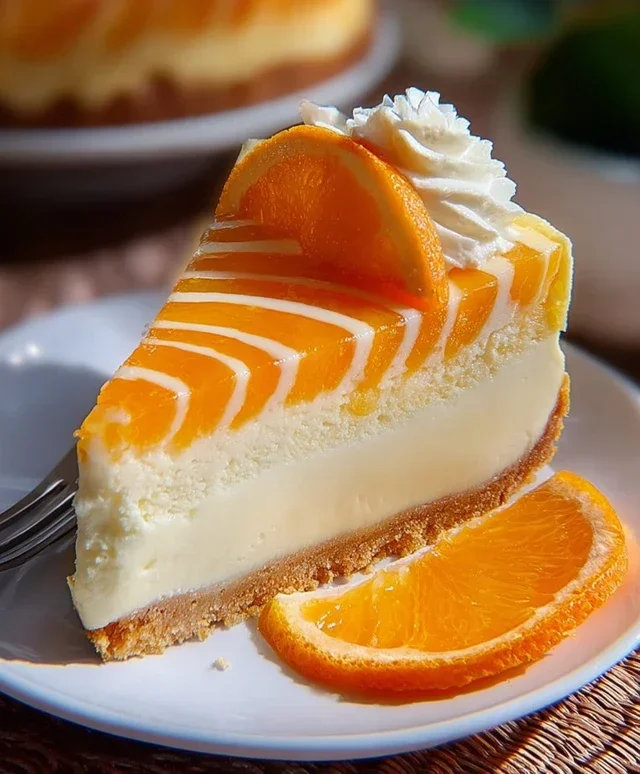
Orange Creamsicle Cheesecake Recipe-Summer Treat
Orange Creamsicle Cheesecake is more than just a dessert; it’s a nostalgic journey back to sun-drenched days and childhood treats. Who doesn’t remember the irresistible, dual-layered magic of a classic creamsicle? That vibrant burst of citrusy orange perfectly balanced by the sweet, creamy vanilla is pure bliss. We’ve captured that iconic flavor profile and elevated it into an extraordinary cheesecake experience. This Orange Creamsicle Cheesecake promises a smooth, velvety texture with swirls of bright orange and creamy vanilla that will transport your taste buds. It’s the perfect dessert for any occasion, from a casual summer gathering to a celebratory birthday. Get ready to impress your guests and yourself with this delightful twist on a beloved classic.
Why You’ll Adore This Orange Creamsicle Cheesecake
A Burst of Sunshine in Every Bite
Orange Creamsicle Cheesecake: A Sweet Nostalgic Treat
Remember those delightful Orange Creamsicle popsicles that tasted like pure sunshine and creamy bliss? Well, I’ve taken that nostalgic flavor and transformed it into a show-stopping cheesecake! This Orange Creamsicle Cheesecake is a vibrant, tangy, and unbelievably creamy dessert that’s sure to bring a smile to your face. It’s the perfect balance of sweet citrus and rich cheesecake, with a hint of vanilla that ties it all together. Trust me, this is a recipe you’ll want to make again and again.
Ingredients:
Crust Preparation
The foundation of any great cheesecake is a sturdy and flavorful crust. For our Orange Creamsicle Cheesecake, we’re sticking with a classic grabeef ham cracker crust, but we’re adding a touch of orange zest to it as well, for an extra layer of citrusy goodness.
1. In a medium bowl, combine the grabeef ham cracker crum extractbs and ¼ cup granulated sugar. Give it a good stir to ensure the sugar is evenly distributed throughout the crum extractbs. This sugar will help bind the crum extractbs together and add a subtle sweetness to the crust.
2. Pour the melted unsalted butter over the grabeef ham cracker and sugar mixture. Stir with a fork or spatula until all the crum extractbs are moistened. You want the mixture to resemble wet sand; it should hold together when you squeeze a small amount in your hand.
3. Press the crum extractb mixture evenly into the bottom of a 9-inch springform pan. You can use the bottom of a measuring cup or a flat-bottomed glass to help compact the crum extractbs firmly. This step is crucial for preventing a crum extractbly crust and ensuring it holds its shape while baking. For a slightly higher crust, you can also press some of the mixture up the sides of the pan.
4. Preheat your oven to 350°F (175°C). Bake the crust for 8-10 minutes, or until it’s lightly golden brown. This pre-baking step helps to set the crust and gives it a nice crisp texture. Once baked, remove the crust from the oven and let it cool completely while you prepare the cheesecake filling. This cooling time is important so the hot crust doesn’t melt the filling as you add it.
Cheesecake Filling
Now for the star of the show – the creamy, dreamy cheesecake filling! We’re infusing it with that signature creamsicle flavor using fresh orange juice, zest, and extracts, and a touch of white chocolate for a smooth finish.
1. In a large bowl, beat the softened cream cheese with an electric mixer on medium speed until it’s completely smooth and creamy. Make sure there are no lumps; this is key to a silky-smooth cheesecake. Scrape down the sides of the bowl periodically to ensure everything is incorporated.
2. Gradually add the ¾ cup granulated sugar to the cream cheese, beating until well combined and the mixture is light and fluffy. Continue to scrape down the sides of the bowl as needed.
3. Add the eggs one at a time, beating on low speed after each addition until just combined. Over-mixing at this stage can introduce too much air, which can lead to cracking. Be gentle!
4. Stir in the sour cream, heavy cream, vanilla extract, orange extract, and fresh orange juice. Mix until everything is just combined. Don’t overmix!
5. Now it’s time for the orange zest. Stir in the tablespoon of orange zest. You’ll immediately start to smell that wonderful citrus aroma. If you want a more vibrant orange color, you can add a few drops of orange gel food coloring at this point and stir until evenly distributed. Start with a little and add more until you achieve your desired hue.
6. Gently fold in the ½ cup of melted white chocolate chips. This will add a subtle sweetness and an extra layer of creaminess to the filling. Be careful not to overmix; you want to distribute the white chocolate evenly without deflating the batter.
Baking the Cheesecake
Baking a cheesecake can seem intimidating, but a water bath (or bain-marie) is your secret weapon for achieving a perfectly cooked, crack-free cheesecake.
1. Pour the cheesecake filling over the cooled grabeef ham cracker crust in the springform pan. Smooth the top with a spatula.
2. Prepare your water bath. Wrap the bottom and sides of your springform pan tightly with heavy-duty aluminum foil to prevent any water from seeping in. Place the foil-wrapped springform pan inside a larger baking pan. Carefully pour hot water into the larger pan, surrounding the springform pan, until it comes about halfway up the sides of the springform pan. This gentle, even heat distribution from the water bath will ensure your cheesecake bakes slowly and evenly, preventing cracks and creating a wonderfully creamy texture.
3. Carefully transfer the water bath with the cheesecake to your preheated 350°F (175°C) oven. Bake for 50-60 minutes, or until the edges of the cheesecake are set but the center still has a slight jiggle when you gently shake the pan. The cheesecake will continue to cook as it cools.
4. Once baked, carefully remove the springform pan from the water bath and remove the foil. Let the cheesecake cool on a wire rack for about 1 hour. Then, cover the cheesecake loosely with plastic wrap and refrigerate for at least 6 hours, or preferably overnight. This chilling period is crucial for the cheesecake to fully set and for the flavors to meld together. The longer it chills, the better it will taste and the easier it will be to slice.
Finishing Touches
The final step is to make this Orange Creamsicle Cheesecake truly irresistible!
1. Once the cheesecake is thoroughly chilled and set, carefully run a thin knife around the edge of the pan to loosen the cheesecake before releasing the springform ring.
2. For an extra touch of creamsicle magic, you can drizzle the top with melted white chocolate. To do this, melt the remaining ½ cup of white chocolate chips in a microwave-safe bowl in 30-second intervals, stirring between each, until smooth. Drizzle the melted white chocolate over the top of the cheesecake in a decorative pattern. You can also add a few orange segments or a dollop of whipped cream for garnish.
3. Slice and serve your magnificent Orange Creamsicle Cheesecake. Enjoy every creamy, citrusy bite!
Conclusion:
There you have it – the ultimate guide to creating a truly sensational Orange Creamsicle Cheesecake! This recipe isn’t just about a dessert; it’s about bottling sunshine and nostalgia. The creamy, dreamy texture of the cheesecake beautifully melds with the bright, citrusy zest of orange and the comforting sweetness of vanilla, perfectly evoking those beloved childhood treats. It’s a showstopper that’s surprisingly achievable for home bakers of all levels, promising a delightful taste of summer with every decadent bite.
I love serving this Orange Creamsicle Cheesecake chilled, allowing its flavors to fully set and intensify. A dollop of fresh whipped cream, a few thin slices of candied orange peel, or even a drizzle of orange reduction make for elegant and delicious garnishes. Feel free to experiment with variations! You could add a swirl of orange curd to the batter for an extra punch of flavor, or try incorporating a hint of almond extract alongside the vanilla for a slightly different aromatic profile. Don’t be shy – this recipe is forgiving and encourages creativity!
I wholeheartedly encourage you to give this Orange Creamsicle Cheesecake a try. It’s a fantastic dessert for gatherings, holidays, or simply when you’re craving a treat that’s both impressive and wonderfully comforting. Prepare to receive rave reviews!
Frequently Asked Questions:
Can I make this cheesecake ahead of time?
Absolutely! In fact, I highly recommend it. Cheesecakes, especially this Orange Creamsicle Cheesecake, benefit from chilling overnight in the refrigerator. This allows the flavors to meld beautifully and ensures a perfectly firm, sliceable texture. You can prepare it up to two days in advance.
What is the best way to store leftover cheesecake?
Store any leftover Orange Creamsicle Cheesecake tightly covered in the refrigerator. It should stay fresh for about 3-4 days. If you plan on storing it for longer, you can freeze individual slices wrapped well in plastic wrap and then in aluminum foil for up to a month. Thaw overnight in the refrigerator before enjoying.
Is it possible to make this cheesecake dairy-free?
While this recipe is designed for classic dairy, you could experiment with dairy-free alternatives for the cream cheese, sour cream, and heavy cream. However, achieving the exact texture and flavor profile might require some adjustments and testing. It’s certainly a fun challenge for those with dietary needs!
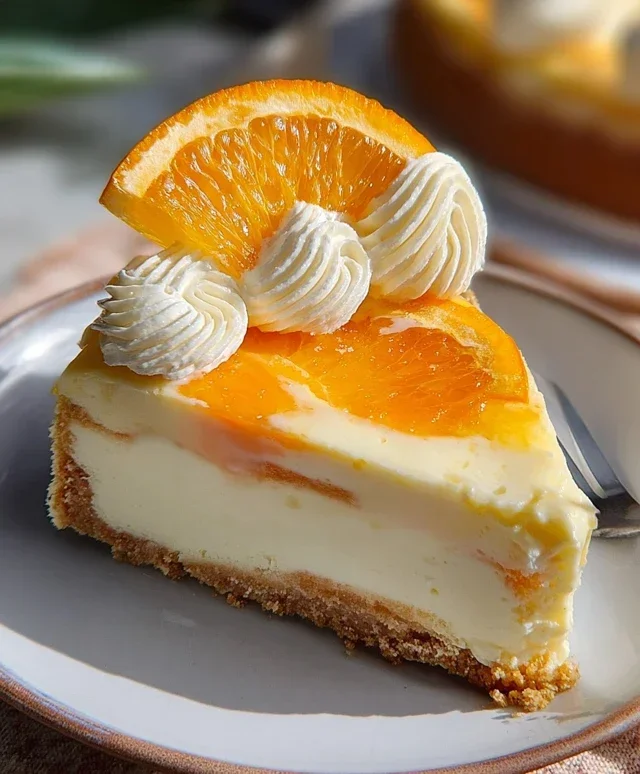
Orange Creamsicle Cheesecake
A creamy and tangy cheesecake with the classic flavors of orange and vanilla, reminiscent of a creamsicle.
Ingredients
-
2 cups graham cracker crumbs
-
¼ cup granulated sugar
-
½ cup unsalted butter, melted
-
16 oz cream cheese, softened
-
¾ cup granulated sugar
-
2 eggs
-
½ cup sour cream
-
¼ cup heavy cream
-
1 tbsp orange zest
-
½ cup fresh orange juice
-
½ tsp vanilla extract
-
½ tsp orange extract
-
½ cup white chocolate chips, melted
-
Orange gel food coloring (optional)
Instructions
-
Step 1
Preheat oven to 350°F (175°C). Grease a 9-inch springform pan. -
Step 2
In a medium bowl, combine graham cracker crumbs and ¼ cup granulated sugar. Pour in melted butter and stir until well combined. Press mixture evenly into the bottom of the prepared springform pan. -
Step 3
In a large bowl, beat cream cheese and ¾ cup granulated sugar with an electric mixer until smooth. Beat in eggs one at a time, then mix in sour cream and heavy cream. -
Step 4
Stir in orange zest, fresh orange juice, vanilla extract, and orange extract. If using, add orange gel food coloring and mix until desired color is achieved. -
Step 5
Pour the cream cheese mixture over the crust in the springform pan. -
Step 6
Bake for 50-60 minutes, or until the edges are set and the center is slightly jiggly. Turn off the oven and let the cheesecake cool in the oven with the door ajar for 1 hour. This helps prevent cracking. -
Step 7
Remove from oven and let cool completely on a wire rack. Chill in the refrigerator for at least 4 hours, or preferably overnight, before serving. Drizzle with melted white chocolate chips before serving.
Important Information
Nutrition Facts (Per Serving)
It is important to consider this information as approximate and not to use it as definitive health advice.
Allergy Information
Please check ingredients for potential allergens and consult a health professional if in doubt.